Create a new GPO
Step 1. Create GPO
Open Group Policy Management from Start --> Administrative Tools --> Group Policy Management. If it is not installed, go to the Server Manager (also in Administrative tools) and go to the Features tab on the left hand side and then click Add Features in the pane on the right. Check the box in the new window that says Group Policy Management, and then click through the next few screens. It will install and then you can open it like described before.
Navigate to Forest: YOURDOMAIN --> Domains --> YOURDOMAIN --> Group Policy Objects. Right click the folder Group Policy Objects and click New. Type in a name for your GPO. Once you create your new GPO, it will show up under the Group Policy Objects folder.
Step 2. Select computers on which to deploy the software
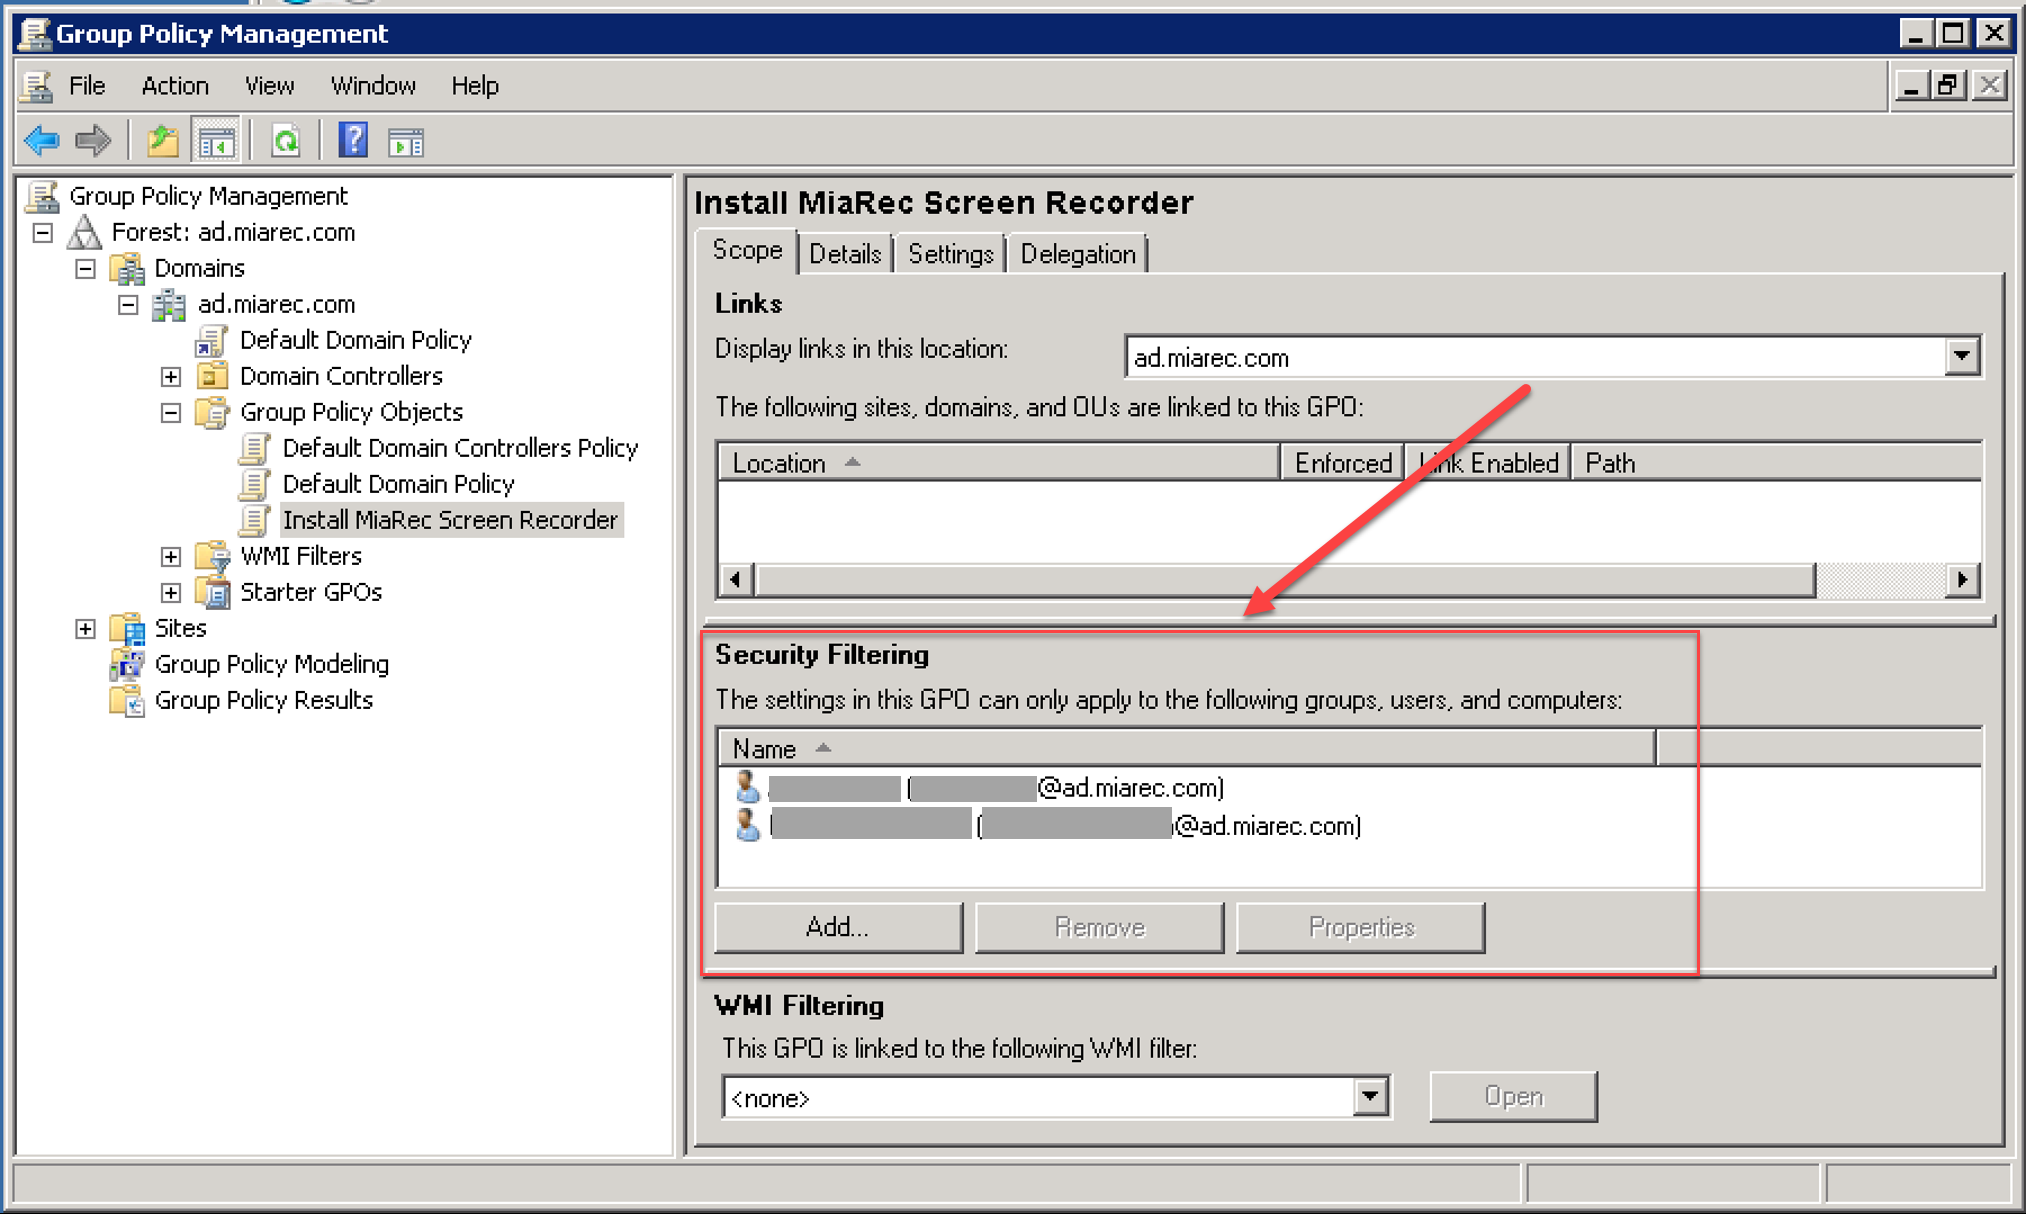
Click on the new GPO with the name that you just assigned. In the right pane on the bottom, there is a box that says Security Filtering. Click on and remove the Authenticated Users entry.
Option 1. Deploy software for certain users
If you want this program deployed on certain computers, add all of the specific computer names that you want the software to be deployed on.
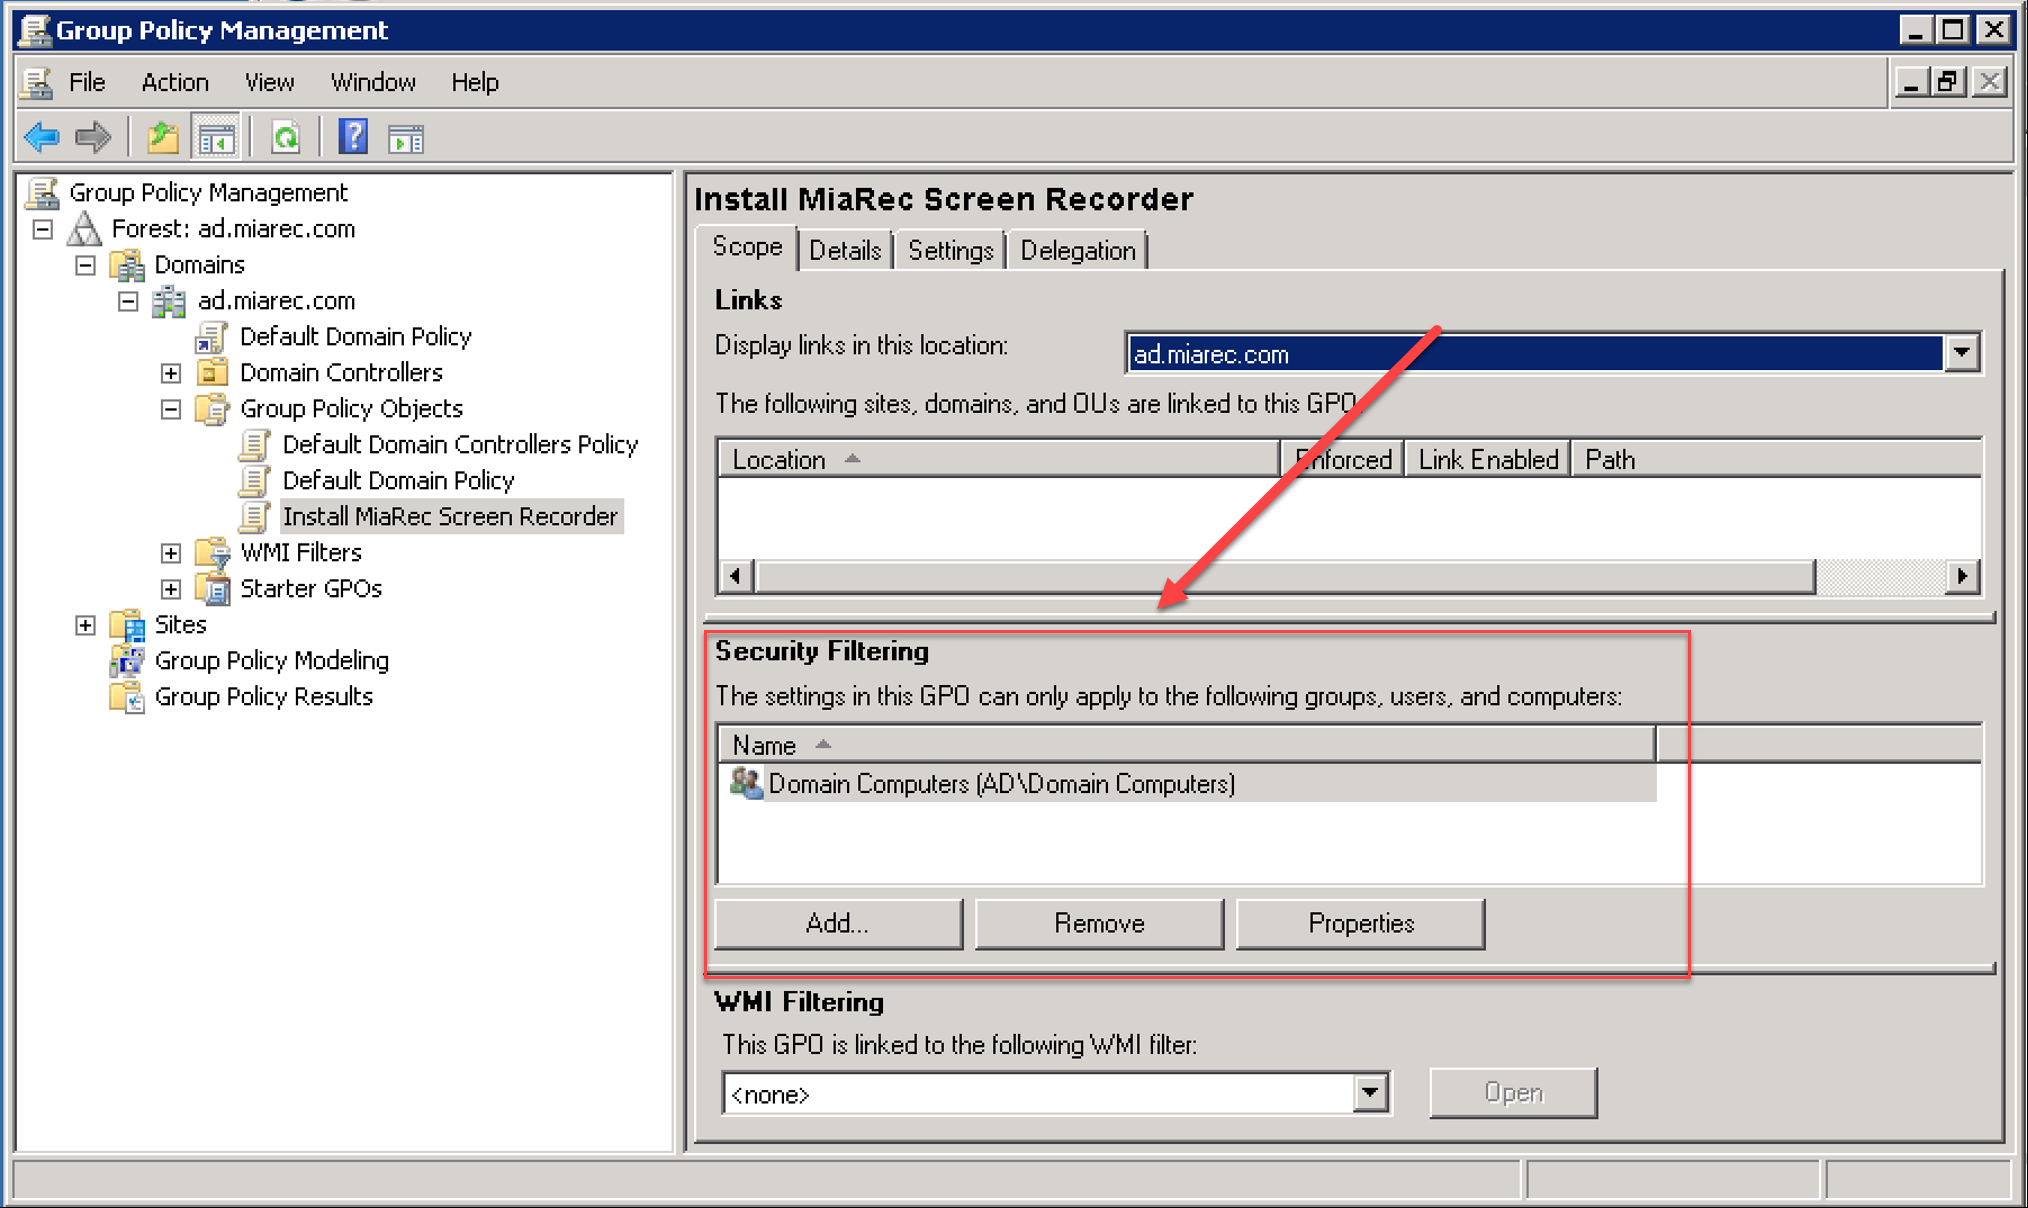
Option 2. Deploy on all domain computers
if you want it on all computers, add the group "Domain Computers". Go back up to the "YOURDOMAIN" folder (in the navigation pane) and right-click it. Click "Link an existing GPO". Click your new GPO's name and click OK.
Step 3. Create a Software installation
Now go back to the GPO under Group Policy Objects folder, and right-click it. Click on Edit.
A new window will open. Navigate to Computer Configuration --> Policies --> Software Settings --> Software installations.

Right click inside the empty pane on the right and go to New --> Package….
In the new windows that pops up, Navigate to the share that you created earlier using the full Universal Naming Convention (UNC) path like (\YOURSERVERNAME\FOLDERNAME), not the physical folder on the server (C:\FAKEPATH\FOLDERNAME), and select your MSI. Click Open.
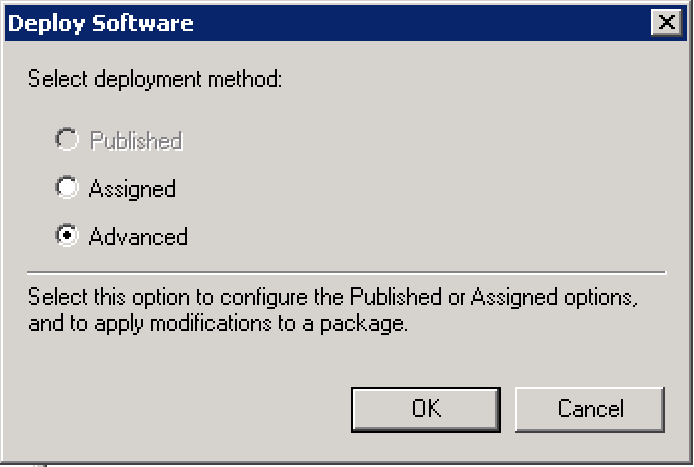
On Select deployment method, select Advanced. If you select another option, you won’t able to apply the MST file you created.
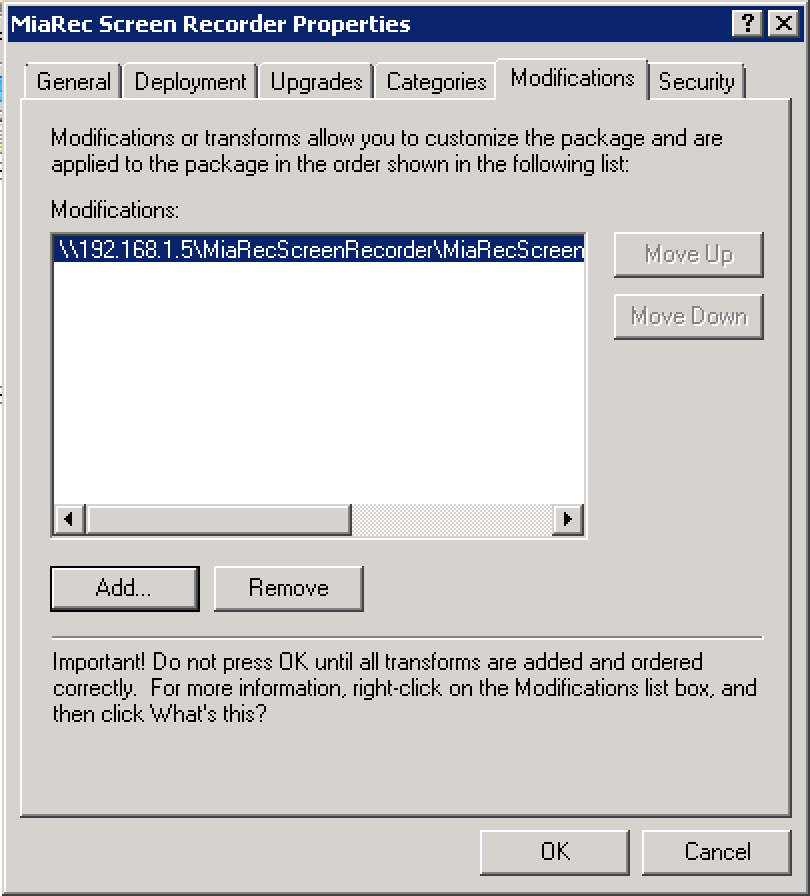
Open Modifications tab. Select your MST file (that customizes your installation) from the network share.
Note: Again it is very important to use a UNC to the file (to the network share), rather than a local/network drive path.
Click OK to complete the setup.
Close the Group Policy snap-in, click OK, and then close the Active Directory Users and Computers snap-in.
Reboot workstations (optional)
When the workstations re-start, the software package is automatically get installed with the pre-configured parameters (Note: It may take 2-3 restarts for the server to update the GPO on the workstations).