How to set up SAML 2.0 Single Sign-On with Google G-Suite
This article describes how to setup single sign-on in MiaRec application using Google G-Suite as a SAML 2.0 Identity Provider.
Once configured, users can use their G Suite credentials to sign in to MiaRec application.
Step 1. Create SAML App in Google G-Suite
Sign in to your Google Admin console (at admin.google.com) using an administrator account.
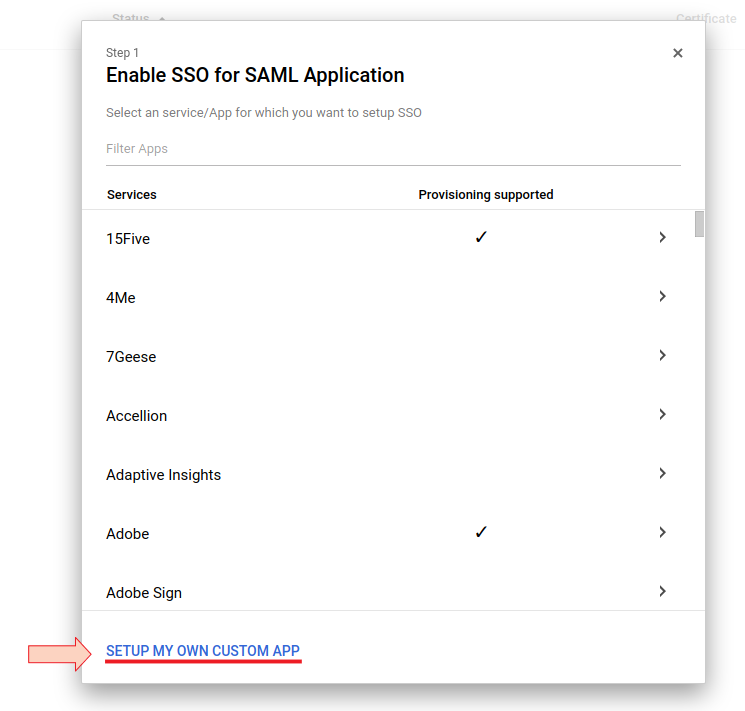
Go to Apps > SAML apps.
Click the plus (+) icon at the bottom right, then click Set up my own custom app.
In the Google IDP Information window, under Option 1:
- Note the SSO URL attribute. It is required for the next step.
- Click the DOWNLOAD button for Certificate. Save the file to your computer and open it in a text editor. This certificate is required for the next step.

Before you click the Next button in the Google IdP Information window, it is necessary configure MiaRec application first. Do not close this page yet, we will return to this process later.
Step 2. Set up Identity Provider in MiaRec
In another web browser tab, log in to MiaRec web portal as an administrator.
Navigate to Administration > User Authentication > SAML 2.0 Single Sign On and click Add to create the new Identity Provider.
On this page you need to configure:
- Application domain. It should be the domain name that your users type in their web browser to access MiaRec web portal. By design, MiaRec supports multiple SAML Identity Providers. For example, you may create multiple sub-domains for different groups (or different tenants in a multi-tenant enviornment), like customer1.example.com and customer2.example.com. Each subdomain can be associated with its own SAML Identity Provider.
- SAML Login URL should be the same as SSO URL copied from Google Admin console in the previous step.
- Leave the SAML Logout URL empty.
- For the Identity Provider X.509 certificate parameter, use a content of the downloaded certificate file in the previous step. Omit the enclosing lines
-----BEGIN CERTIFICATE-----and-----END CERTIFICATE-----if any. - Login attribute set to email.
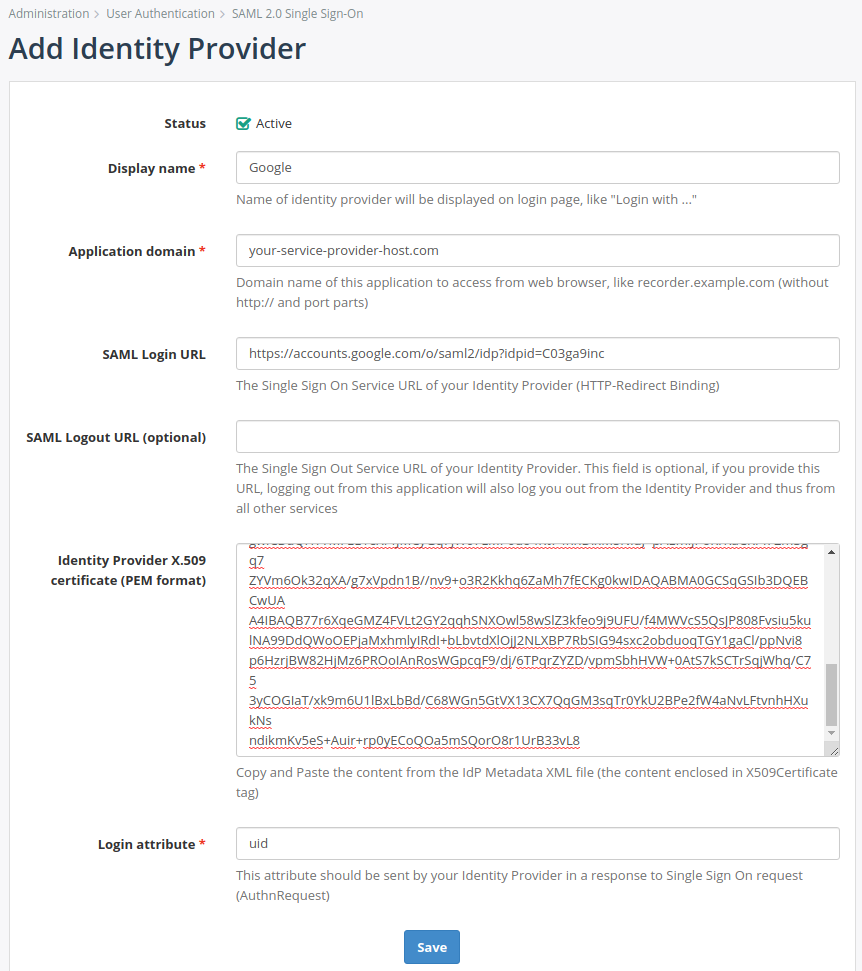
Click the Save button.
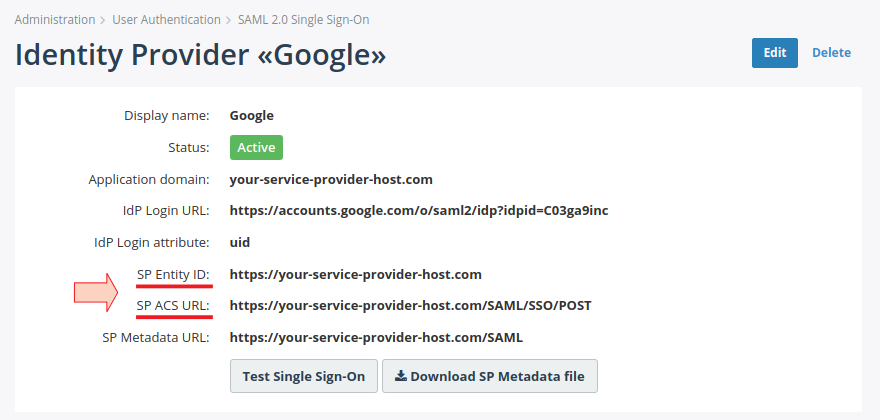
You will be redirected to the details page of the newly created Identity Provider, like shown in the following screenshot. On the details page, locate Assertion Consumer Service URL (ACS URL) and Entity ID. They are required for the next step.
Step 3. Create SAML App in Google G-Suite (continued)
Go back to the previously opened Google Admin console page (see Step 1. Create SAML App in Google G-Suite).
Note, if you accidentally closed that window, then sign in to your Google Admin console (at admin.google.com) using an administrator account. Go to Apps > SAML apps. Click the plus (+) icon at the bottom right, then click Set up my own custom app.
In the Google IdP Information window, click the Next button.
In the Basic information window, add a desired application name (for example, “MiaRec”) and an optional description.
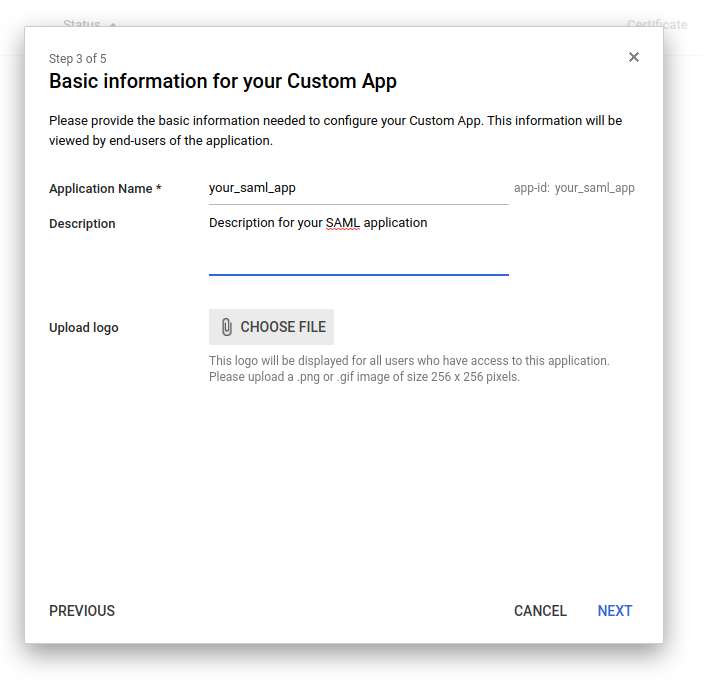
Click Next.
In the Service Provider Details window, enter an ACS URL and Entity ID from the Identity Provider details page in MiaRec (see Step 2. Set up Identity Provider in MiaRec).
It is recommended to set the Signed Response checkbox checked. For all other settings, use default values.

Click Next.
Configure attribute mapping
In the Attribute Mapping, click Add new mapping and map the email attribute Primary Email. This attribute will be passed by Google to MiaRec during the authentication process.
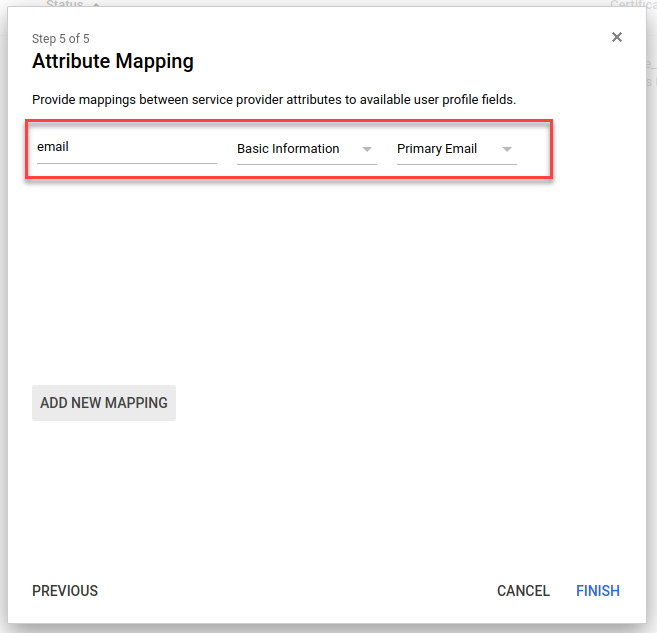
Click Finish.
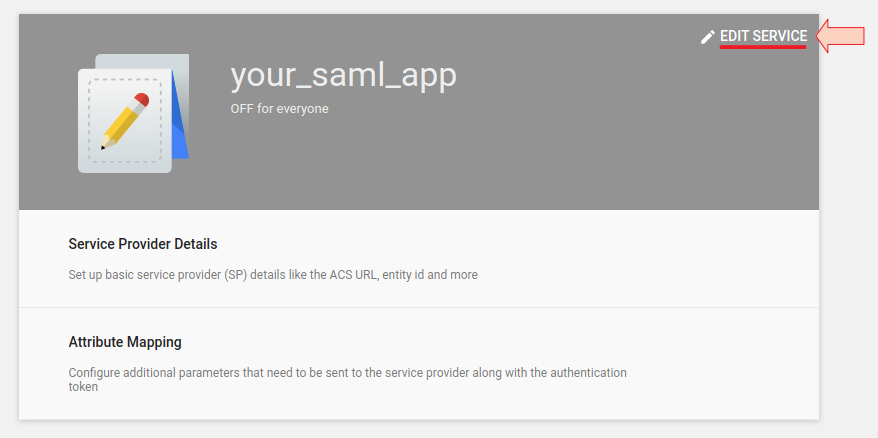
Step 4. Enable MiaRec SAML application for users in Google G-Suite
From the Google Admin console Home page, go to Apps > SAML apps.
Select your newly created SAML app and click Edit Service.
Click On for everyone
Note, alternatively, you can turn the service ON for a particular organization unit or group by selecting the unit or group respectively in the left pane.
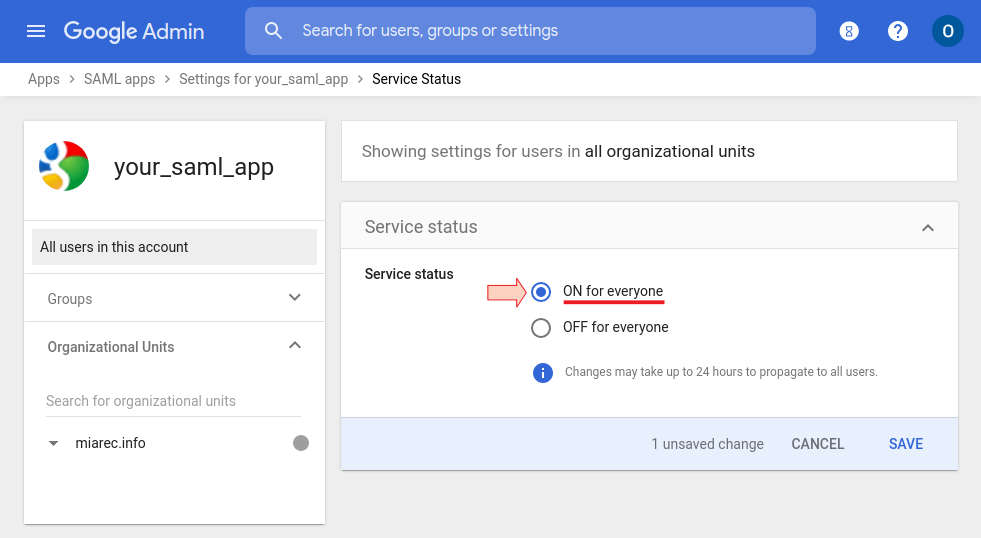
Click Save.
Changes typically take effect in minutes, but can take up to 24 hours. For details, see How changes propagate to Google services.
Step 5. Verify SSO between Google G-Suite and MiaRec
In MiaRec web portal, navigate to Administration > User authentiction -> SAML 2.0 Single Sign-On and select the Identity Provider, that you created in the previous steps.
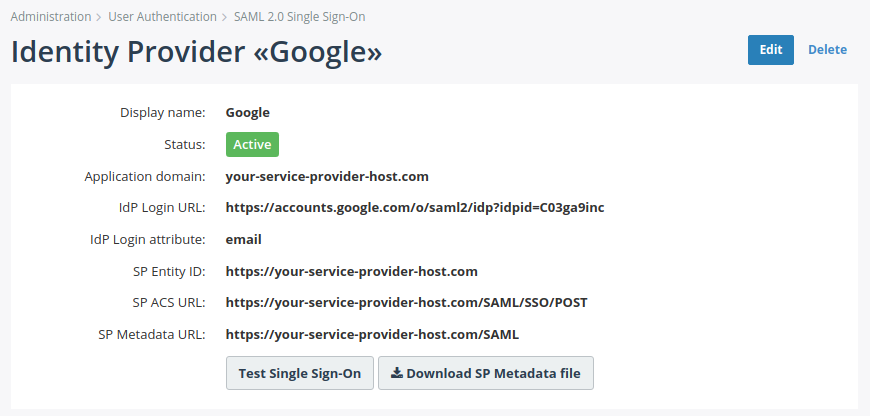
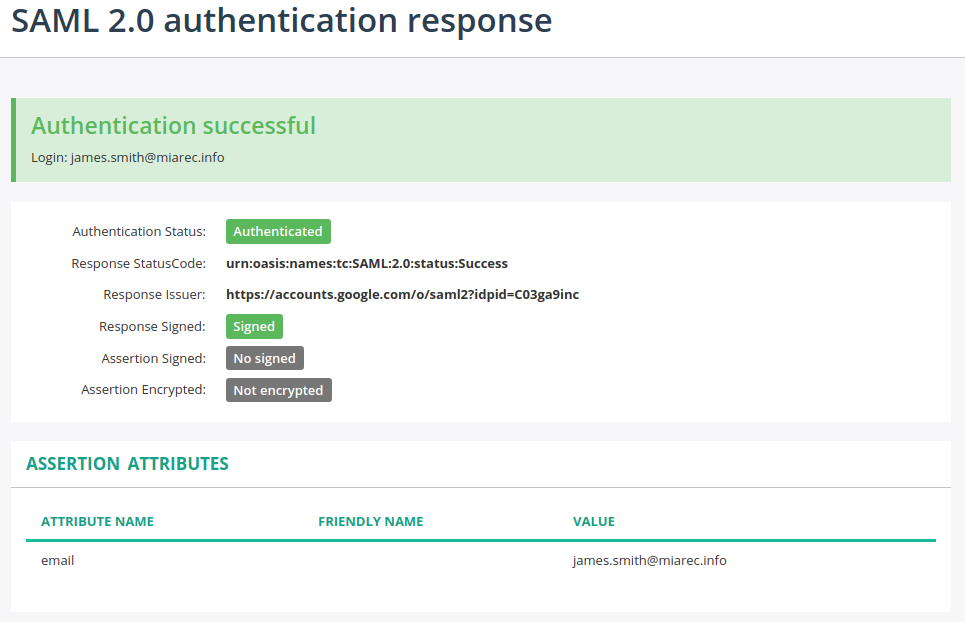
Click the Test Single Sign-On button.
MiaRec will send an authentication request to Google and then display the actual response from it.
In the response message, locate the Assertion attributes section. This section lists all attributes that the Identity Provider sends back to MiaRec. Make sure the email attribute is in the response. Otherwise, go back to step Configure attribute mapping.
Step 6. Enable SAML authentication for users in MiaRec
In MiaRec web portal, navigate to Administration > User management > Users. Click Edit for an individual user or Bulk Edit for multiple selected users and change Authenticate with to SAML 2.0.
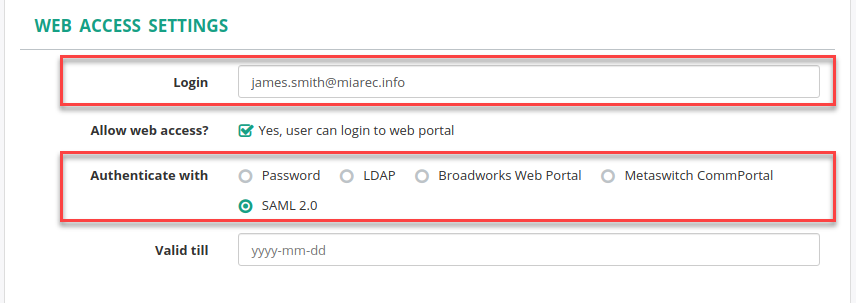
Make sure the Login attribute in MiaRec matches to the user’s email used to login to Google.
Now, users should be able to login to MiaRec using the Single Sign On feature.