9. Configure automatic file relocation to Amazon S3
1. Create an S3 bucket
- Sign in to the AWS Management Console and open the Amazon S3 console at https://console.aws.amazon.com/s3/.
-
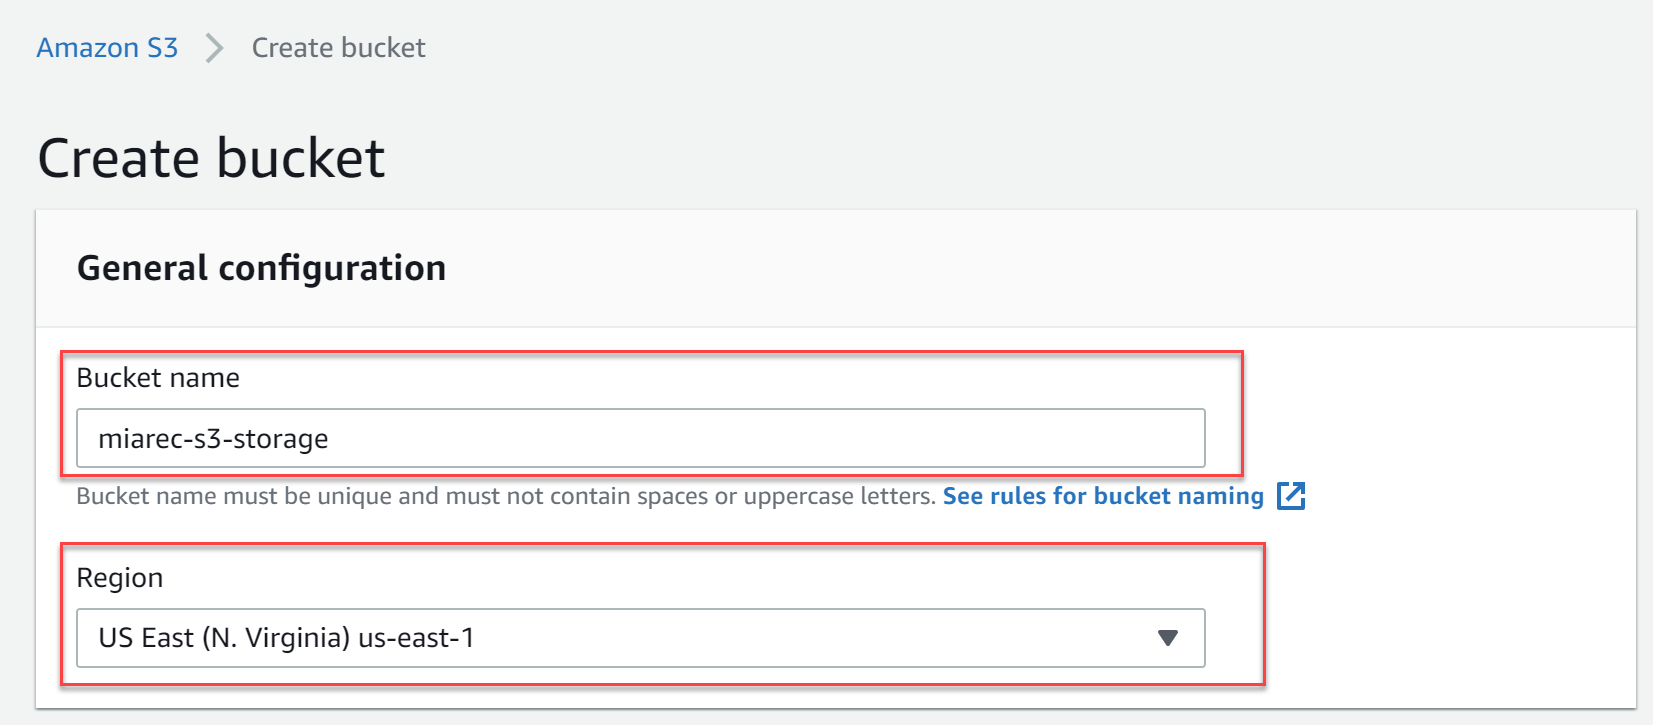
Choose Create bucket.

-
In the Bucket name field, type a unique DNS-compliant name for your new bucket. (The example screen shot uses the bucket name miarec-s3-storage. You cannot use this name because each S3 bucket names must be unique.) Create your own bucket name using the follow naming guidelines:
- The name must be unique across all existing bucket names in Amazon S3.
- After you create the bucket you cannot change the name, so choose wisely.
- Choose a bucket name that reflects the objects in the bucket because the bucket name is visible in the URL that points to the objects that you're going to put in your bucket.
For information about naming buckets, see Rules for Bucket Naming in the Amazon Simple Storage Service Developer Guide.
-
For Region, choose the region where you want the bucket to reside. It is recommended to chose the region that is closest to your end-users. This will provide them the best performance during playback.
-
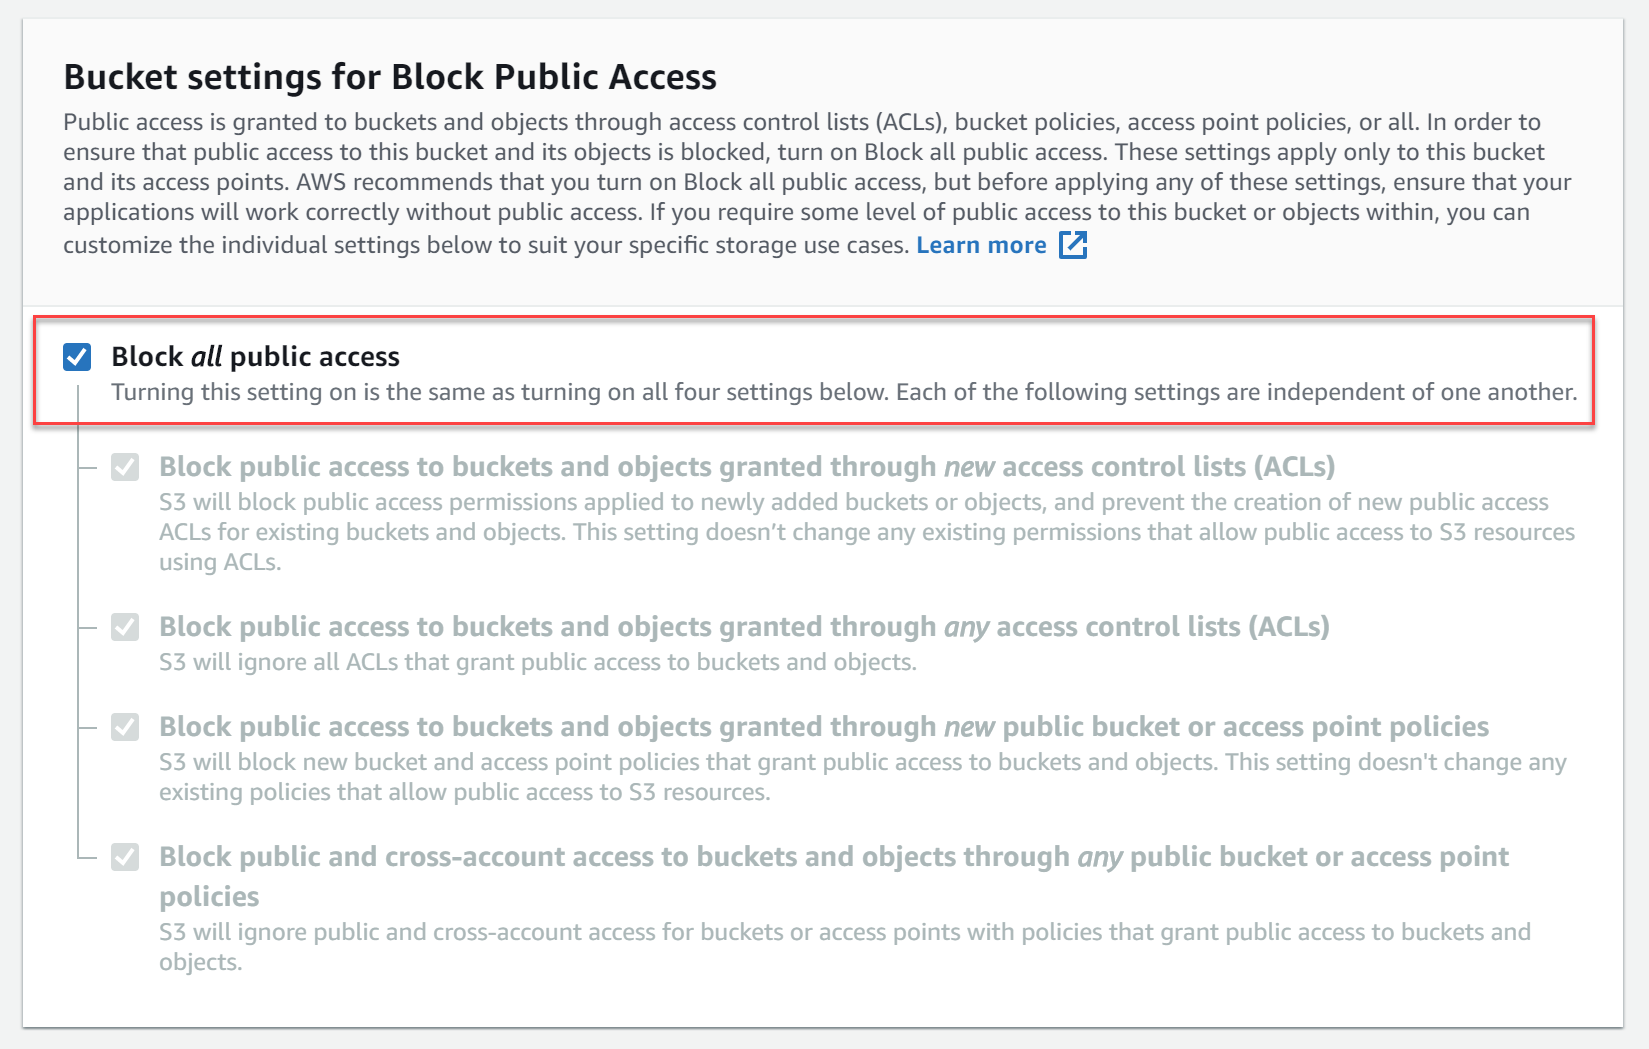
In the section Bucket settings for Block Public Access, make sure that public access is blocked.
-
Click Create bucket in the last screen.
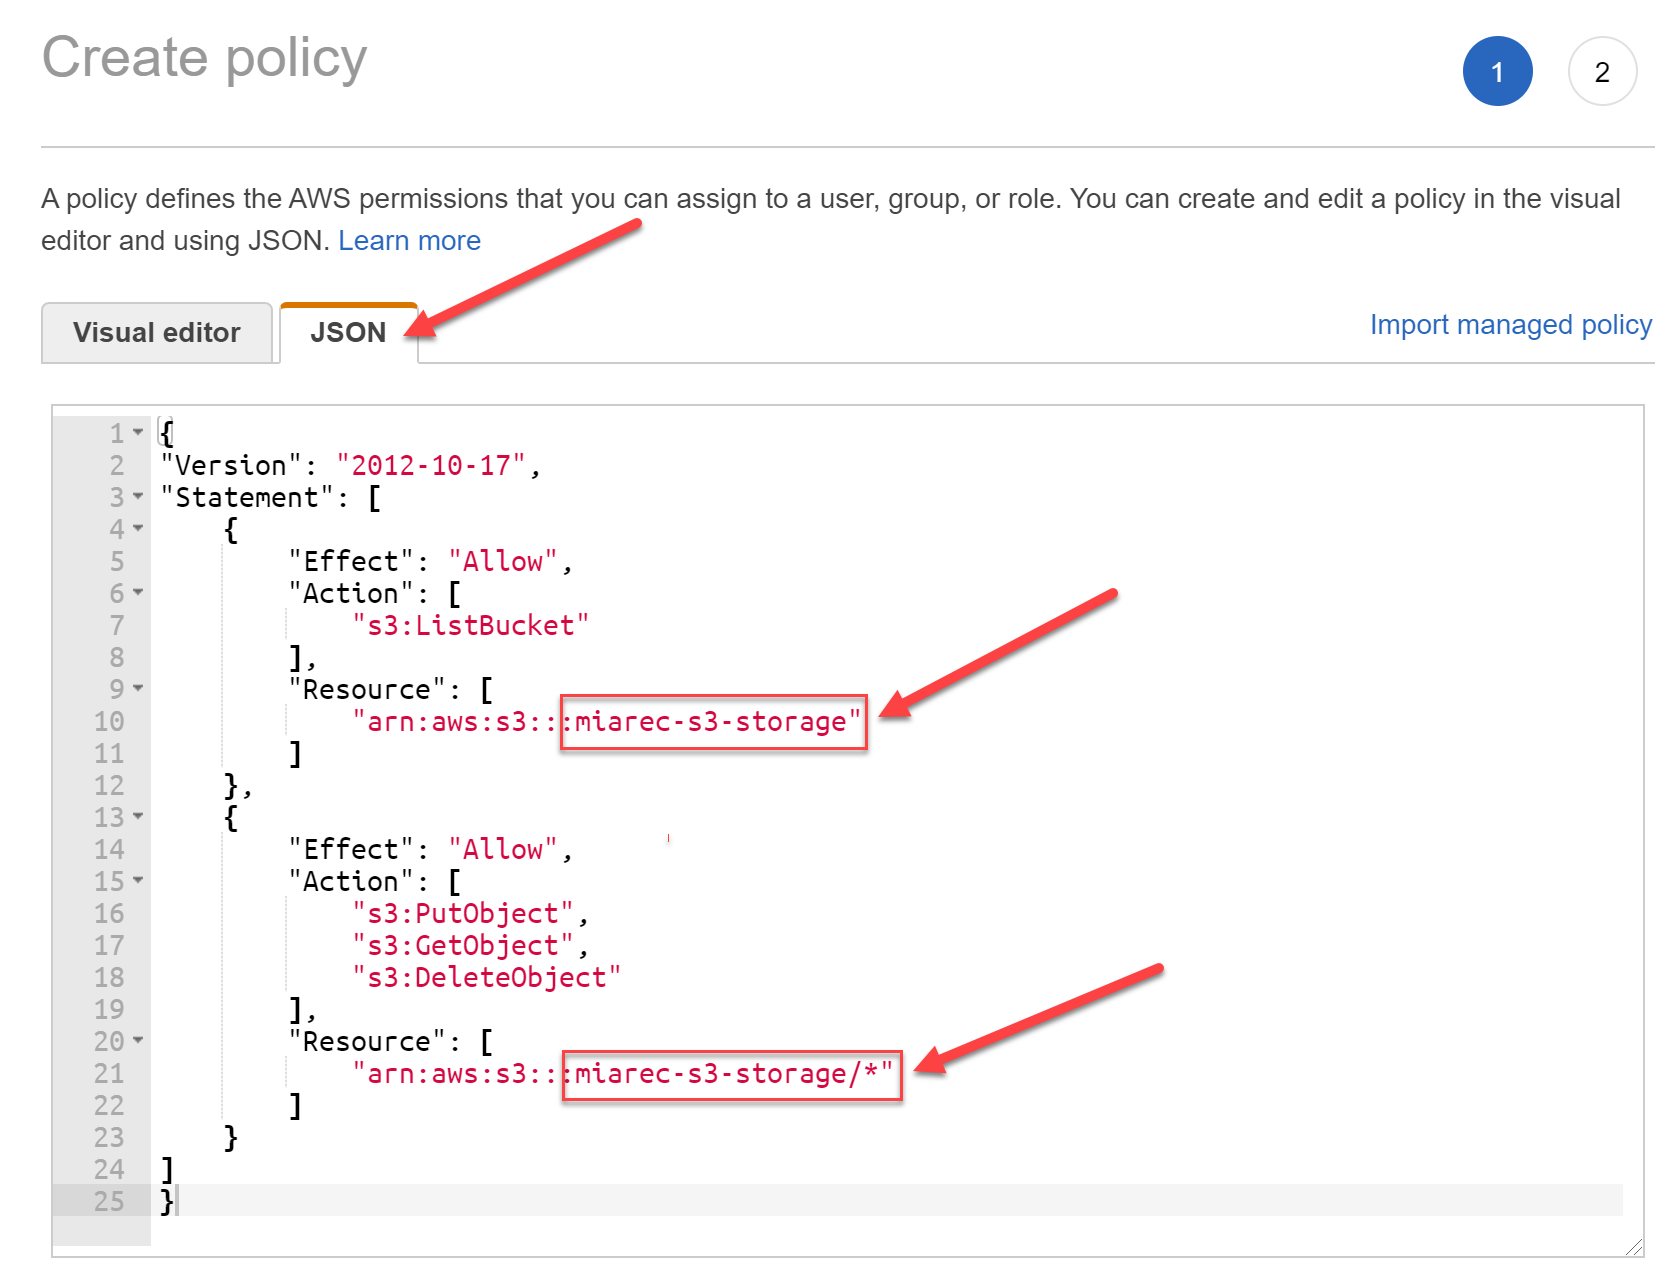
2. Create policy that grants access to the S3 bucket
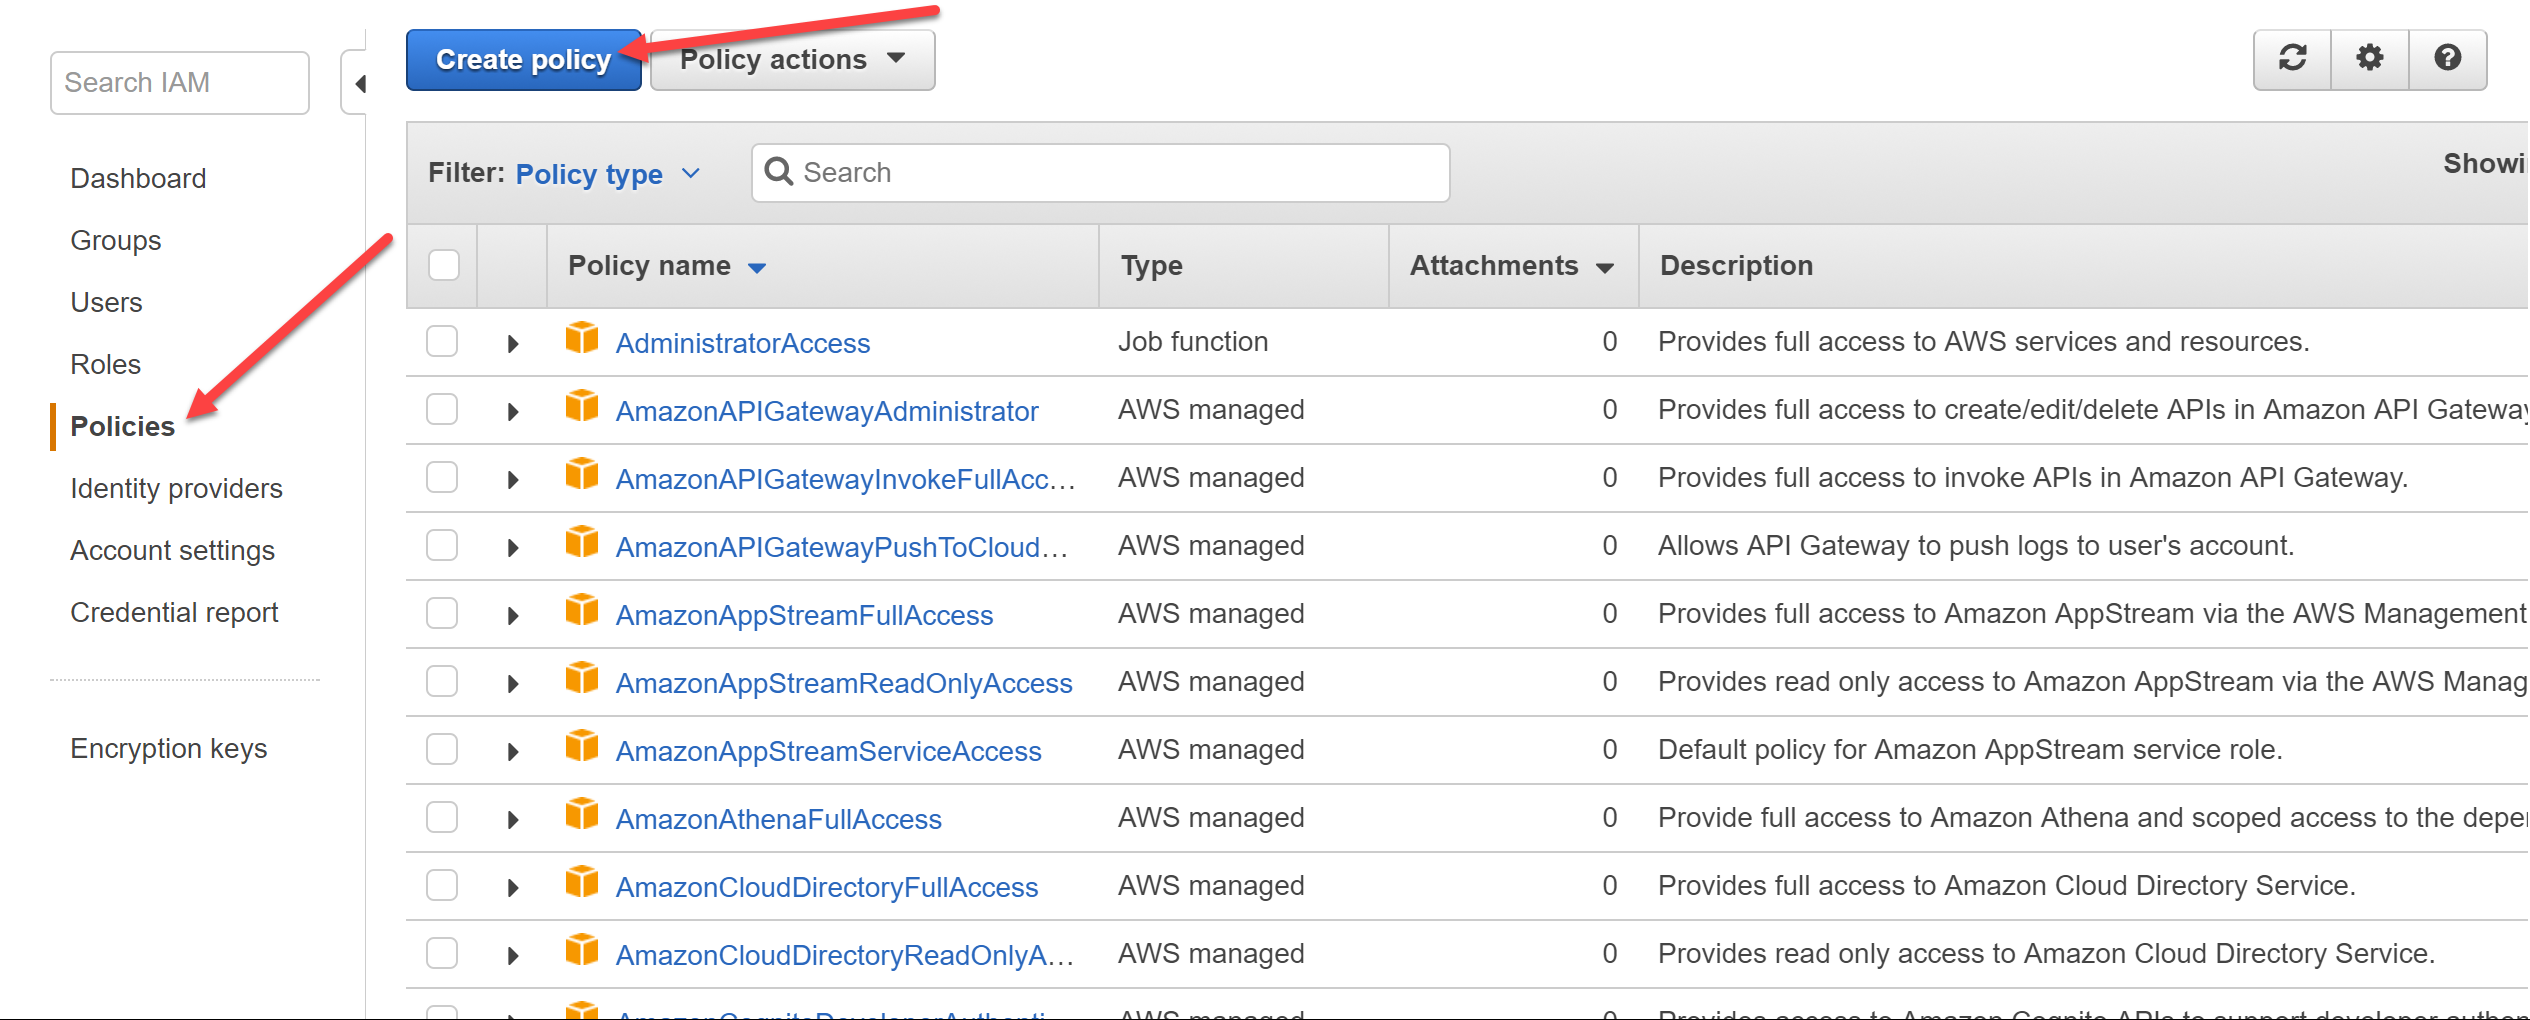
- Sign in to the AWS Management Console and open the IAM console at https://console.aws.amazon.com/iam/.
-
In the navigation pane on the left, click Policies and then click Create Policy.
-
Select JSON tab, copy the following access policy and paste it into the JSON field. Do not forget to replace
miarec-s3-storagewith your bucket name!!!.
{
"Version": "2012-10-17",
"Statement": [
    {
        "Effect": "Allow",
        "Action": [
            "s3:ListBucket"
        ],
        "Resource": [
            "arn:aws:s3:::miarec-s3-storage"
        ]
    },
    {
        "Effect": "Allow",
        "Action": [
            "s3:PutObject",
            "s3:GetObject",
            "s3:DeleteObject"
        ],
        "Resource": [
            "arn:aws:s3:::miarec-s3-storage/*"
        ]
    }
]
}
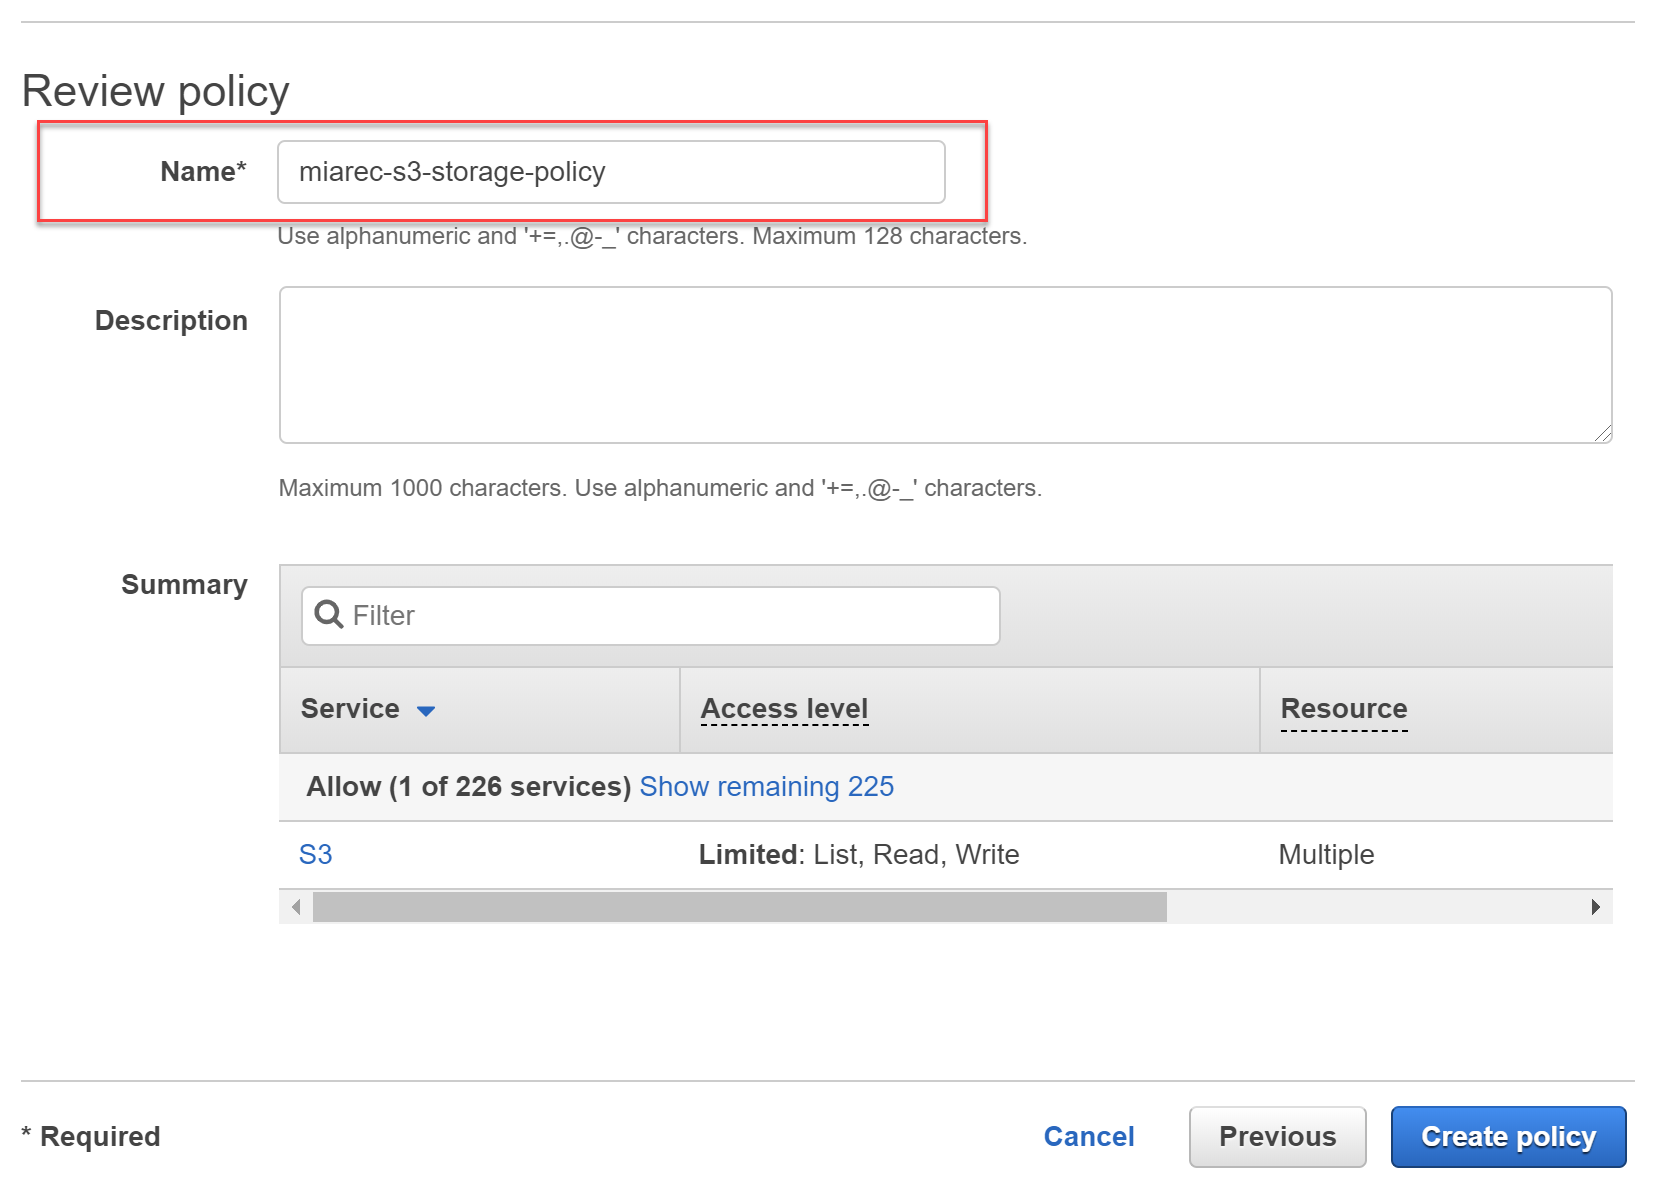
In the step Review policy, choose a descriptive name for the policy and click Create policy button.
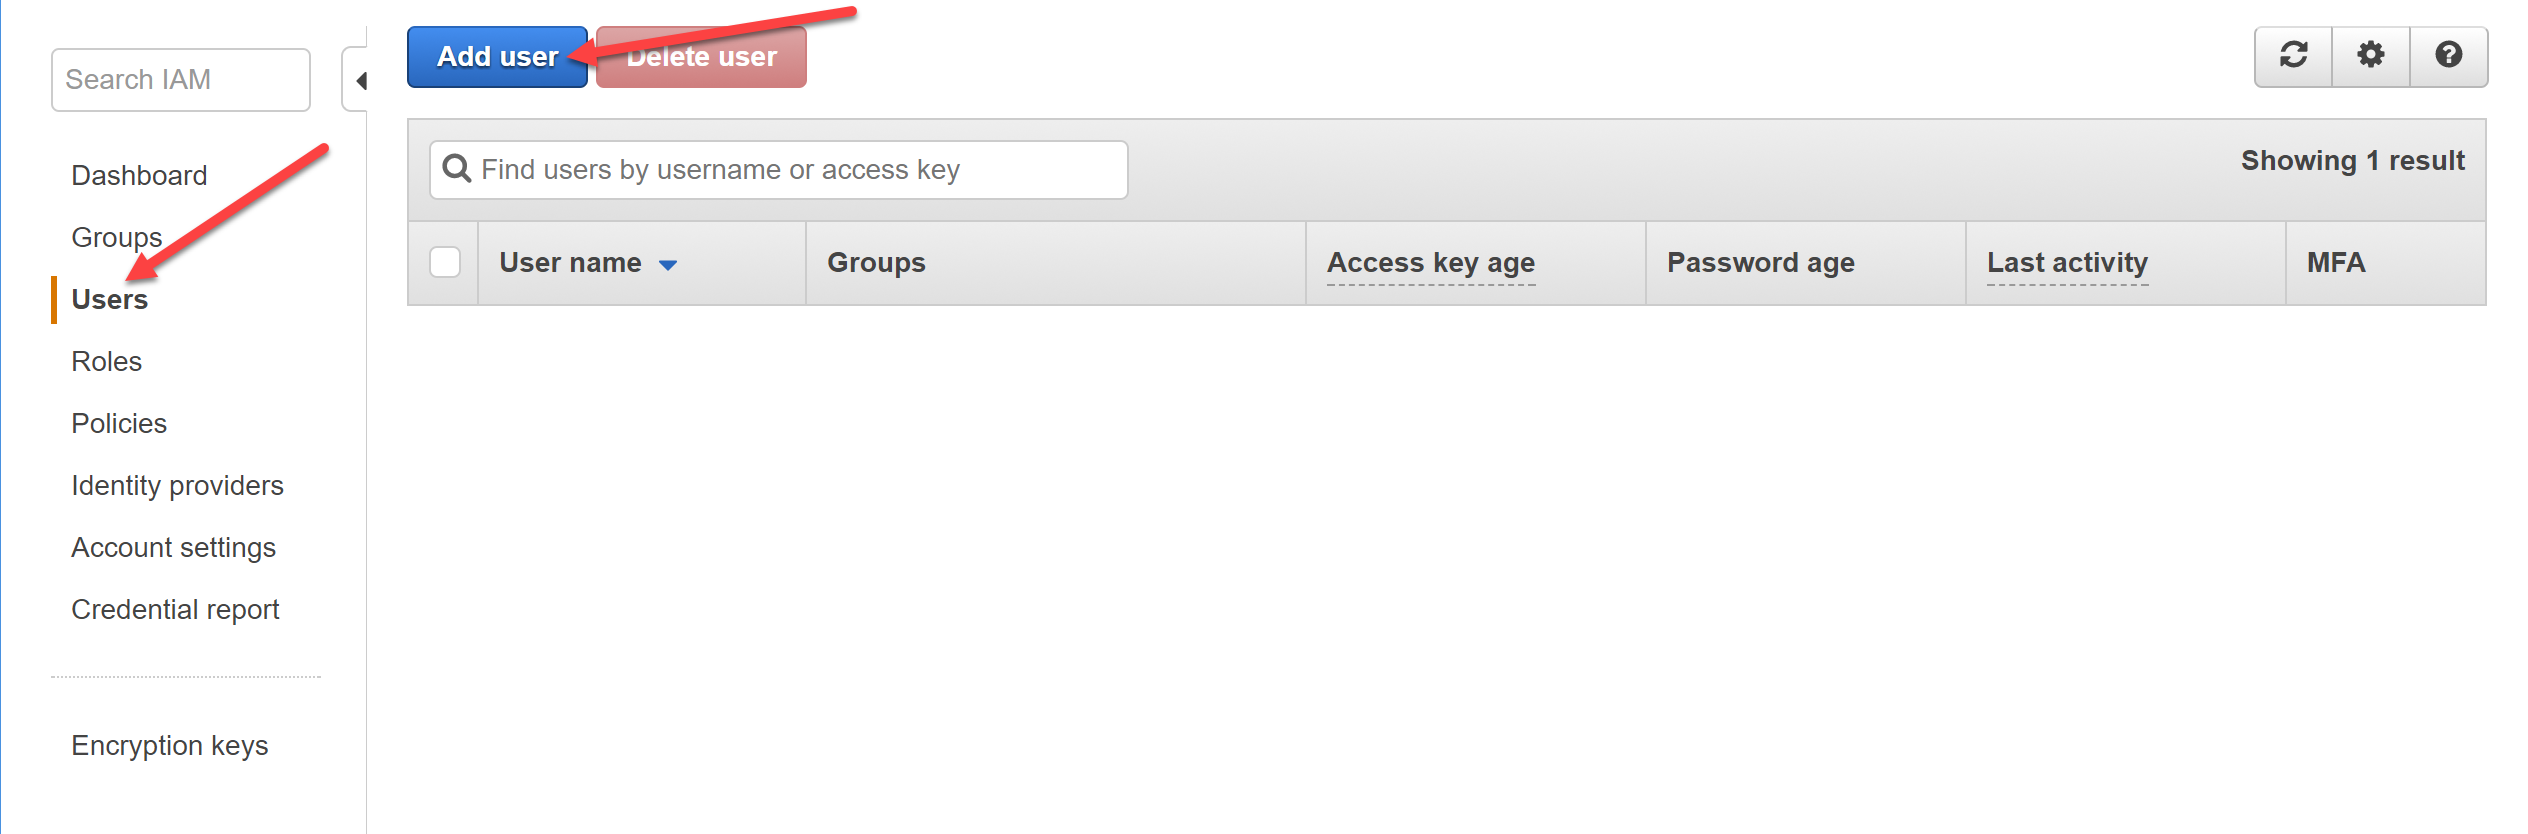
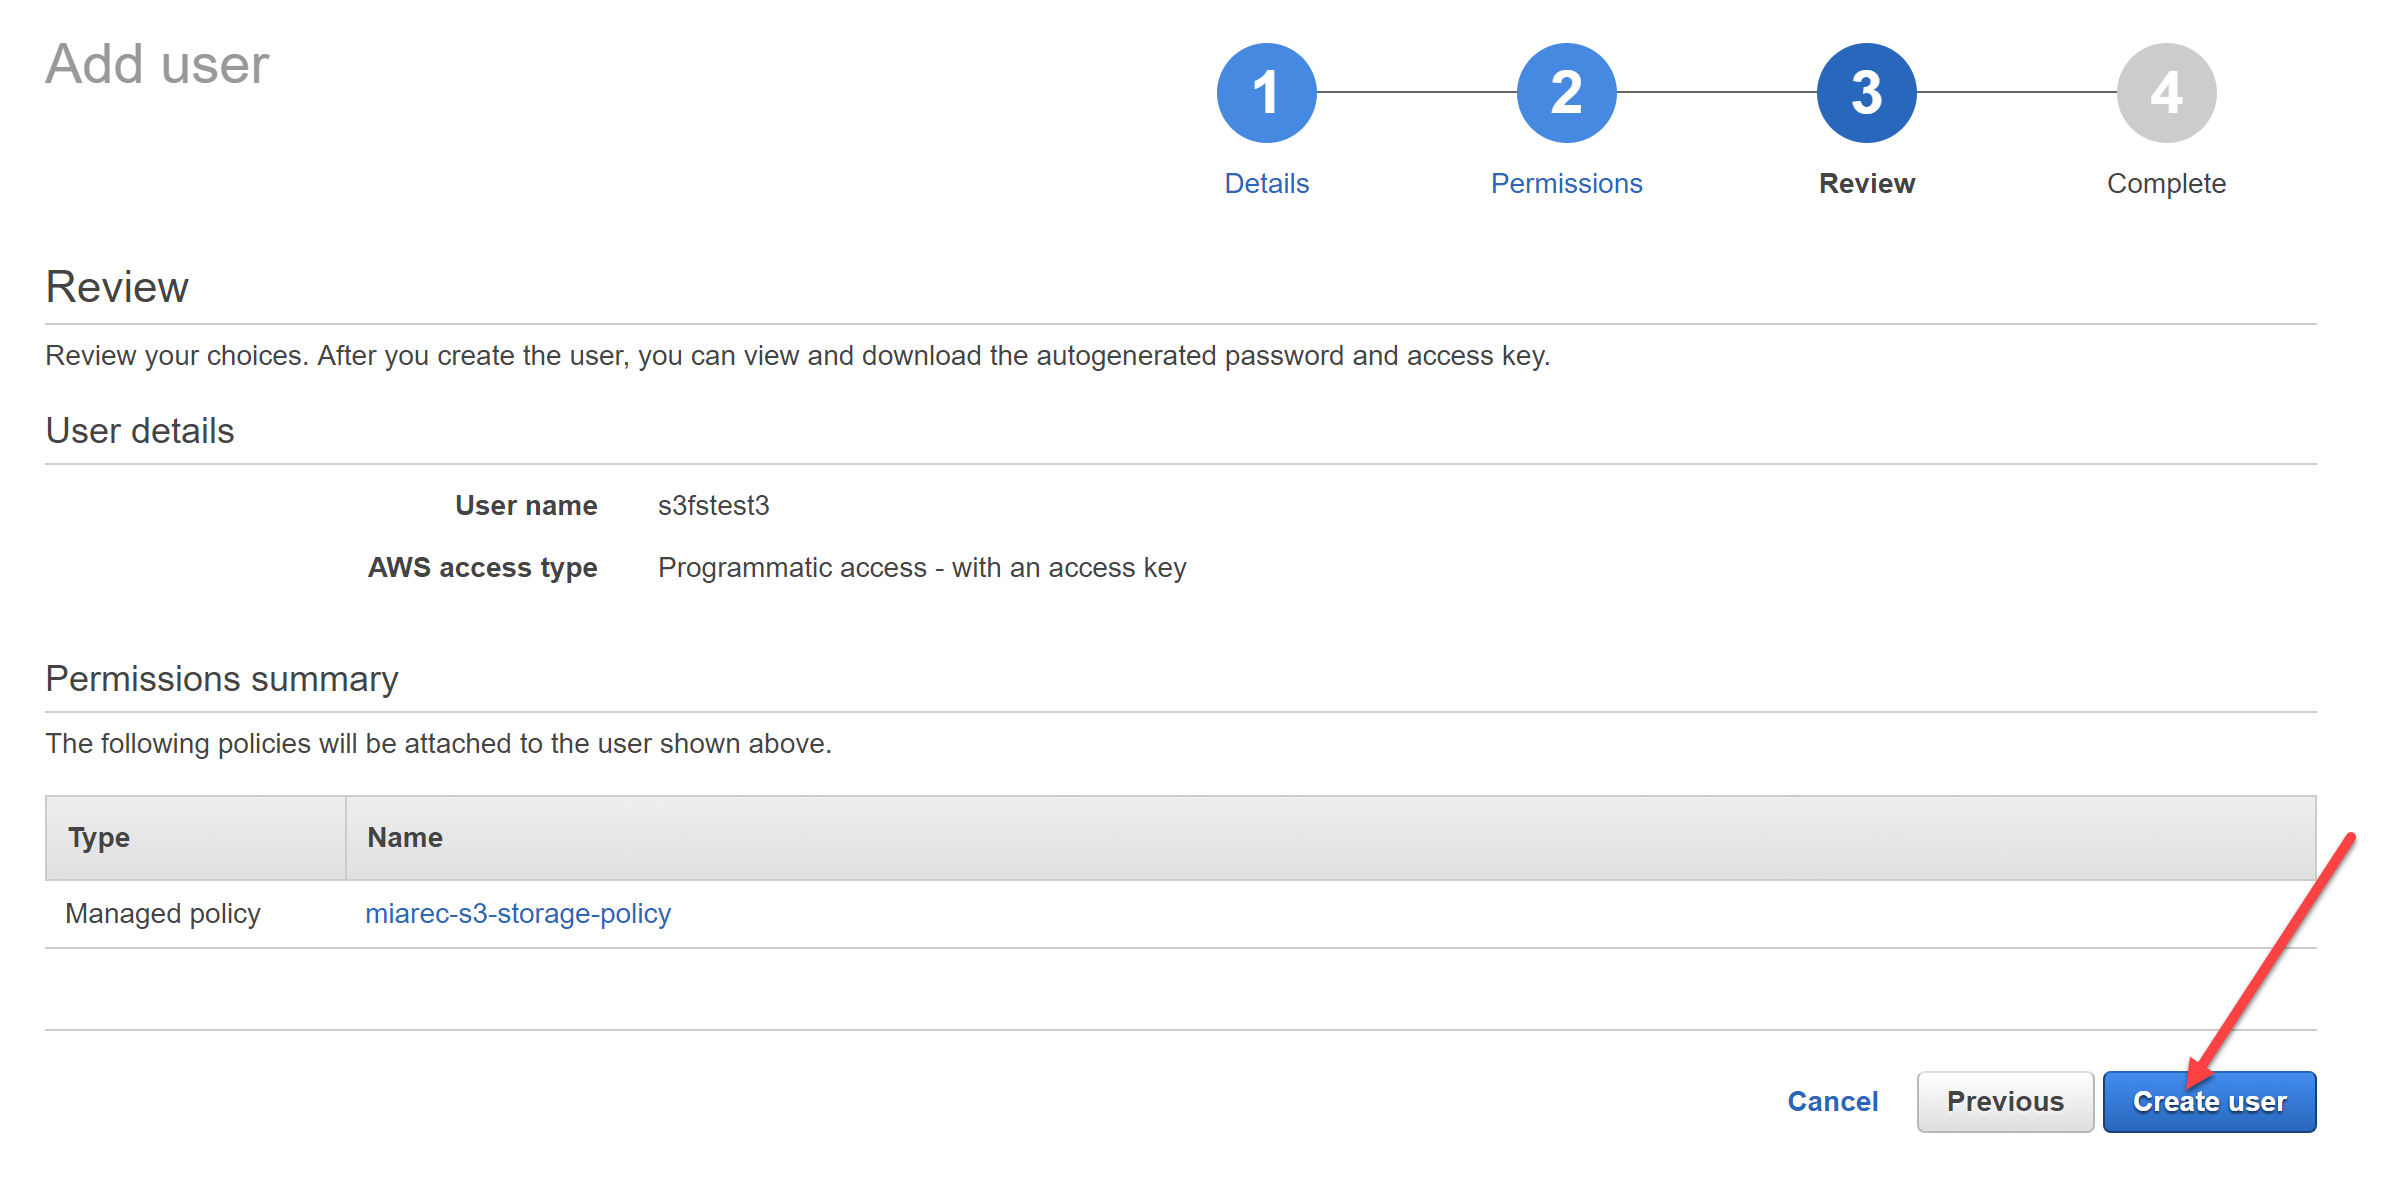
3. Create IAM user
- Sign in to the AWS Management Console and open the IAM console at https://console.aws.amazon.com/iam/.
-
In the navigation pane on the left, click Users and then click Add user.
-
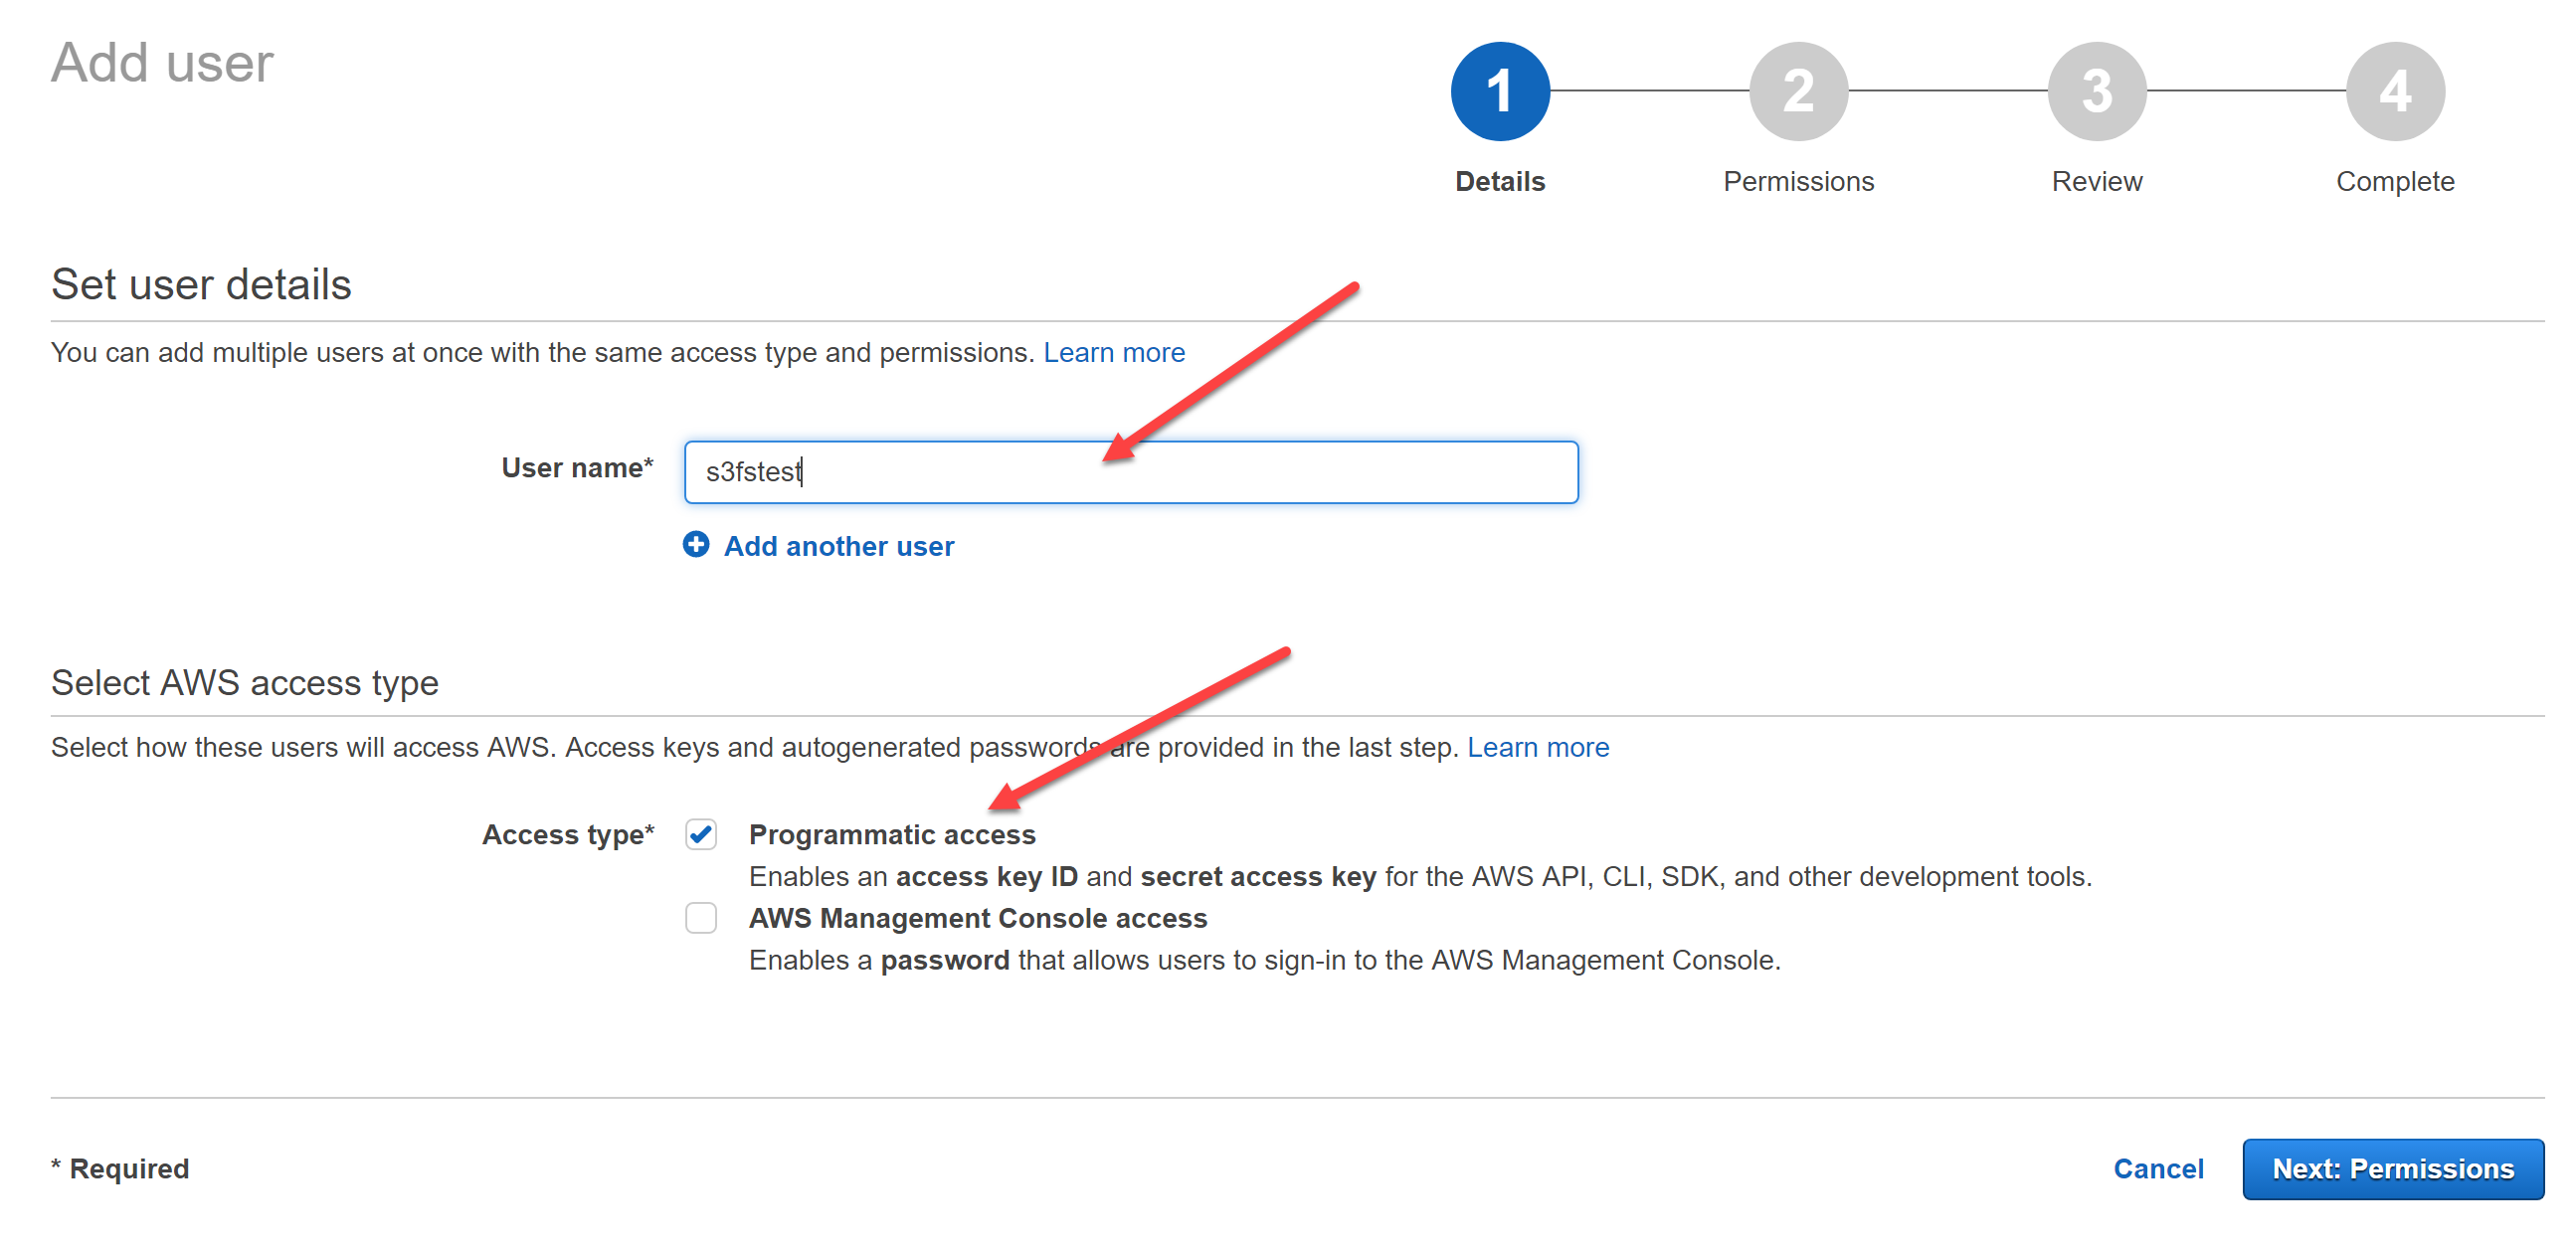
On Details screen, choose User name and enable Programmatic access.
-
On Permissions screen, select Attach existing policies directly and then select the previously created policy from the list. Use the search box to find the policy by name.

-
Review the settings and click Create user.
-
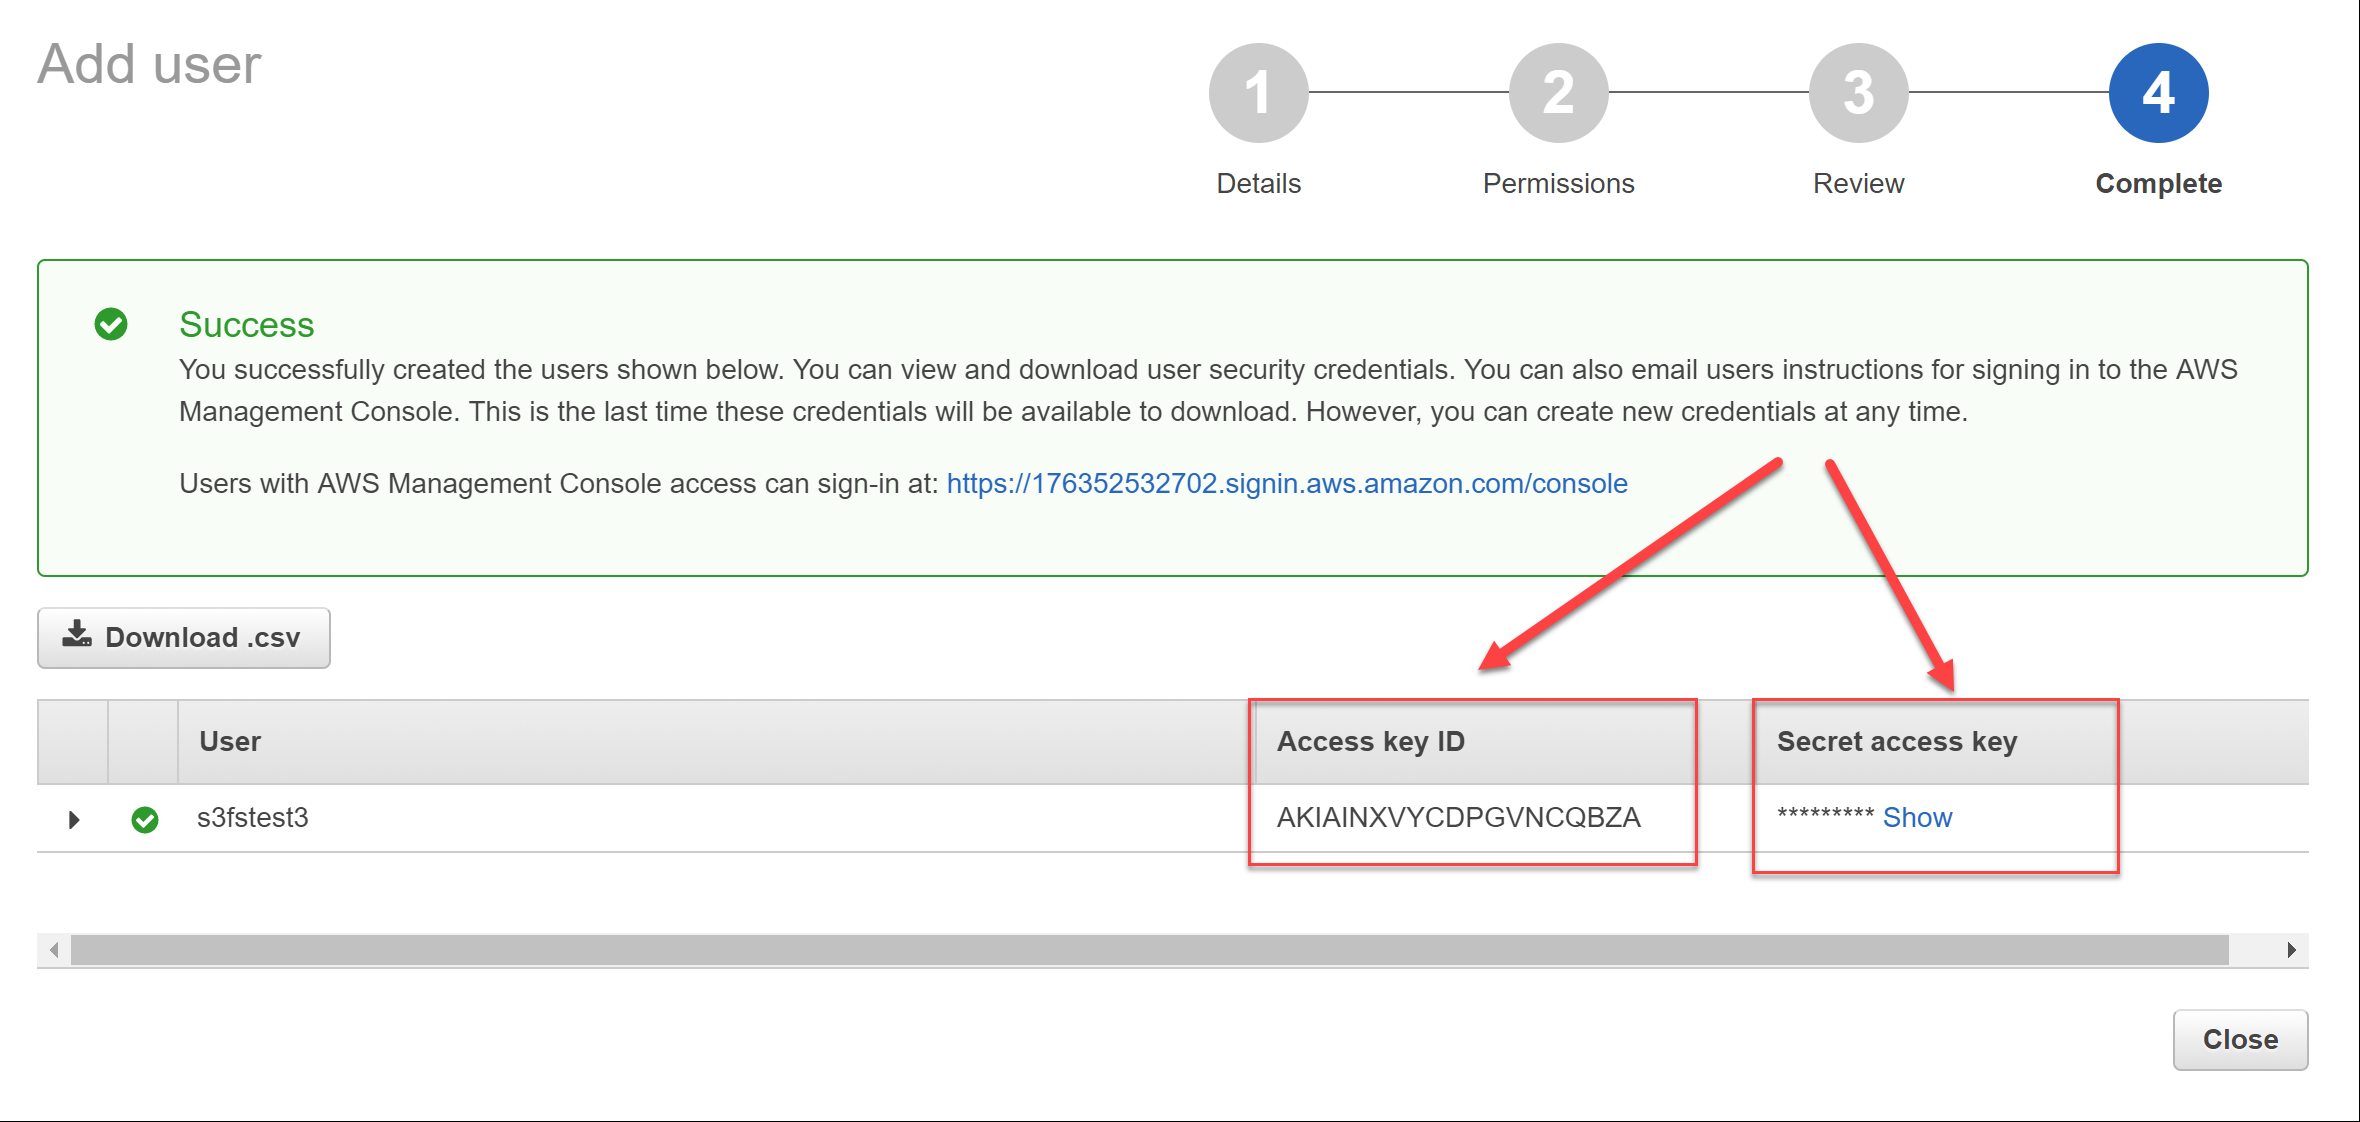
On Complete screen, copy Access Key ID and Secret access Key and store them in secure place. We will use it for configuring storage target in MiaRec.
4. Add Cross-Origin Resource Sharing (CORS) configuration to an S3 bucket
Cross-Origin Resource Sharing (CORS) allows client web applications that are loaded in one domain to interact with resources in another domain. This configuration is required for our setup because MiaRec web application is accessible using one domain (for example, https://recorder.example.com), but audio files are located at Amazon S3 domain (https://s3.amazonaws.com)
To add a CORS configuration to an S3 bucket:
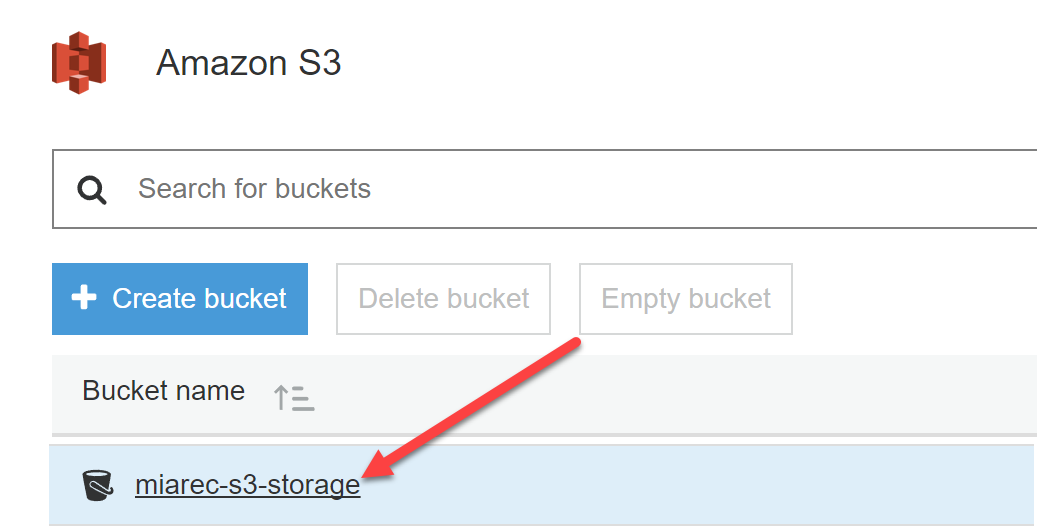
- Sign in to the AWS Management Console and open the Amazon S3 console at https://console.aws.amazon.com/s3/.
-
In the Bucket name list, choose the name of the bucket that you want to create a bucket policy for.
-
Choose Permissions, and then choose CORS configuration.
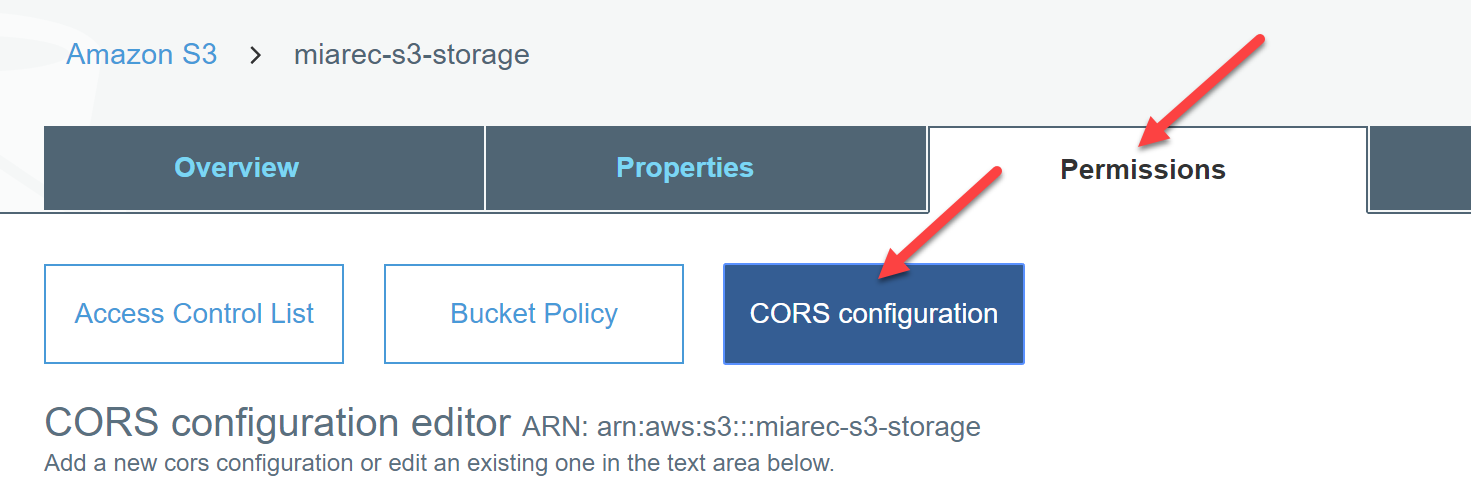
-
Copy the following CORS configuration and paste it into the CORS configuration editor field:
[
    {
        "AllowedHeaders": [
            "*"
        ],
        "AllowedMethods": [
            "GET"
        ],
        "AllowedOrigins": [
            "*"
        ],
        "ExposeHeaders": [],
        "MaxAgeSeconds": 3000
    }
]
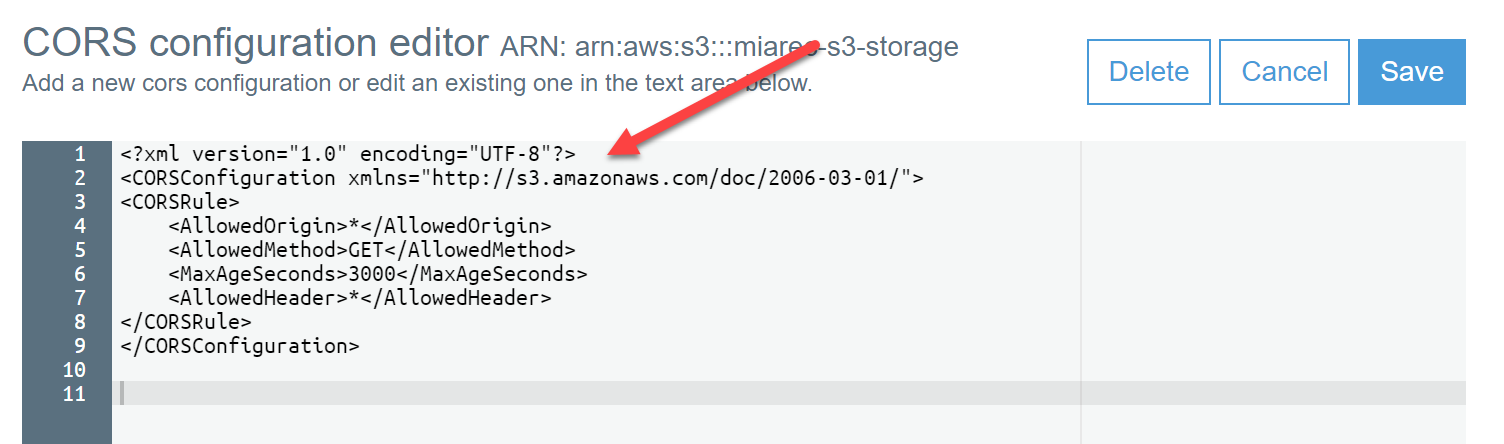
Choose Save.
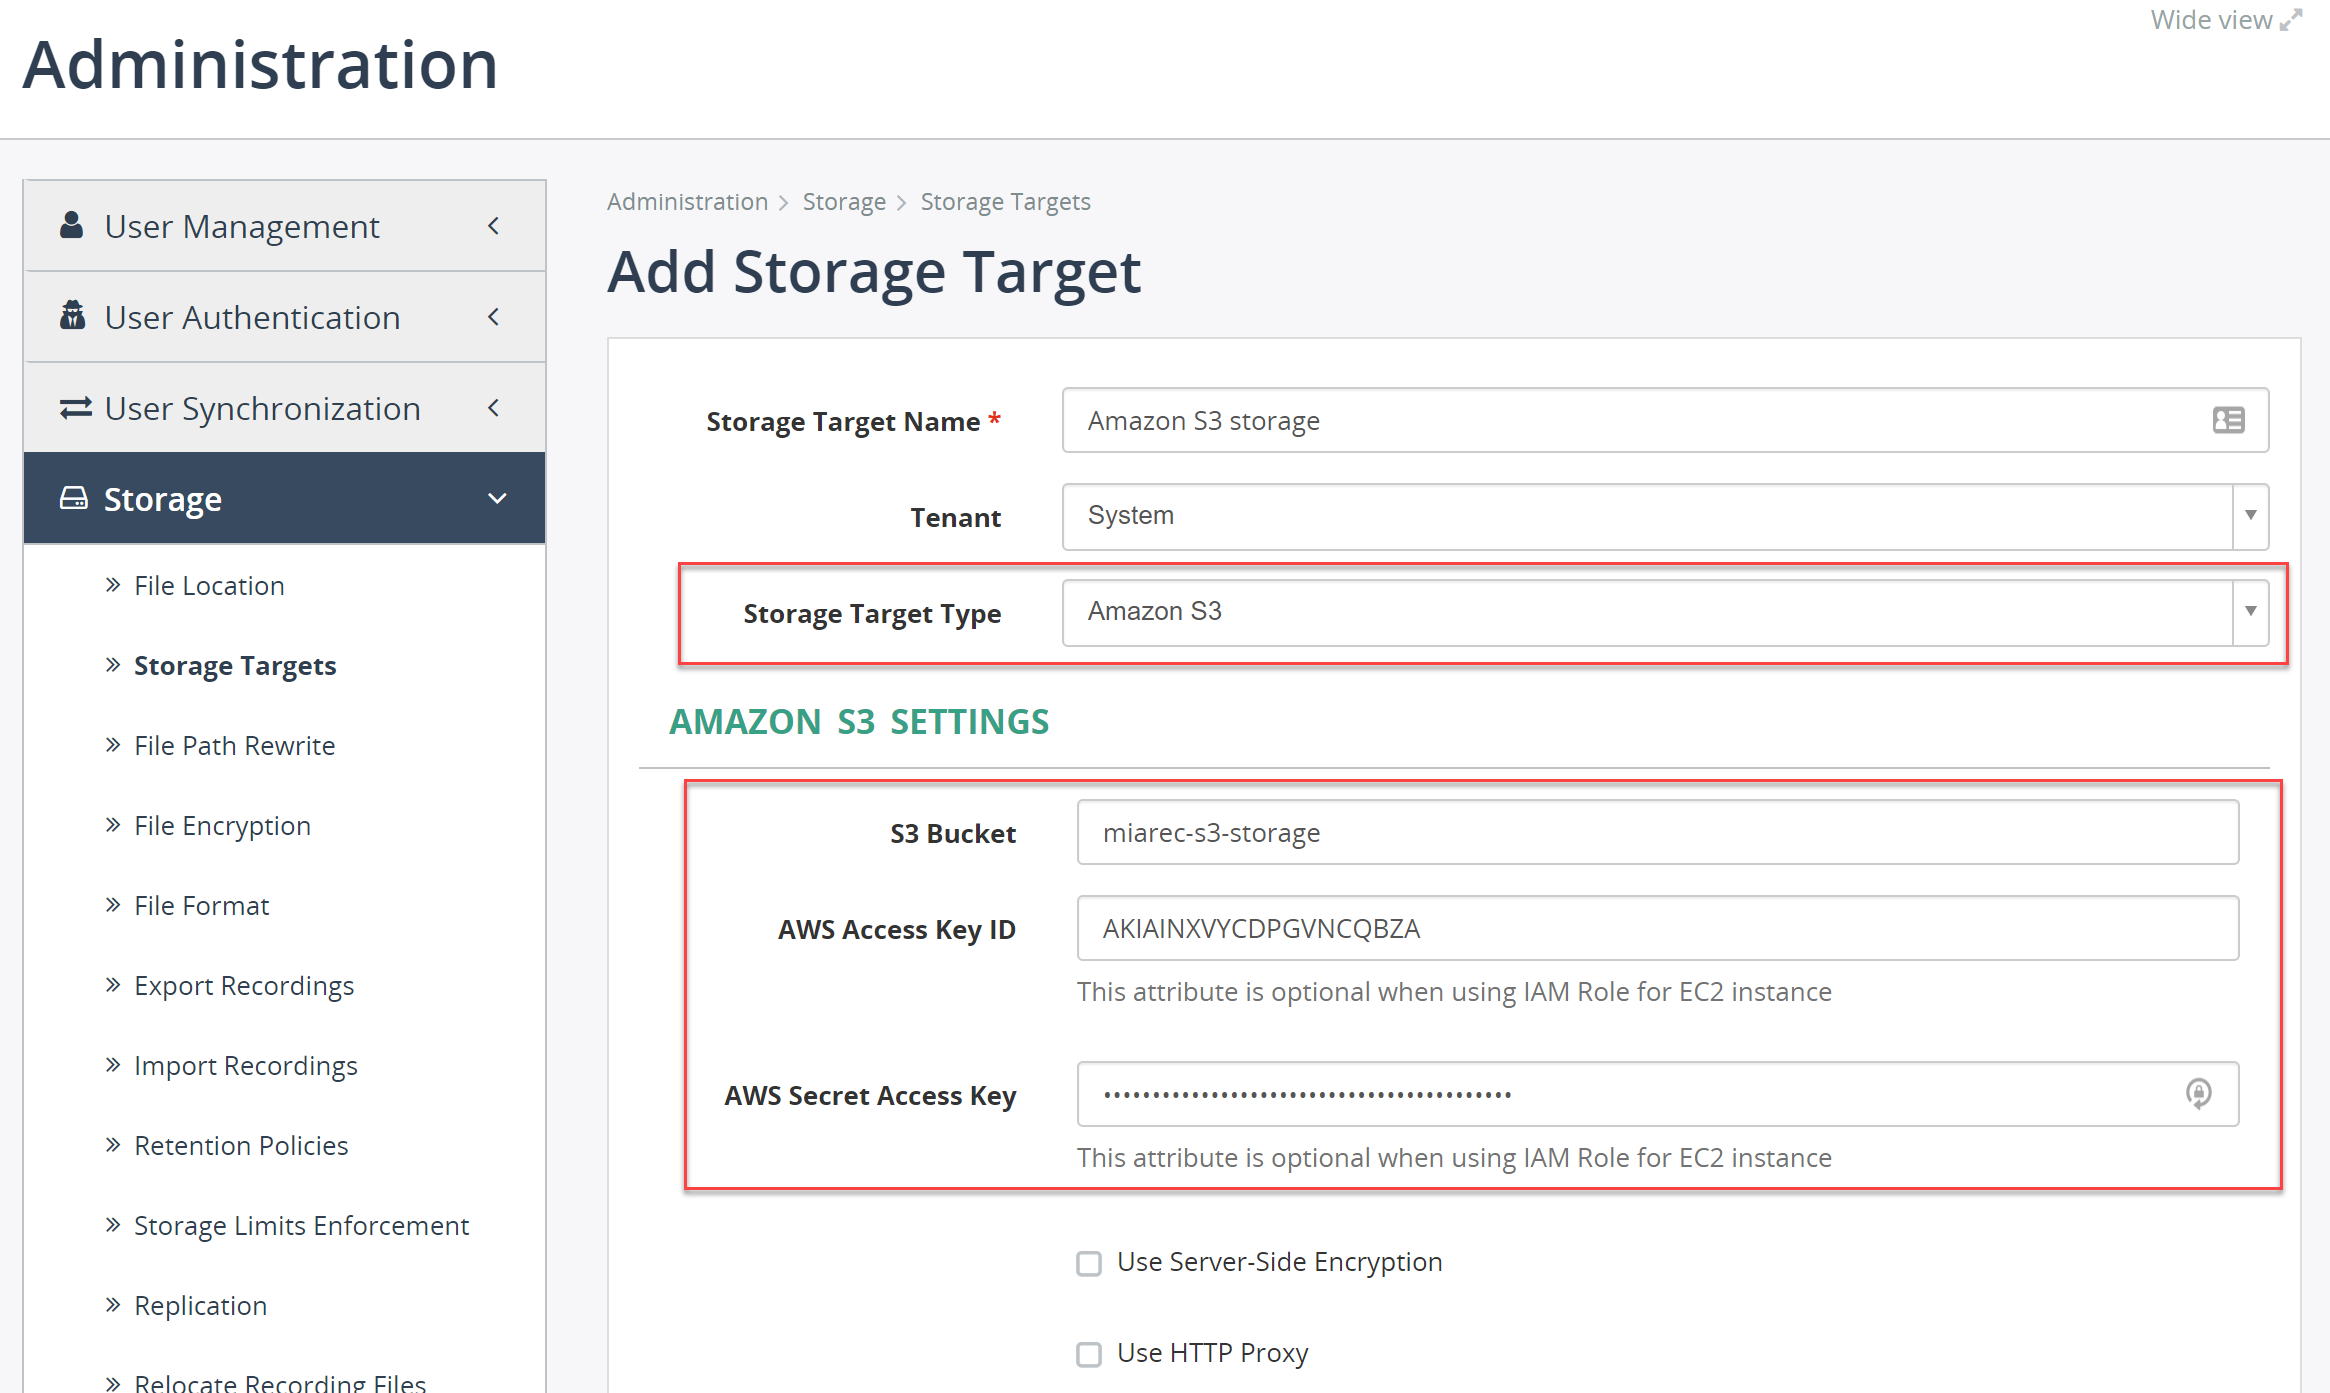
5. Configure Storage Target in MiaRec
- Navigate in MiaRec web portal to Administration -> Storage -> Storage Targets and choose Add.
- Select Amazon S3 in Storage Target Type. Configure S3 Bucket, AWS Access Key ID and AWS Secret Access Key accordingly (as configured in the previous steps).
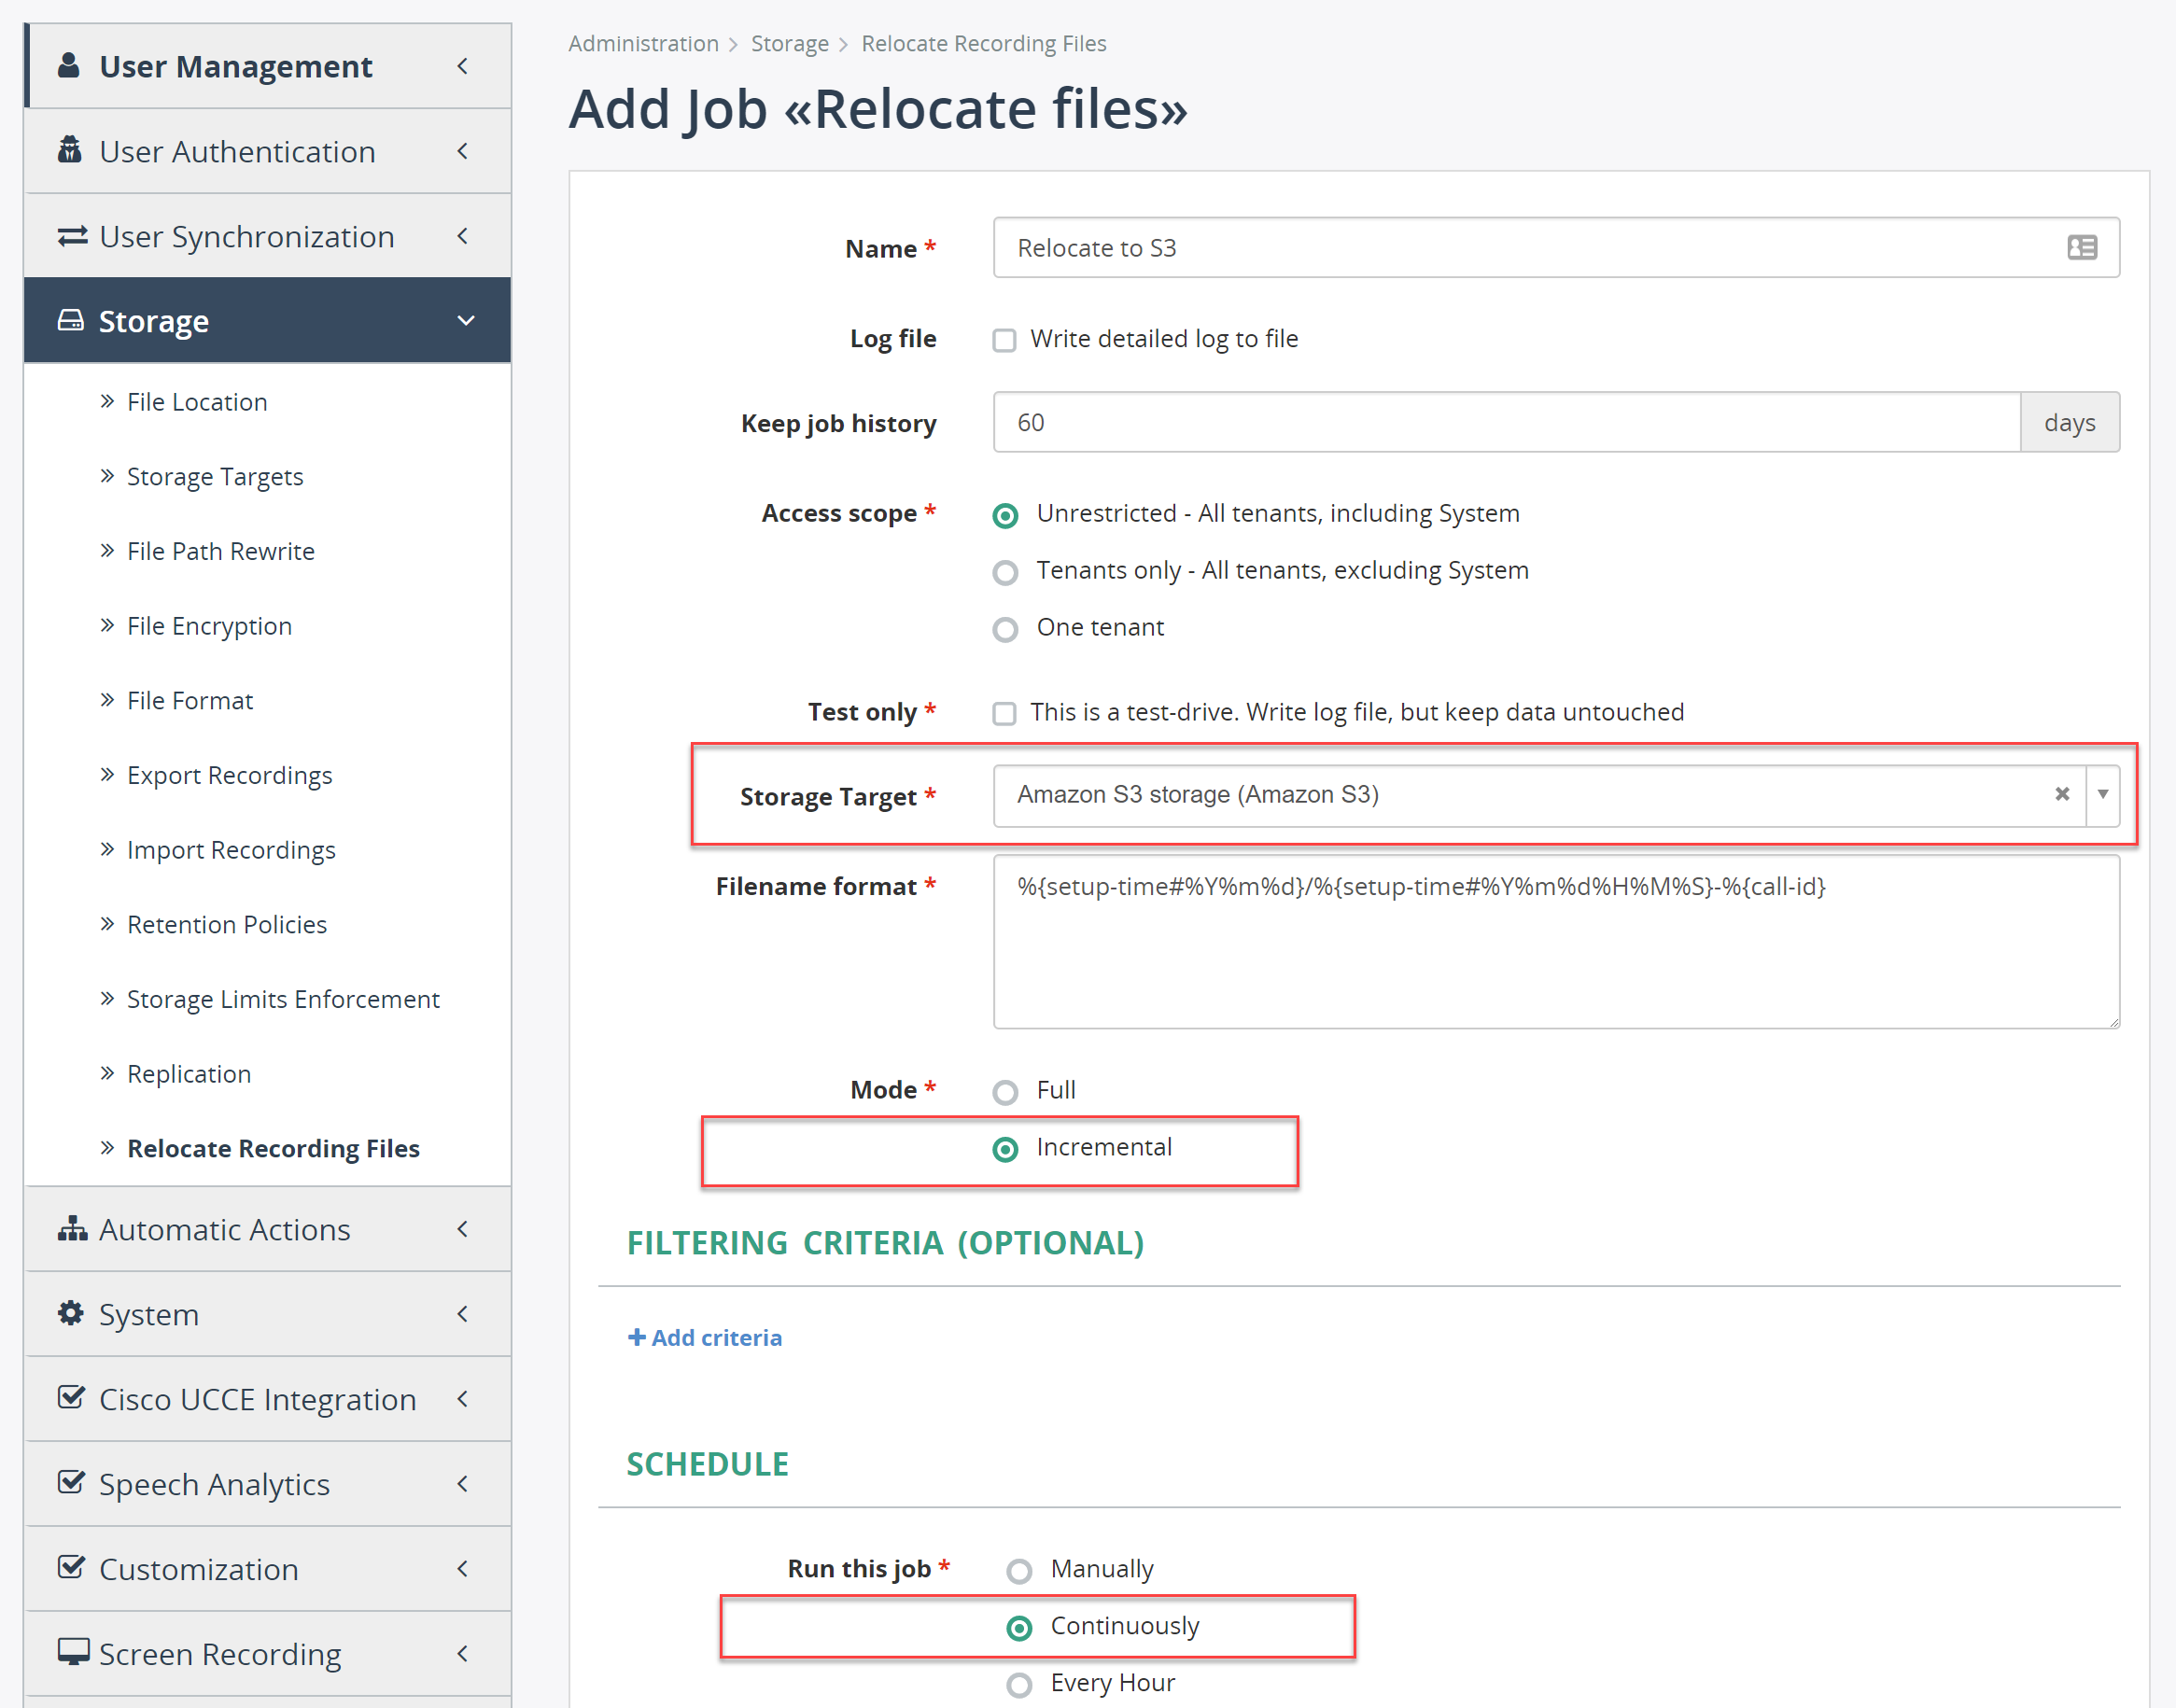
6. Configure automatic file relocation to S3 storate target
- Navigate in MiaRec web portal to Administration -> Storage -> Relocate Recording files and choose Add job.
- Configure Storage Target. Change Mode to Incremental. Select scheduler setting Run this job to Custom (crontab) and schedule it to run every 15 minutes by using
*/15in the Minute attribute.
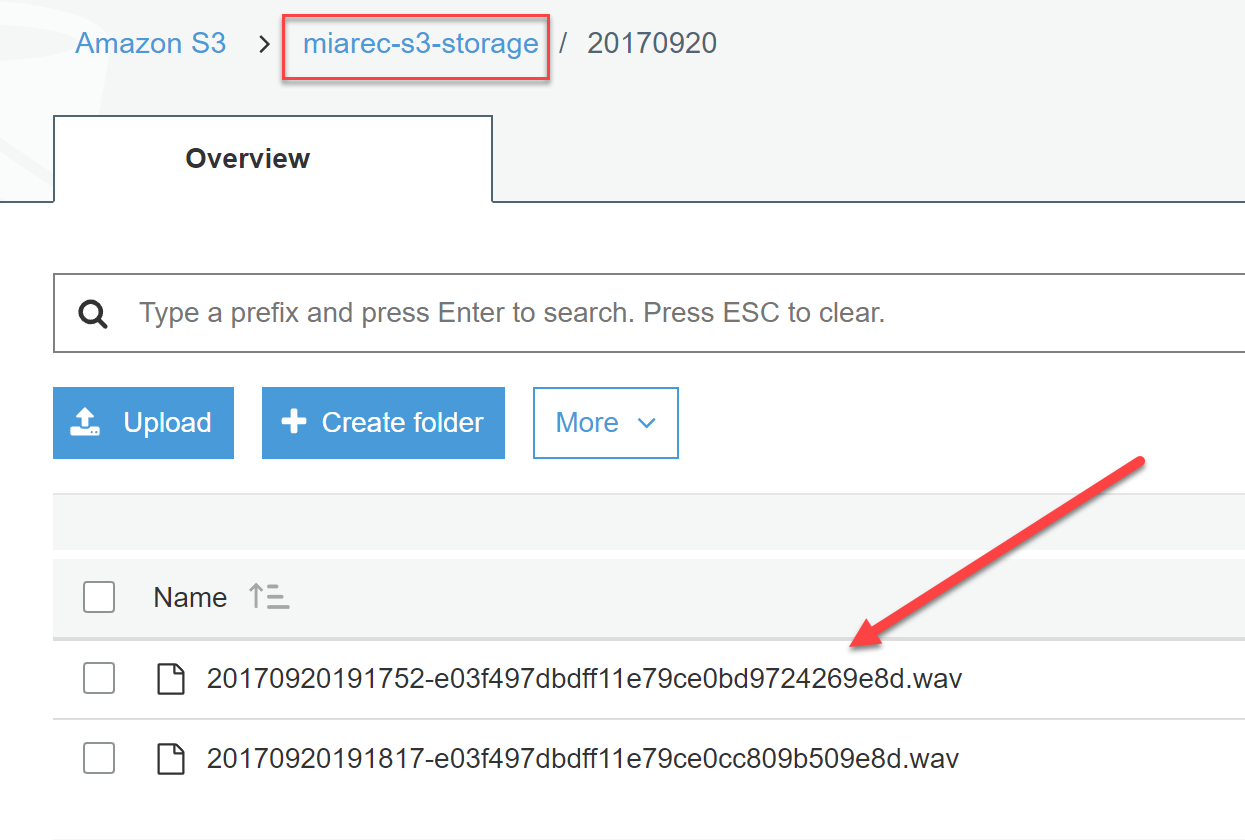
Make a few test calls and check status of this job. It is expected that files are automatically relocated to S3.
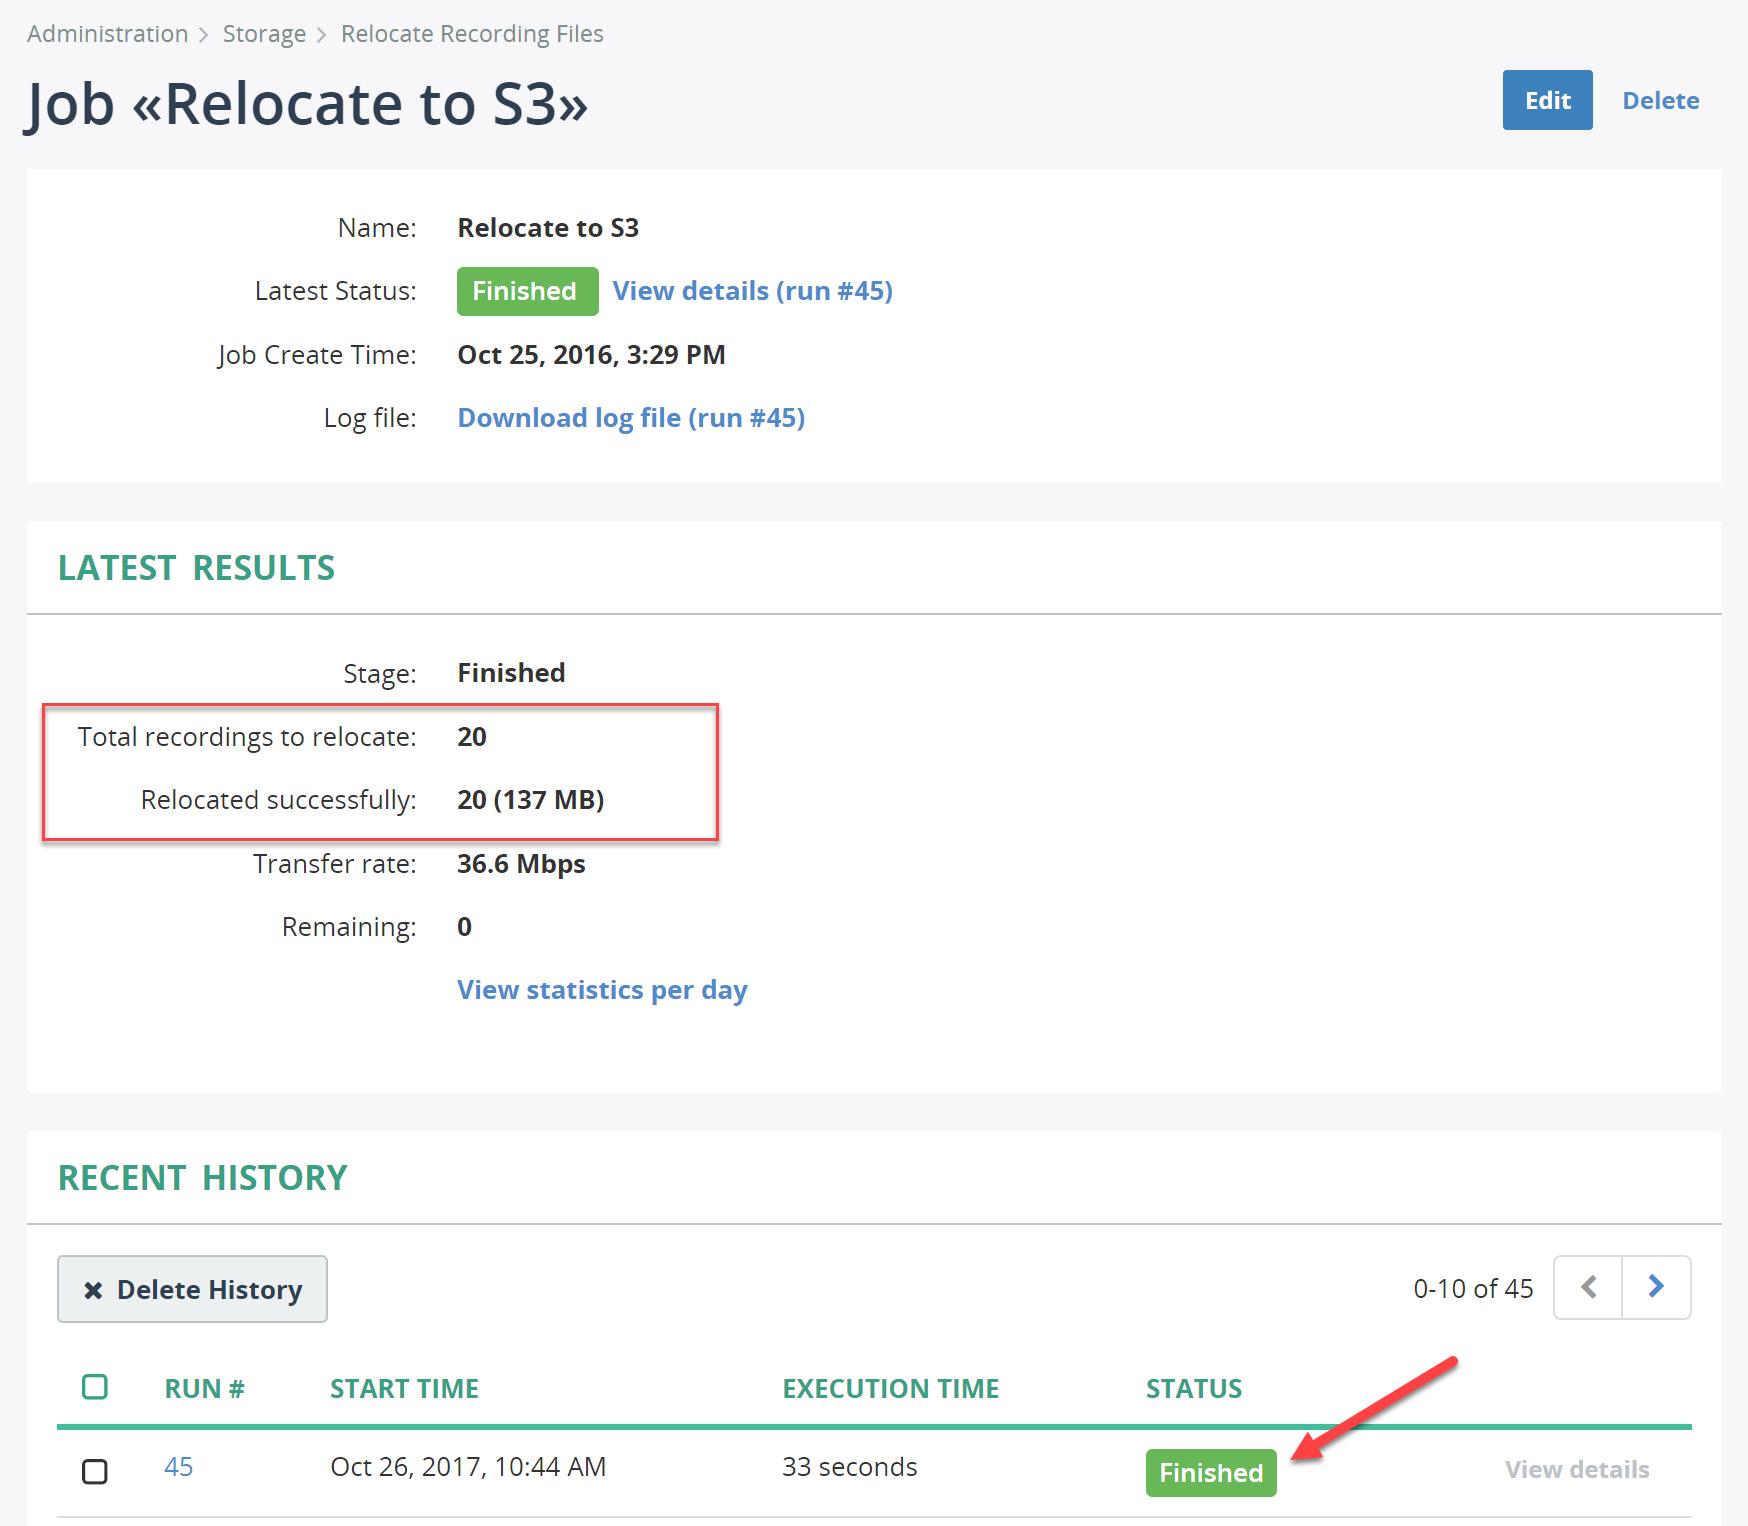
Navigate to Amazon S3 console and verify that files are located there: