4. Configure Avaya Application Enablement Services
This section provides the procedures for configuring Avaya Application Enablement Services. The procedures include the following areas:
- Verify TSAPI service licensing
- Administer TSAPI link
- Obtain Tlink name
- Administer CTI user for MiaRec
4.1. Verify TSAPI service licensing
Prior to any administration, verify that the TSAPI service has been licensed properly. Open the AES OAM web interface by browsing to "https://ip-address-or-dns", where "ip-address-or-dns" is the IP address or DNS alias of the Appliation Enabledment Services server, and log in using the appropriate credentials (not shown).
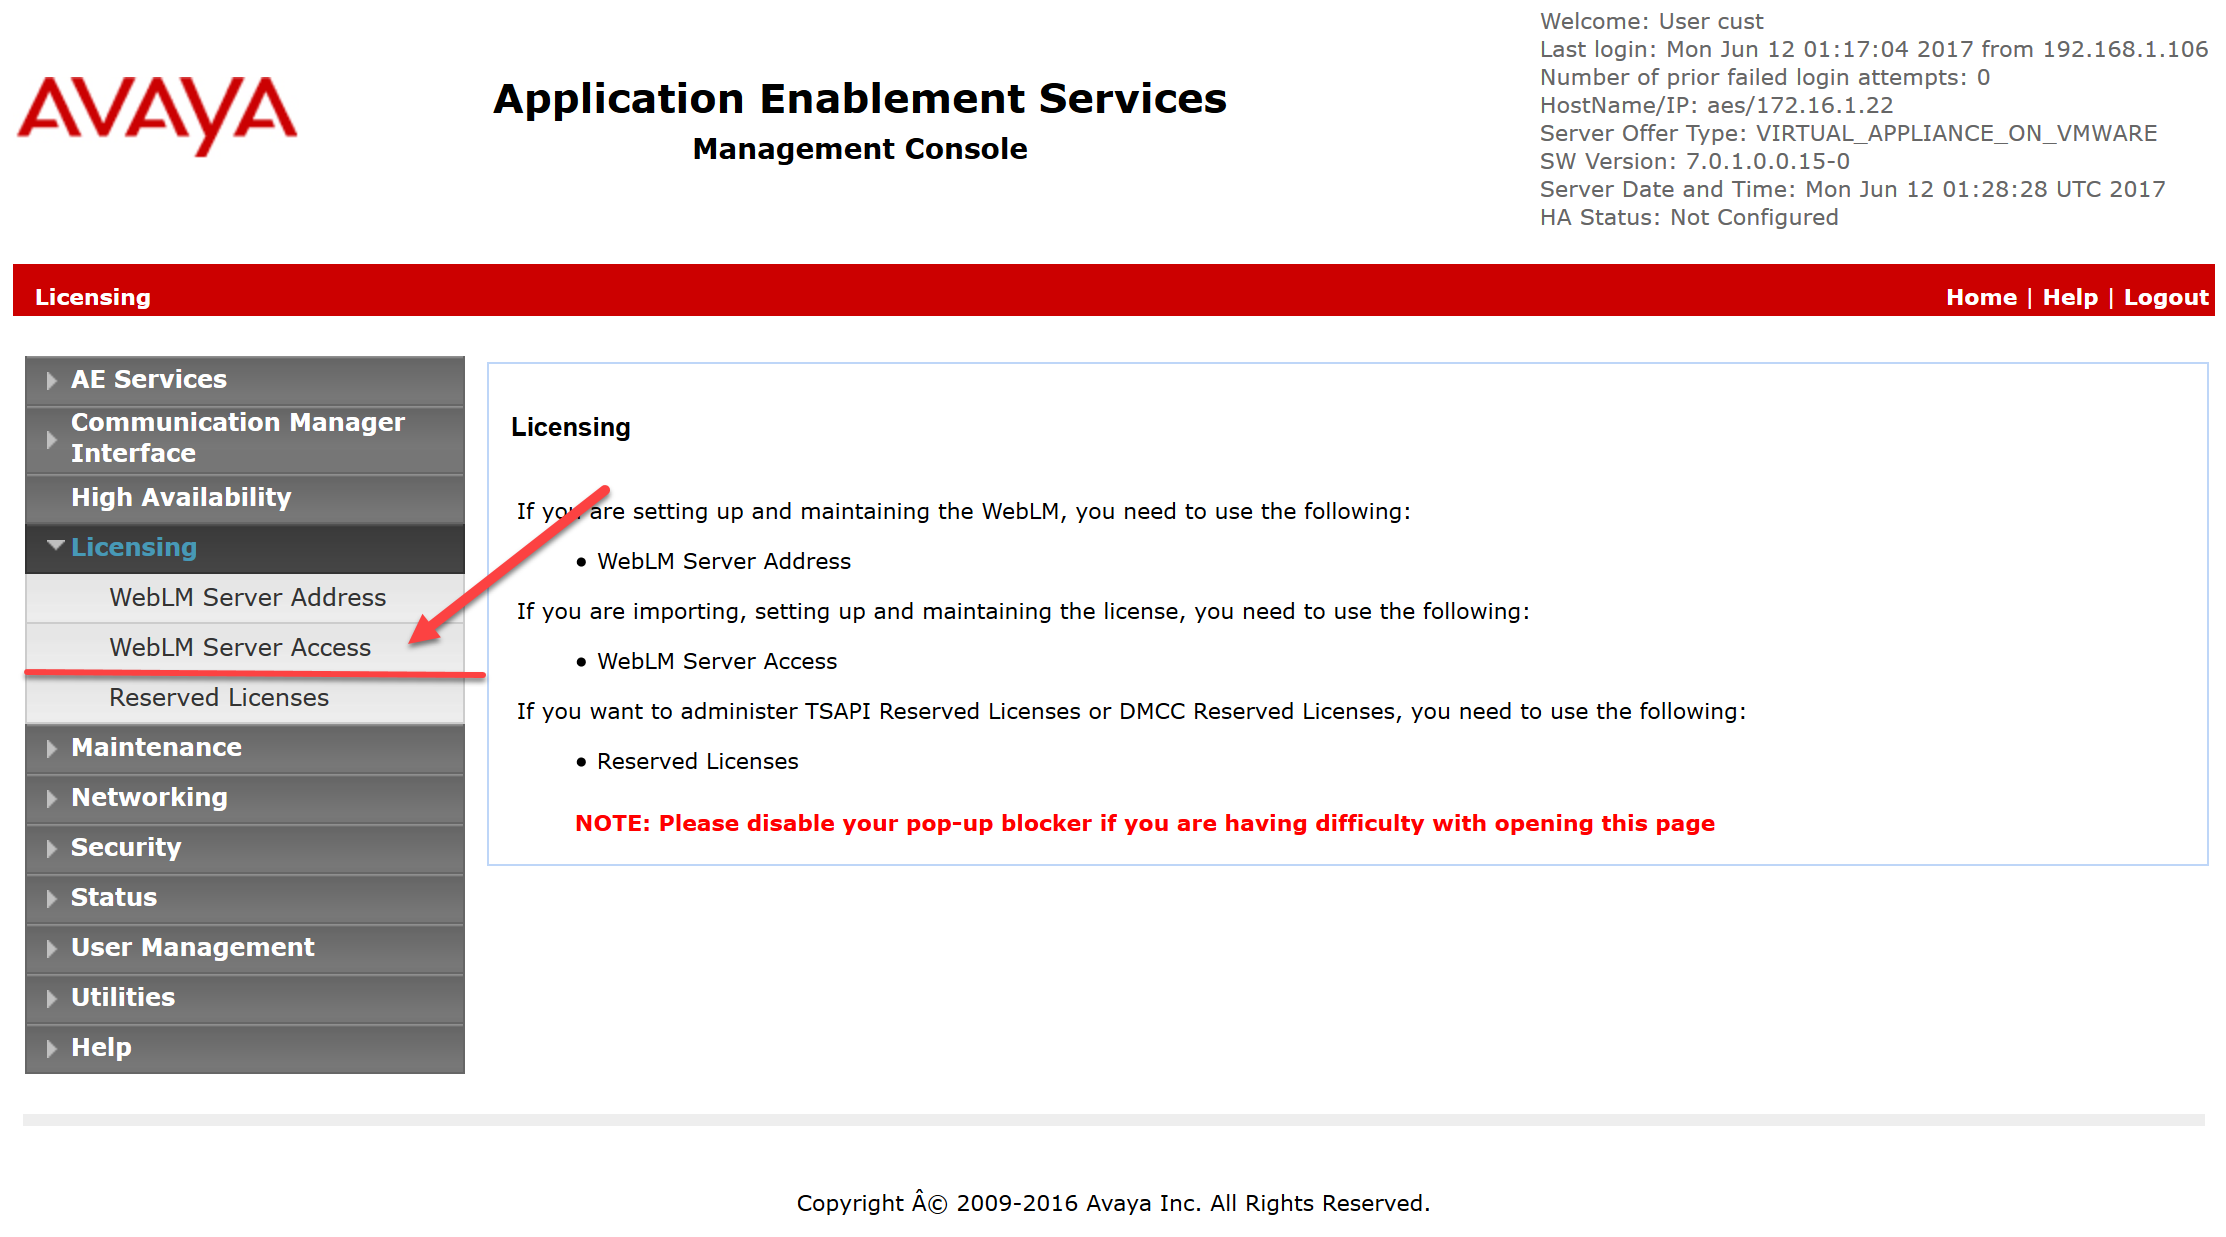
Select Licensing -> WebLM Server Access in the left pane, to display the Web License Manager pop-up screen (not shown), and log in using the appropriate credentials.
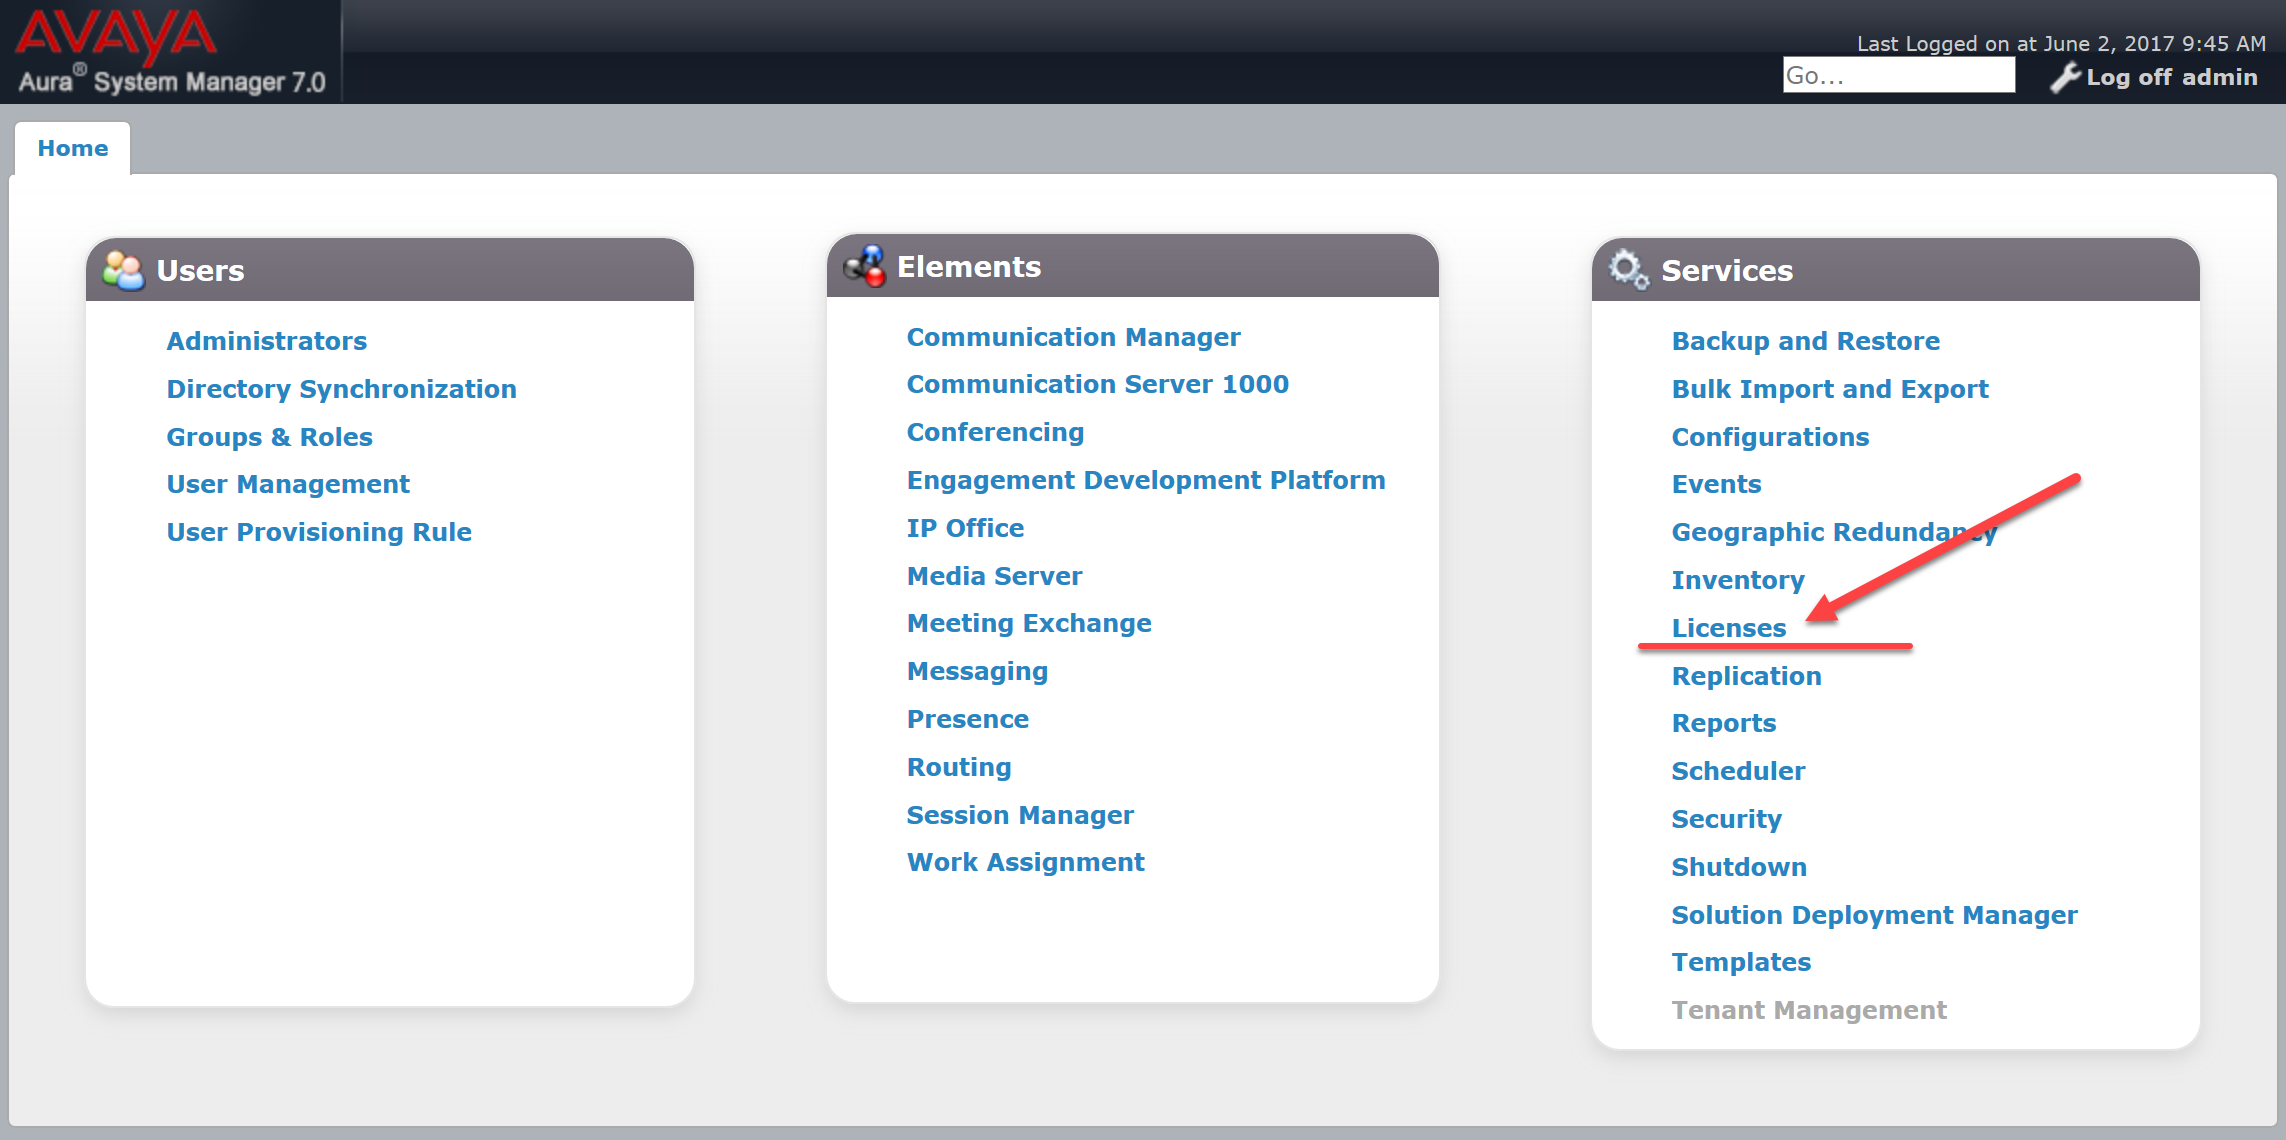
If the licenses are managed centrally on the System Manager, then select Services -> Licenses in the System Manager home screen. Otherwise, the Web License Manager screen is shown immediately.
In the Web License Manager screen, select Application_Enablement under Licenses Products to display license capacity and current usage.
Make certain that a number of TSAPI Simultaneous Users (licenses) is enough. MiaRec requires TSAPI Basic license for each recorded IP Phone and softphone and for each monitored ACD Split (Hunt Group). If the TSAPI service is not licensed, contact the Avaya sales team or business partner for a proper license file.

4.2. Administer TSAPI link
To administer a TSAPI link, select AE Services -> TSAPI -> TSAPI Links from the left pan of the Management Console. The TSAPI Links screen is displayed, as shown below. If the TSAPI Link is not configured yet, then click Add Link to create one.
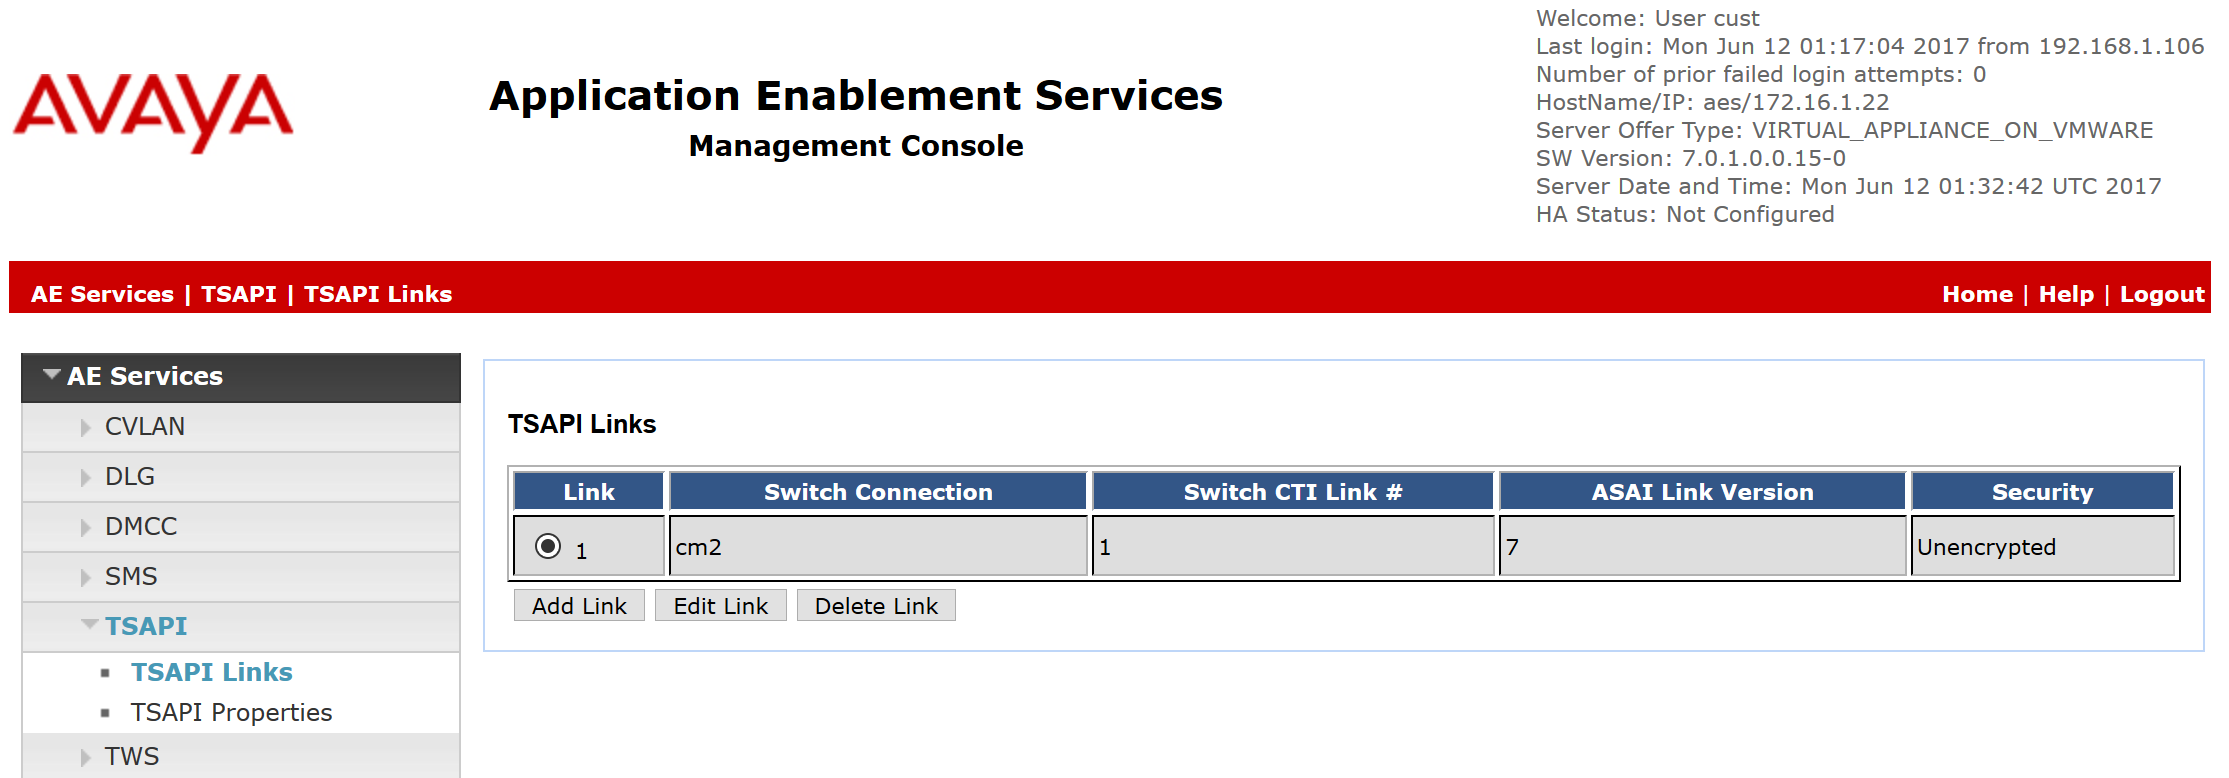
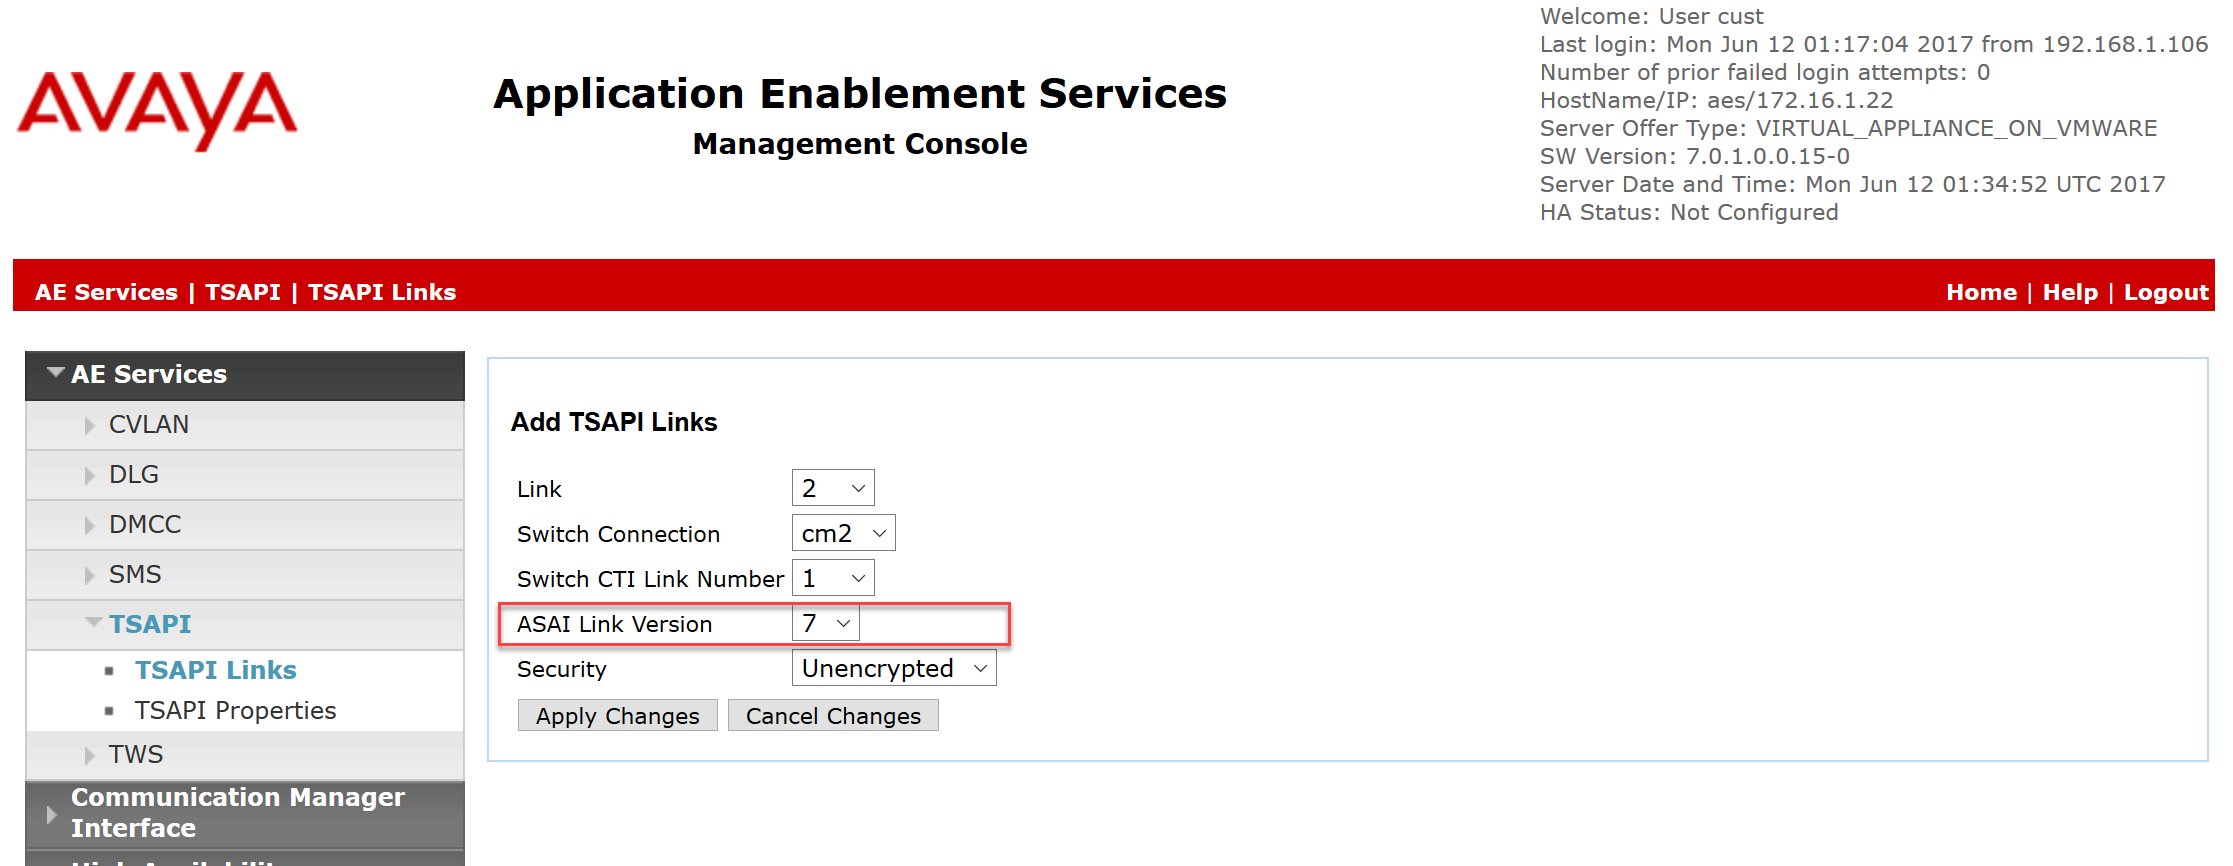
The Add TSAPI Links screen is displayed next.
The Link field is only local to the Application Enablement Services server, and may be set to any available number. For Switch Connection, select the relevant switch connection from the drob-down list. In this case, the existing switch connection "cm2" is selected. For Switch CTI Link Number, select the CTI Link number from Section 3.1. Make sure that ASAI Link Version is 6 or higher. Retain the default values in the remaining fields.
4.3. Obtain Tlink name
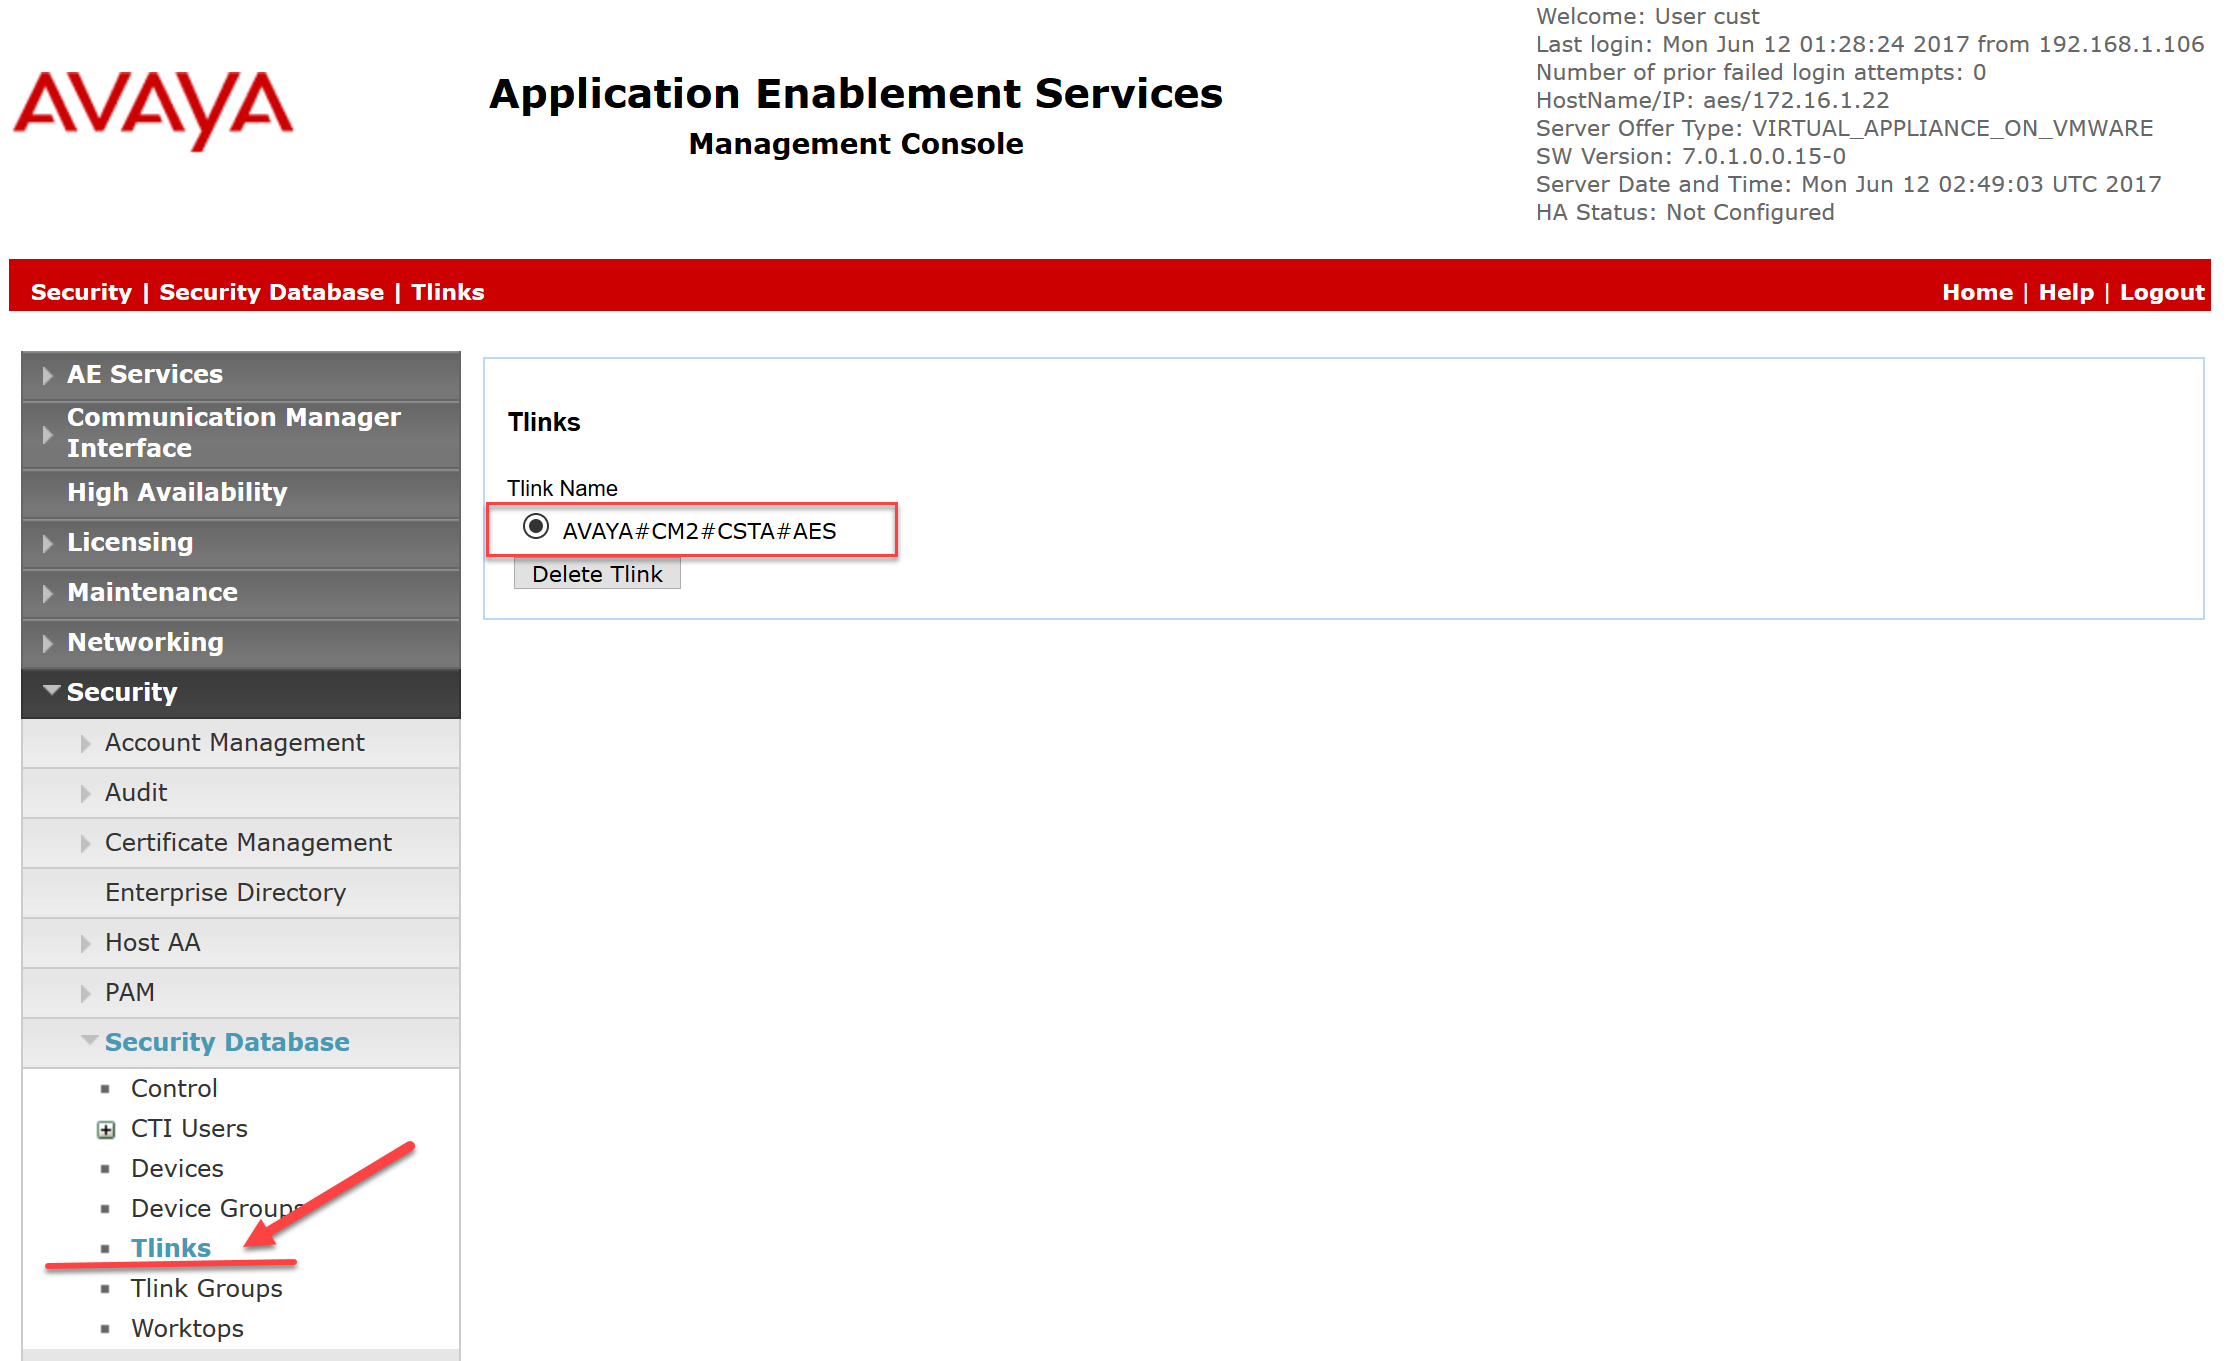
Select Security -> Security Database -> Tlinks from the left pane. The Tlinks screen shows a listing of the Tlink names. Locate the Tlink Name associated with the switch connection to Avaya Communication Manager. A new TLink name is automatically generated for the TSAPI service. Locate the TLink name associated with the relevant switch connection, which would use the name of the switch connection as part of the Tlink name. Make a note of the associated Tlink name, to be used later for configuring the MiaRec server.
In this case, the associated Tlink name is "AVAYA#CM2#CSTA#AES"'. Note the use of the switch connection "CM2" from Section 4.2 as part of the Tlink name.
If Tlink doesn't exist, then follow instructions in AE Services Administration in document Application Enablement Services Administration and Maintenance Guide available at http://support.avaya.com
4.4. Administer CTI user for MiaRec
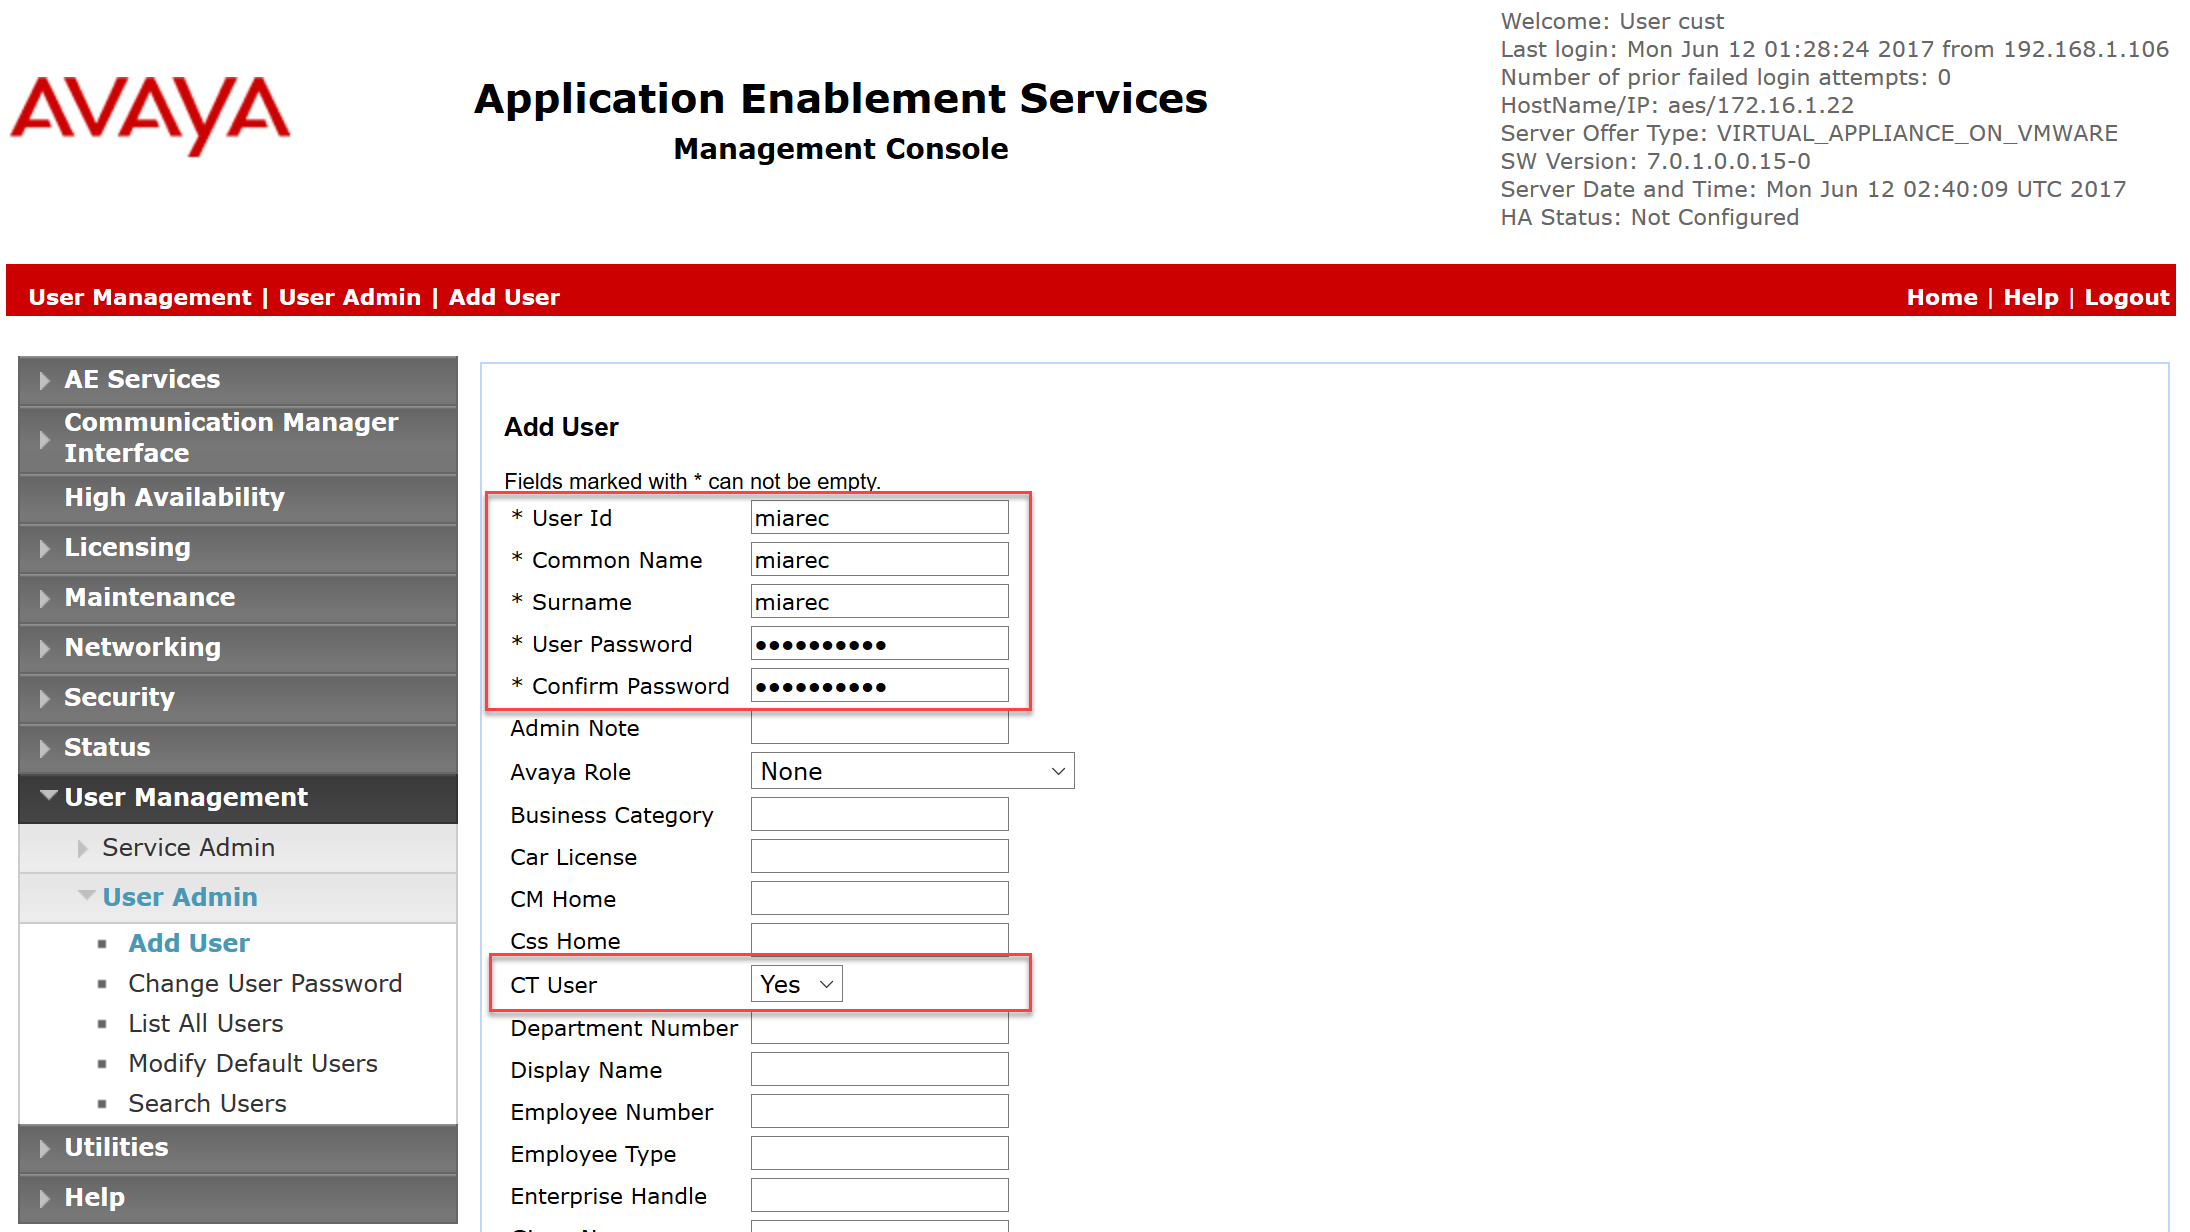
Select User Management -> Add User from the left pane, to display the Add User screen in the right pane.
Enter desired values for User Id, Common Name, Surname, User Password, and Confirm Password. Retain the default value of “None” for Avaya Role, and select “Yes” from the CT User drop-down list. Click Apply at the bottom of the screen (not shown below). Make a note of the User Id and Password, to be used later for configuring the MiaRec server.
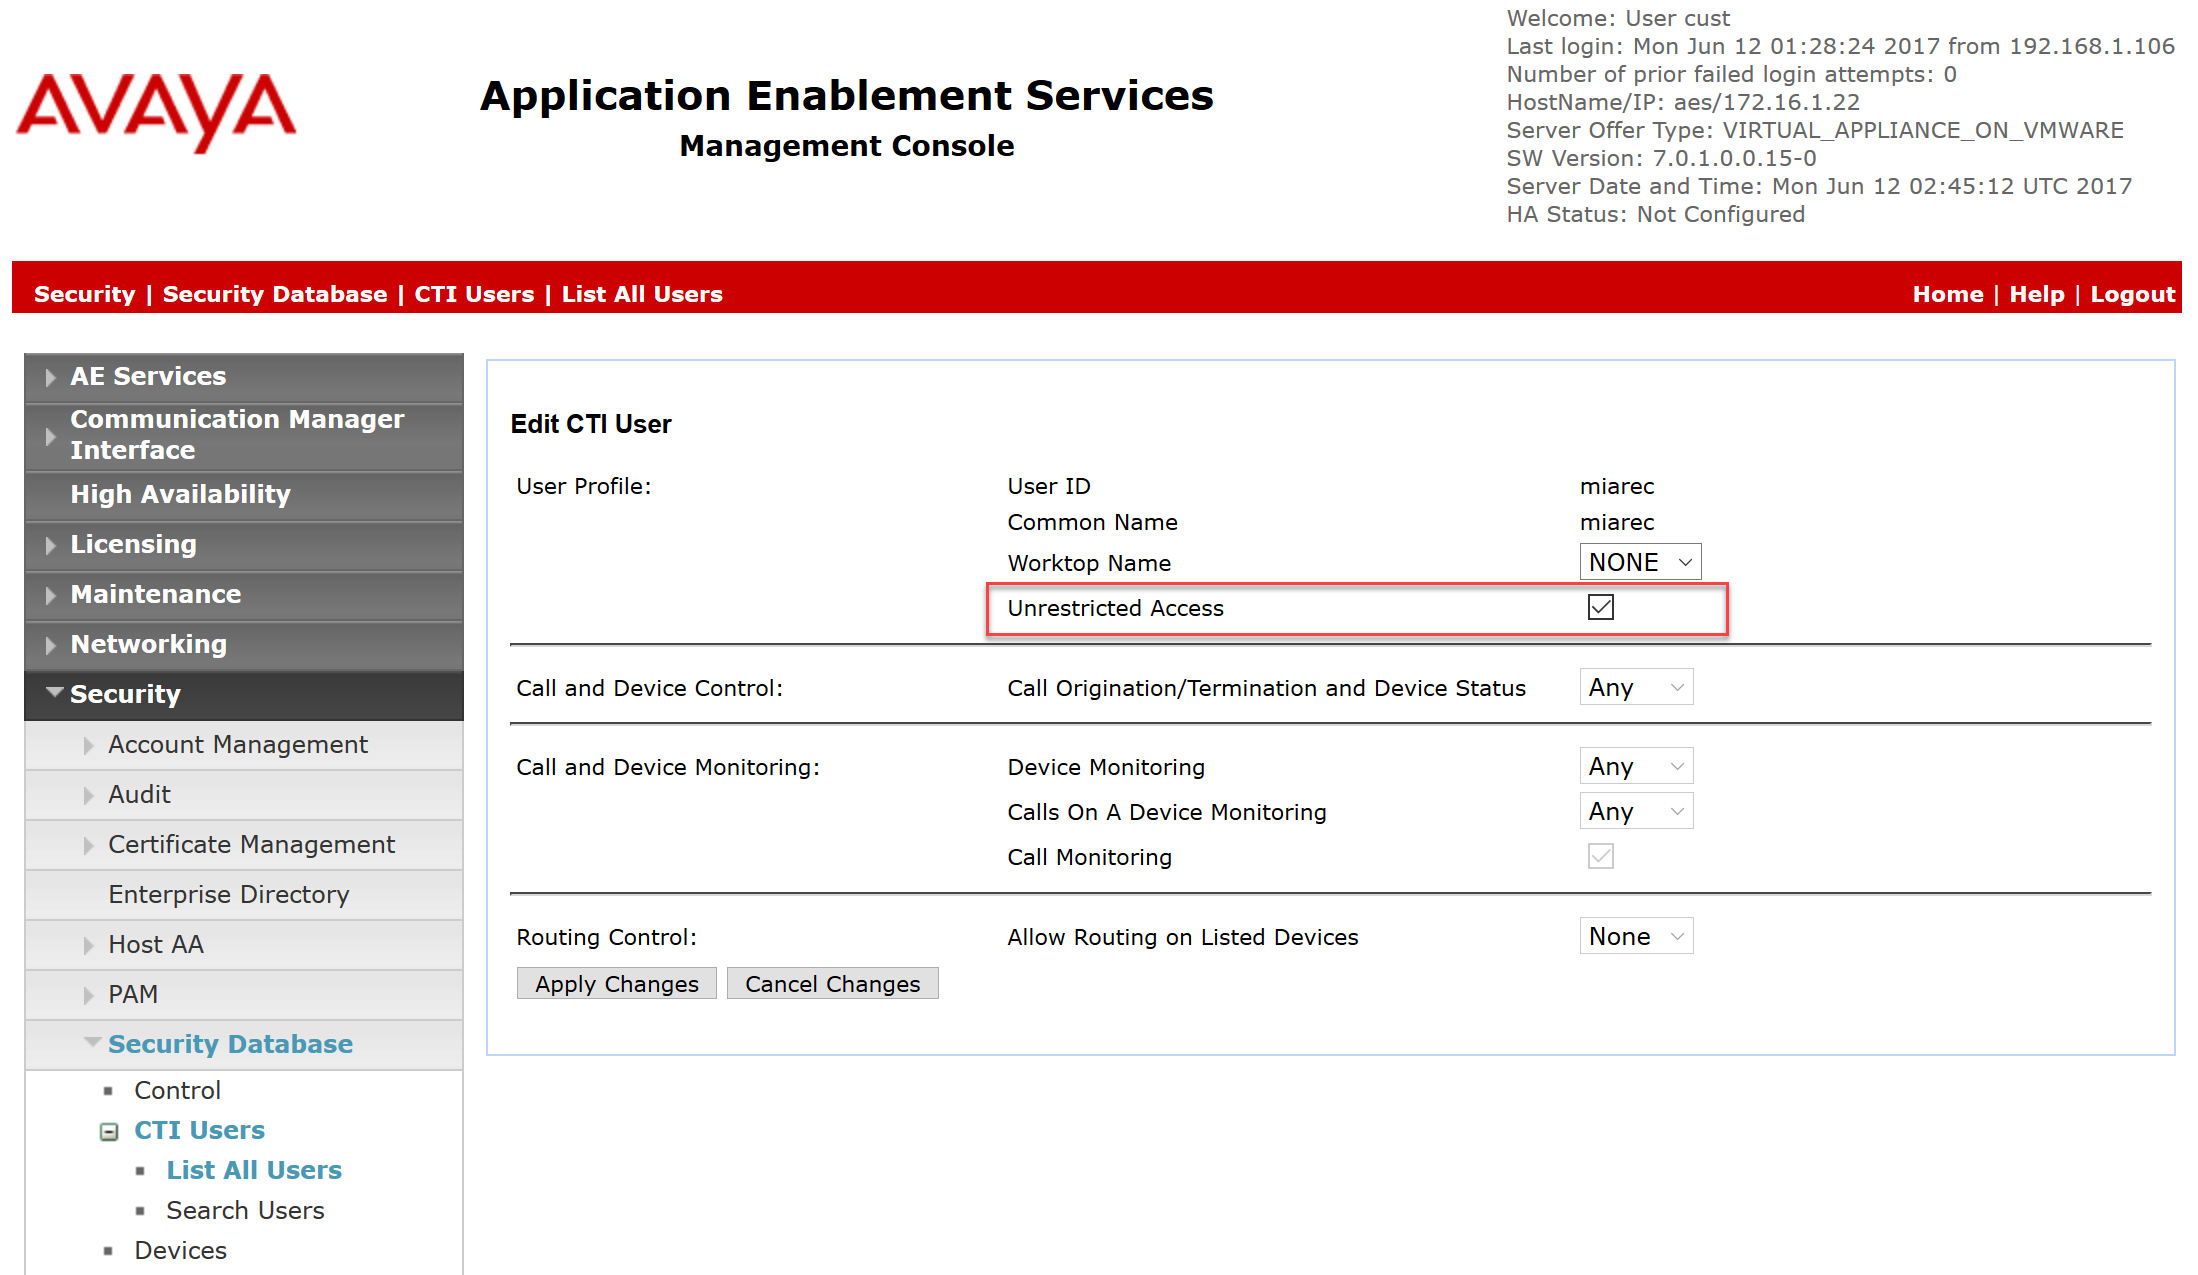
Next, you need to change the security level for the CTI User as it needs to have unrestricted access privileges.
Select Administration -> Security Database -> CTI Users -> List All Users from the left pane. Choose the previously created CTI user, and click Edit.
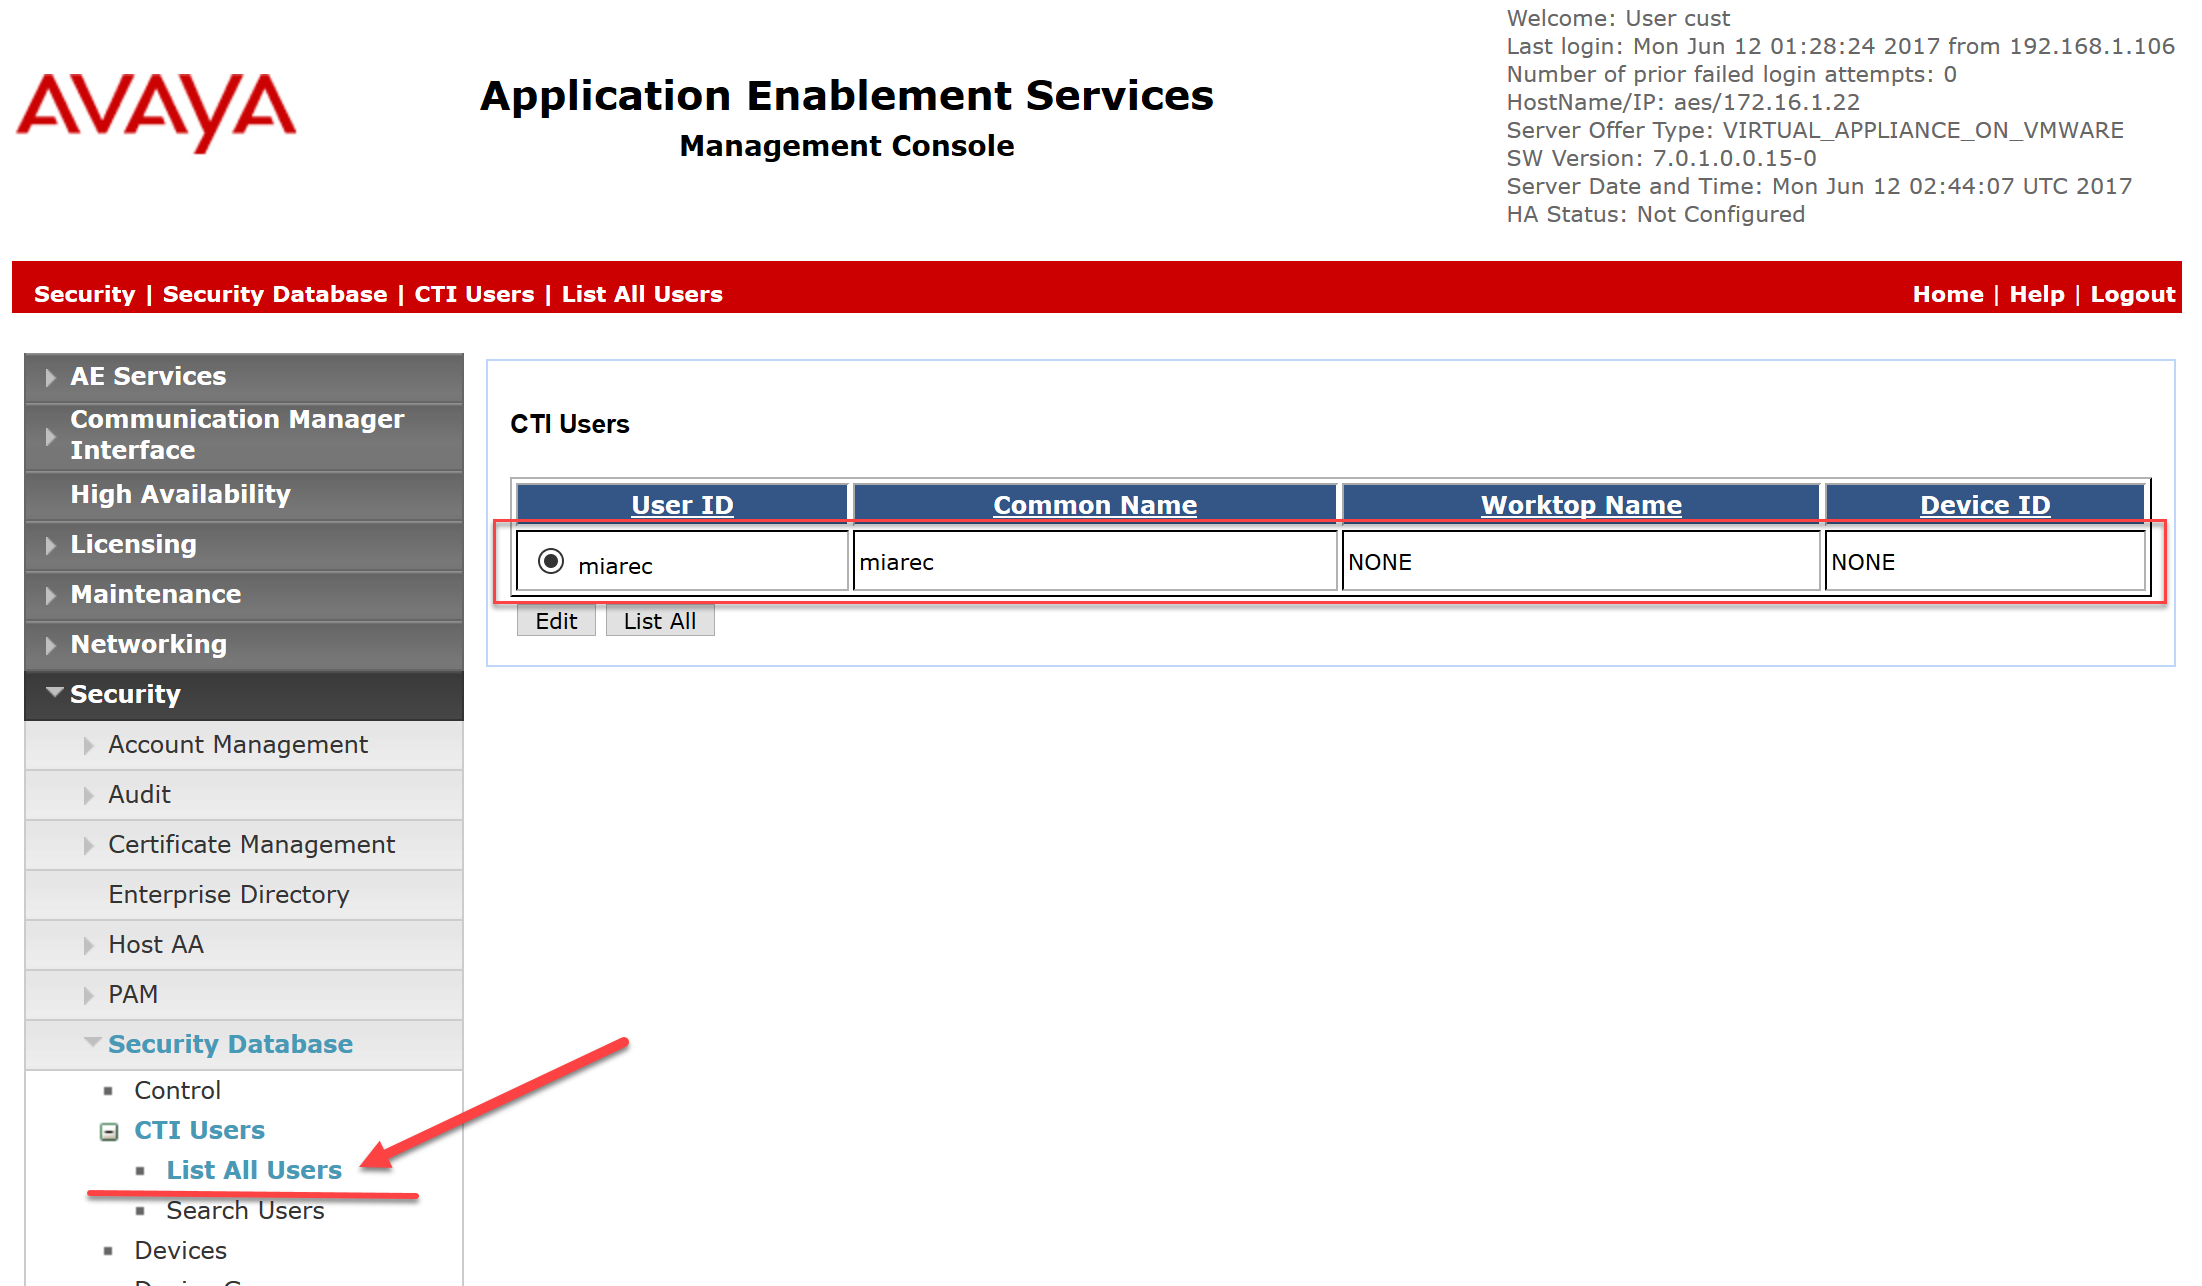
The Edit CTI User screen appears. Tick the Unrestricted Access box and Apply Changes at the bottom of the screen.