SMS-based verification
This article explains how to set up two-step verification using SMS.
Requirements
- Twilio account
Note, SMS-based application uses Twilio service for sending text messages. Check Twilio SMS Pricing page.
Create Twilio project account
If you do not have a Twilio account, then sign-up for account at Twilio site.
As a part of the sign-up process, you will need to confirm your email address and phone number.
Check your inbox for the Confirm your email message from Twilio.
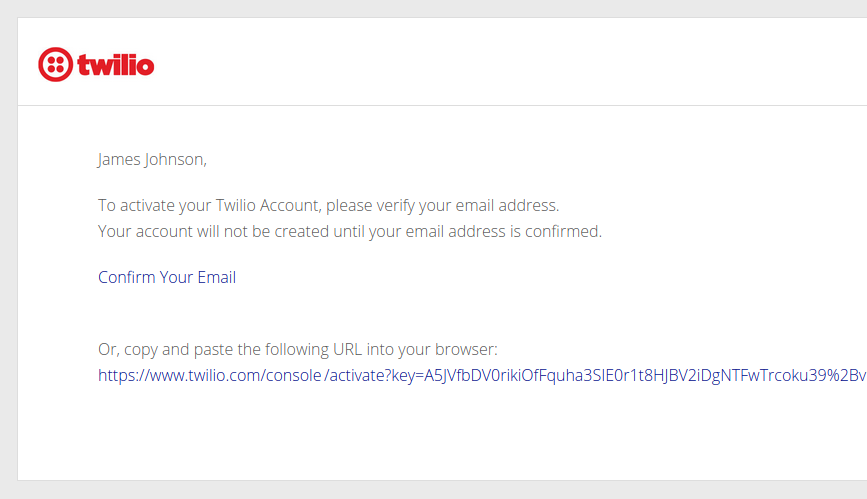
Then, follow the instructions in the email.
Once email is verified, you will be redirected to the Verify Phone Number step.
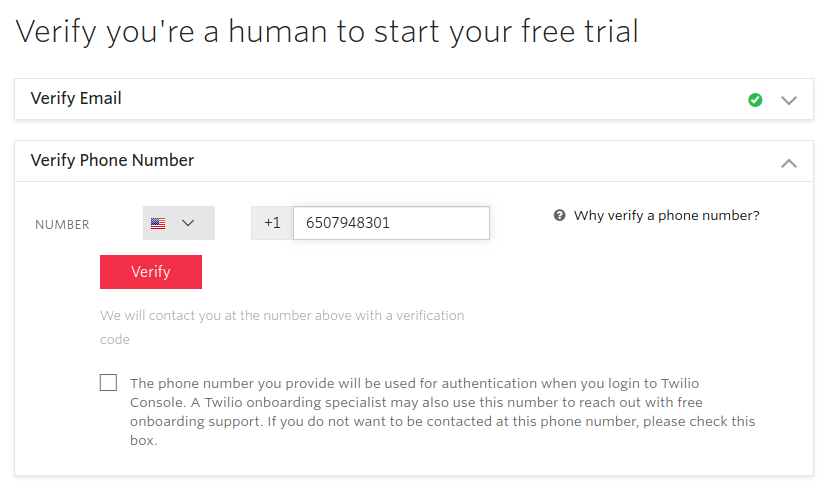
Enter your phone number for verification, and then click Verify.
A verification code will be sent in a text message to your phone number.
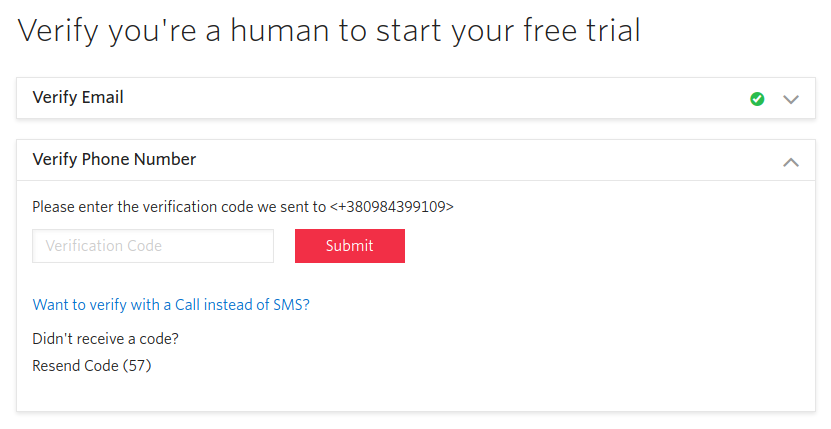
Enter the code, and then click Submit.
You will see the message Welcome! Let’s customize your experience! Do you write code?.
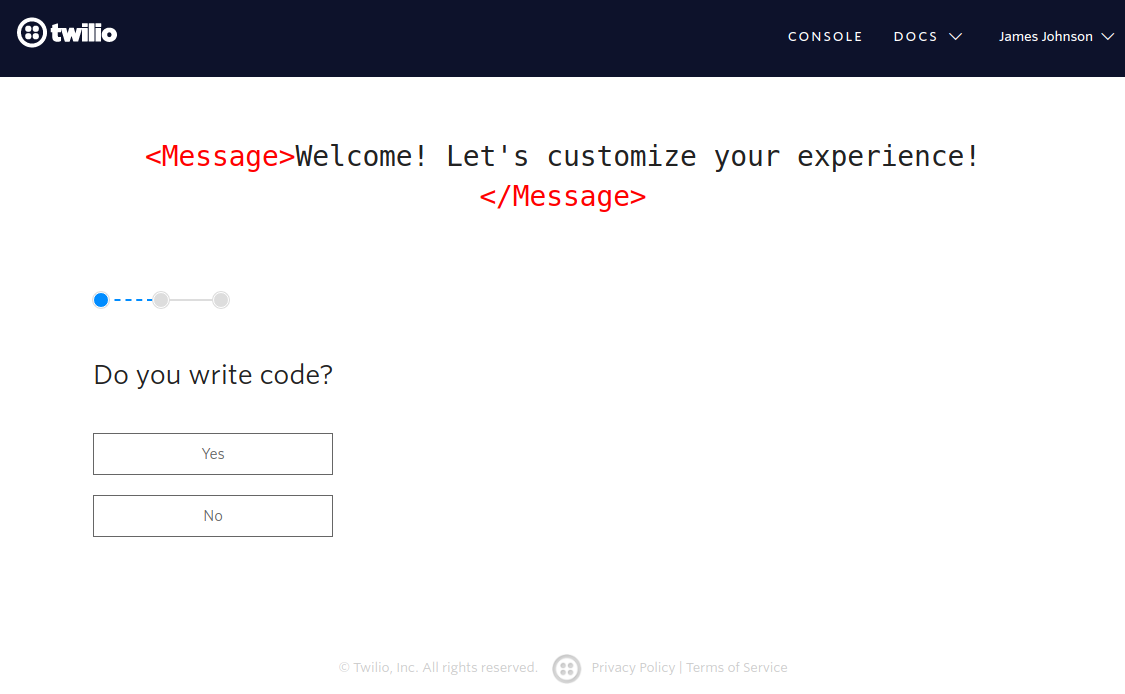
Answer No.
Next, you will see What are you here to do? question.
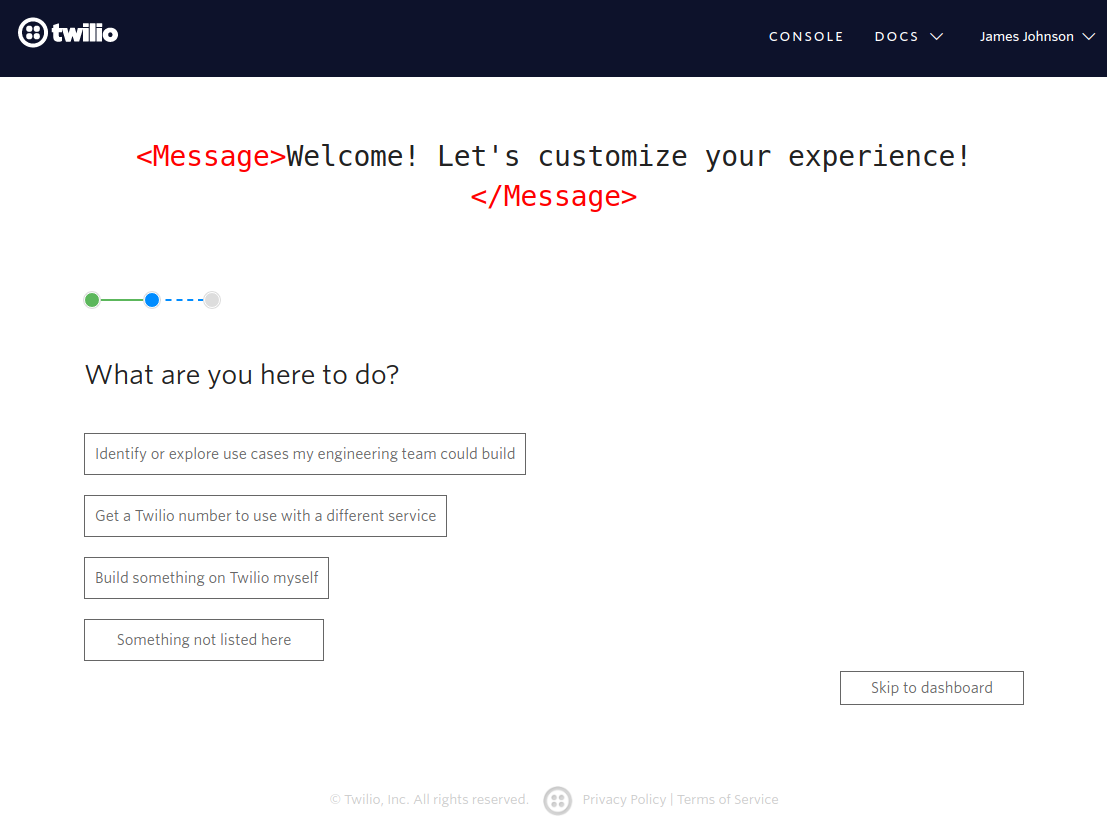
Click the Skip to dashboard button.
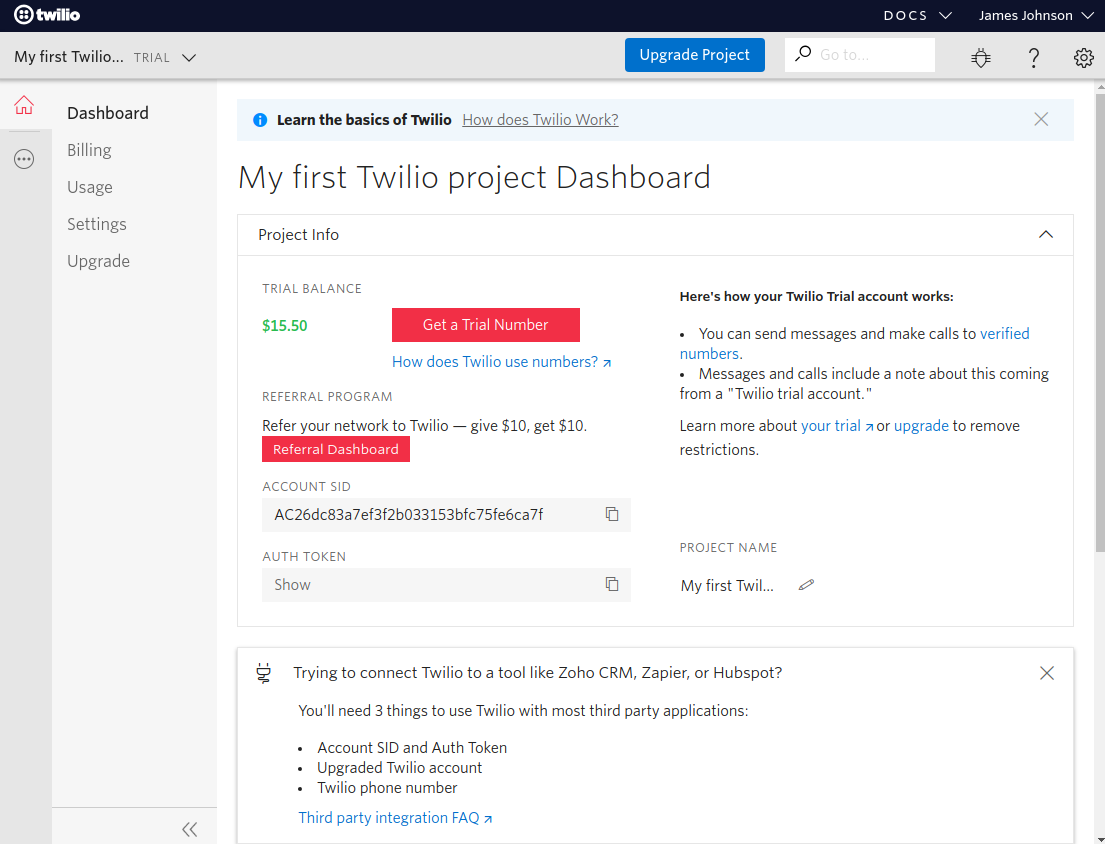
The new Twilio account is created. It is also recommended to enable 2FA on your Twilio account to help protect the Twilio account.
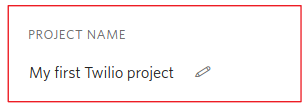
[Optional] Rename the new project
Once account is created and verified, the new project is also created. The new project has the default name, which can be changed from the Twilio Dashboard page.
Upgrade Twilio project account
Initially, the new project is in a trial mode. Twilio offers a trial to all customers who sign up, which includes a free balance for you to experiment with. But the trial account has many limitations, so you will need to upgrade to a Twilio paid account.
To upgrade your Twilio project account, and remove all trial limitations, you’ll need to add your billing information and charge your initial account balance.
Login to your Twilio project at Twilio Dashboard.
Click Upgrade Project at the top of the screen.

Verify the phone number if you have not verified it yet. If you followed our instructions, then the phone number should be already verified. Otherwise, enter your phone number for verification, and then click Verify.
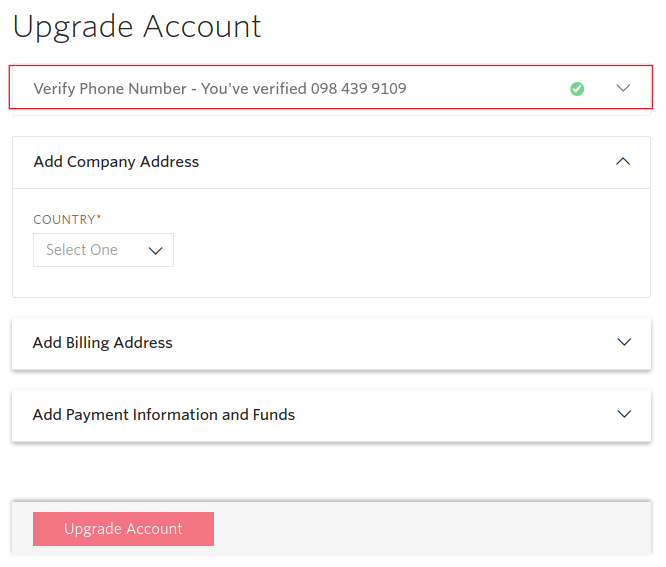
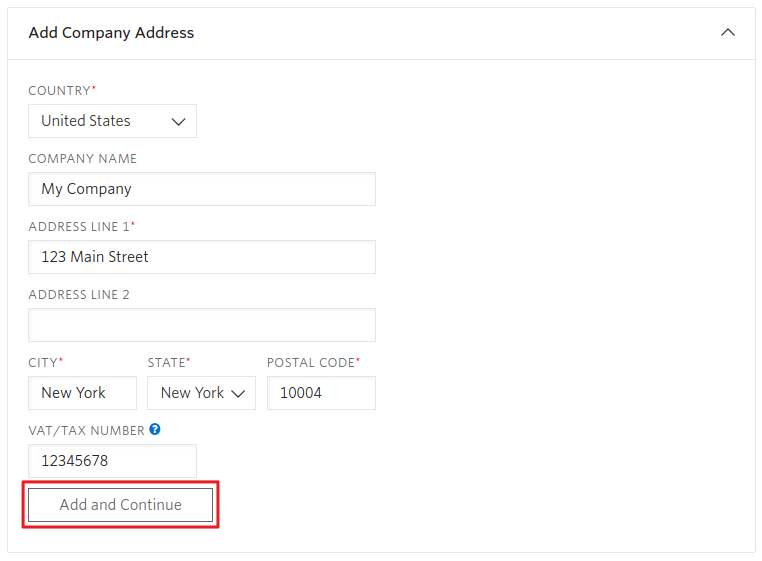
In the “Add Company Address” section, select the country where you will consume Twilio services. When the section expands, enter your service address, and then click Add and Continue.
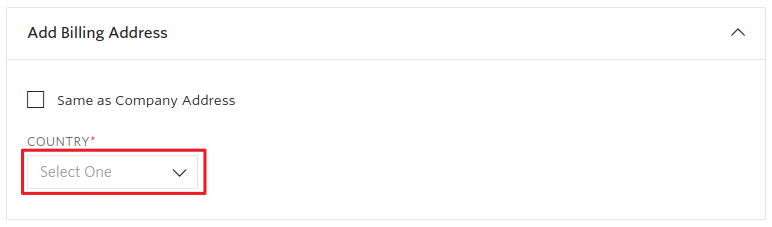
In the “Add a Billing Address” section, select the country for your billing address. When the section expands, enter your billing address, and then click Add and Continue.
Note: If your service and billing addresses match, click Same as Company Address.
In the “Add Payment Information and Funds” section, enter credit card details or a paypal account, and the desired initial funds (default $20), then click Upgrade Account.
Note: To upgrade using a promo code, click Use Promo Code.

Notice: Enable the Automatic Recharge switch to automatically charge your payment source, and refill your project balance when it falls below $10. Disabling this option allows your project to hit zero (or negative) balance, and would require you to manually add funds to prevent account suspension.
Search for and Buy a Twilio Phone Number
You must buy a Twilio phone number in order to send SMS through Twilio services.
Twilio’s Console site allows users to quickly search for and provision phone numbers on your project. From the Console search, you can filter phone numbers based on location, phone number type, capabilities, and more - all with our easy to use GUI. Continue reading for step-by-step instructions.
Open the Buy a Number page in Twilio Console.
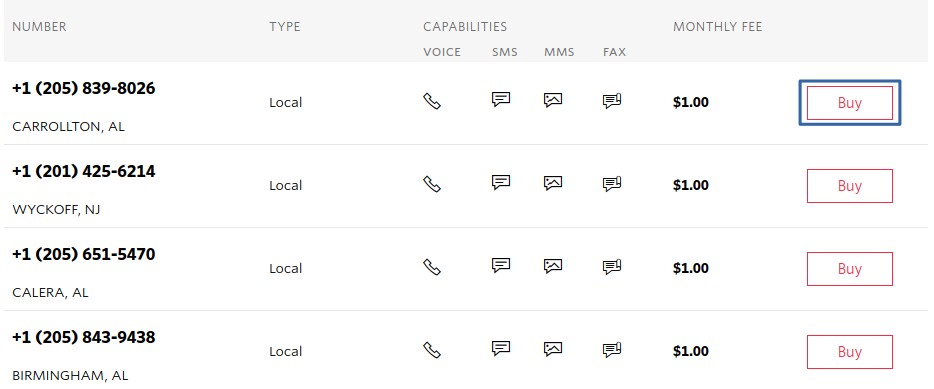
Enter the criteria for the phone number you need, and then click Search.
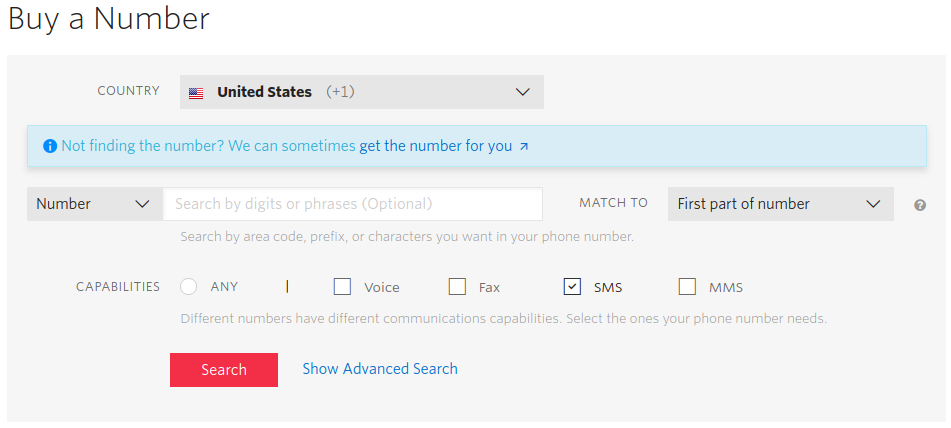
- Country: Select the country from the drop-down menu.
- Number or Location: Select the desired option to search by digits/phrases, or a specific City or Region.
- Capabilities: Two-step verification using SMS requires at least SMS capability.
- Show Advanced Search: Click this link to show options for the phone number type (local, mobile, toll-free), local address requirements, and to allow beta number results.
Search results will be displayed with the phone number, location, type, capabilities, and price listed. Click Buy to purchase a phone number for your current project or sub-account.
After your phone number has been successfully purchased, your Twilio account will be charged for the full monthly price of the phone number.
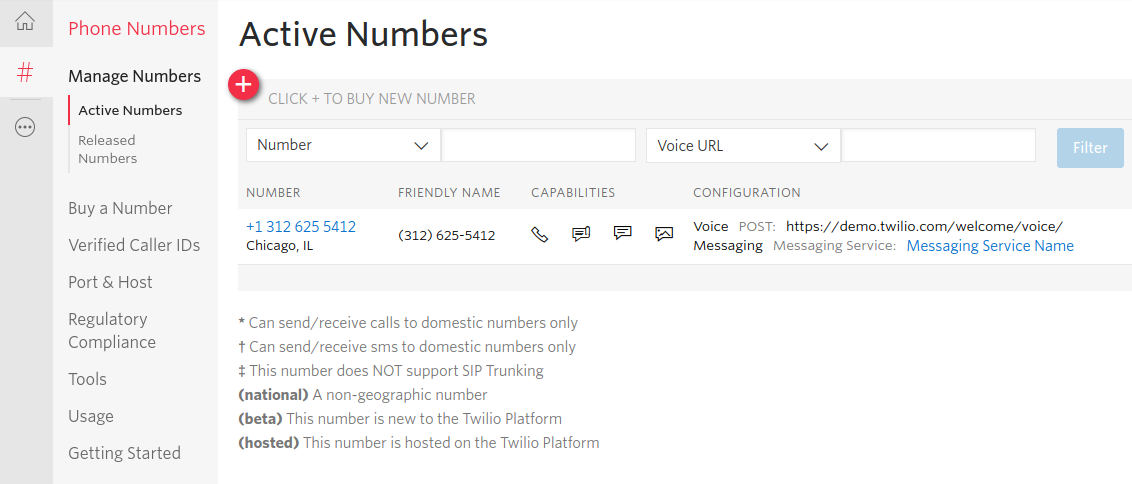
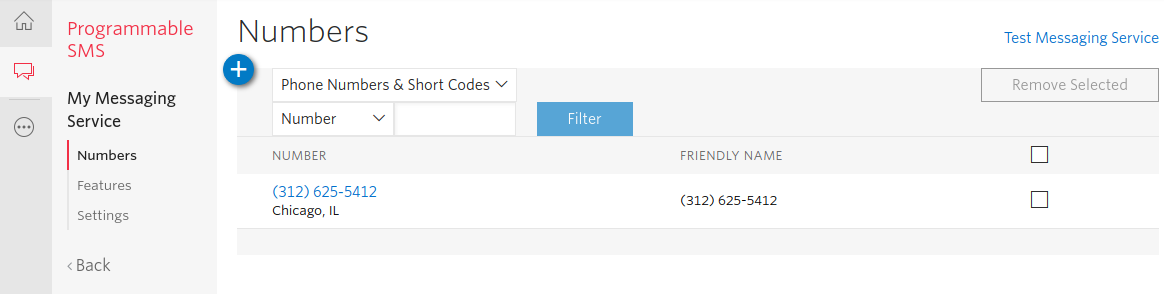
You can find the list of the purchased numbers on the Active Numbers page.
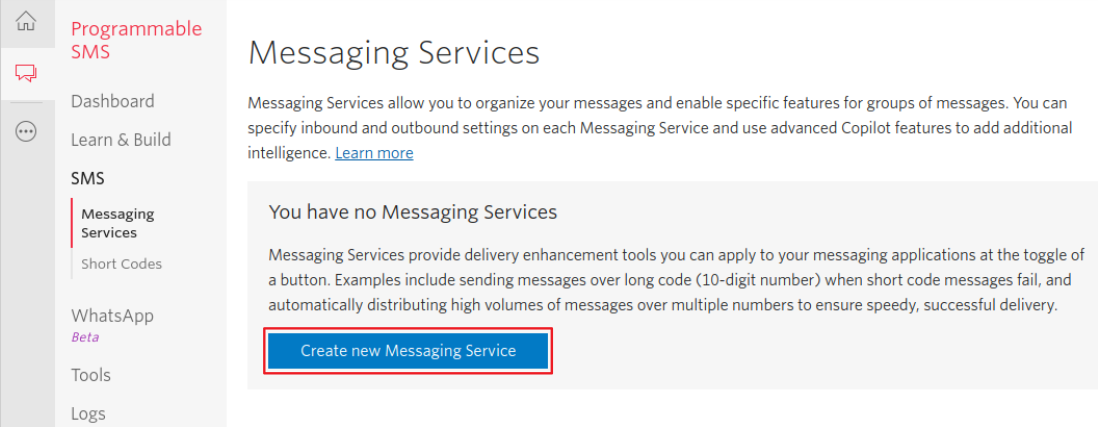
[Optional] Create a Messaging Service
This step is optional. A single Twilio phone number has a throughput of 1 SMS per second. For most of MiaRec deployments, a 1 SMS/second limit is sufficient. If this rate is not sufficient for your load, then you need to use a Messaging Service with Copilot to combine multiple Twilio phone numbers into a group. For example, a group of 5 phone numbers has a combined throughput of 5 SMS messages per second. The Messaging Service automatically balances a traffic among multiple phone numbers.
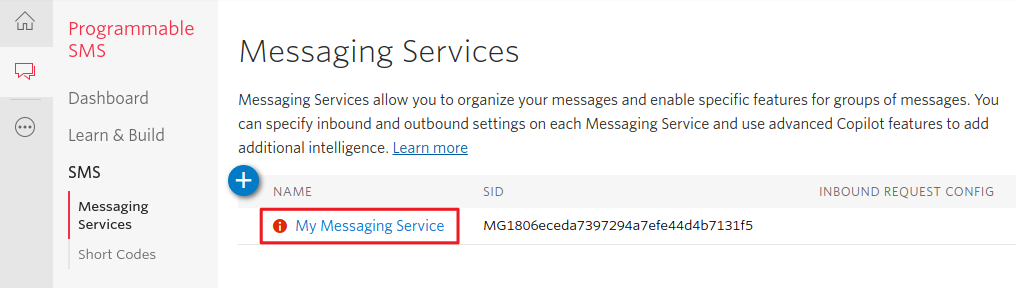
To create a new Messaging service, naviagate to the Messaging Services page in Twilio Console and click the Create new Messaging Service button.
- Specify a Friendly name for the new Messaging Service.
- Select “2 Factor Authentication” as a Use case.
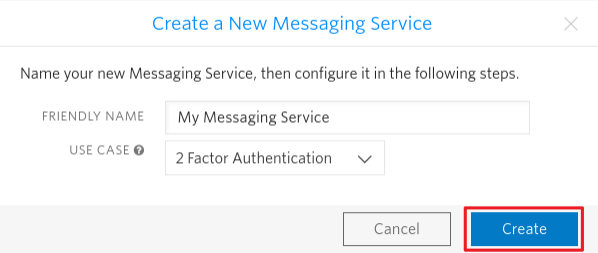
Click the Create button to create a new Messaging Service.
Add phone numbers to a Messaging Service
Navigate to the Messaging Services page in Twilio Console and click on the name of the created messaging service.
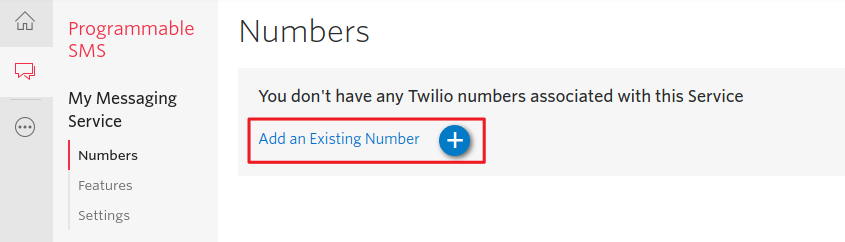
Click Add an Existing Number to add the previously purchased Twilio phone number to the messaging service.
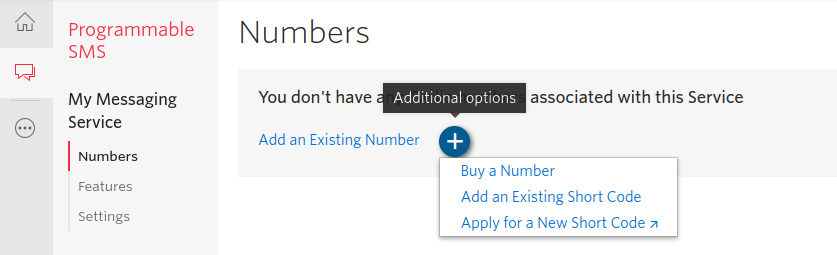
There is an “Additional options” (+) button that allows you to buy a new phone number right here.
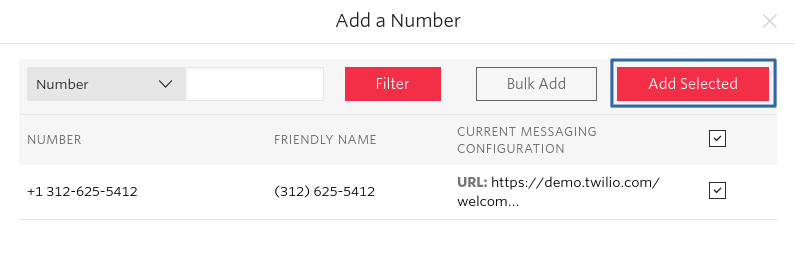
Select phone numbers to add and click the Add Selected button.
You can find the added phone numbers on messaging service’s “Numbers” page.
After you have added the phone numbers to the Messaging Service, it is ready to go.
Setup SMS-based verification in MiaRec
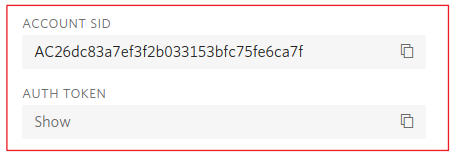
Open Twilio Dashboard, navigate to Project Info of the previously created project and locate Account SID and Auth Token. These values are required for the next steps.
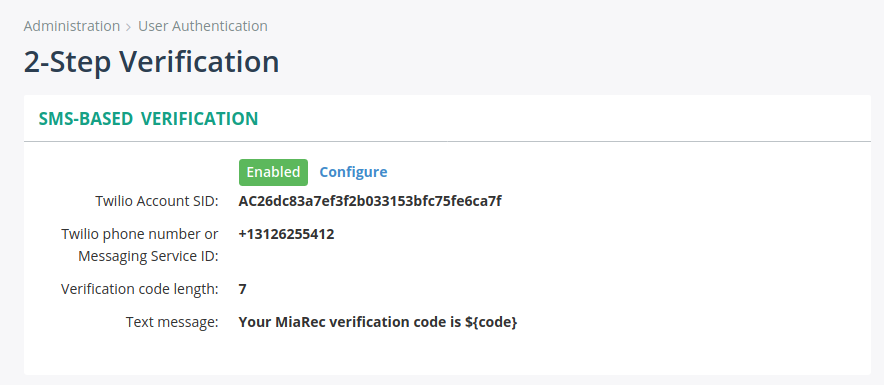
In MiaRec Web portal, go to Administration > User Authentication > 2-Step Verification page.
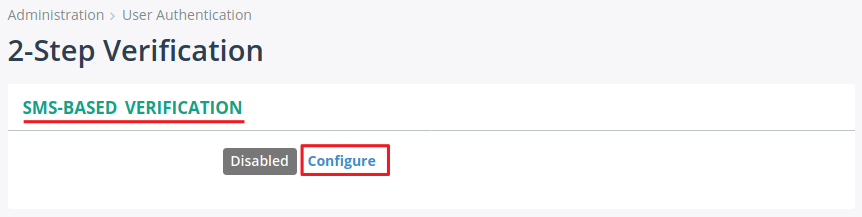
Click the Configure link for the SMS-based verification setting.
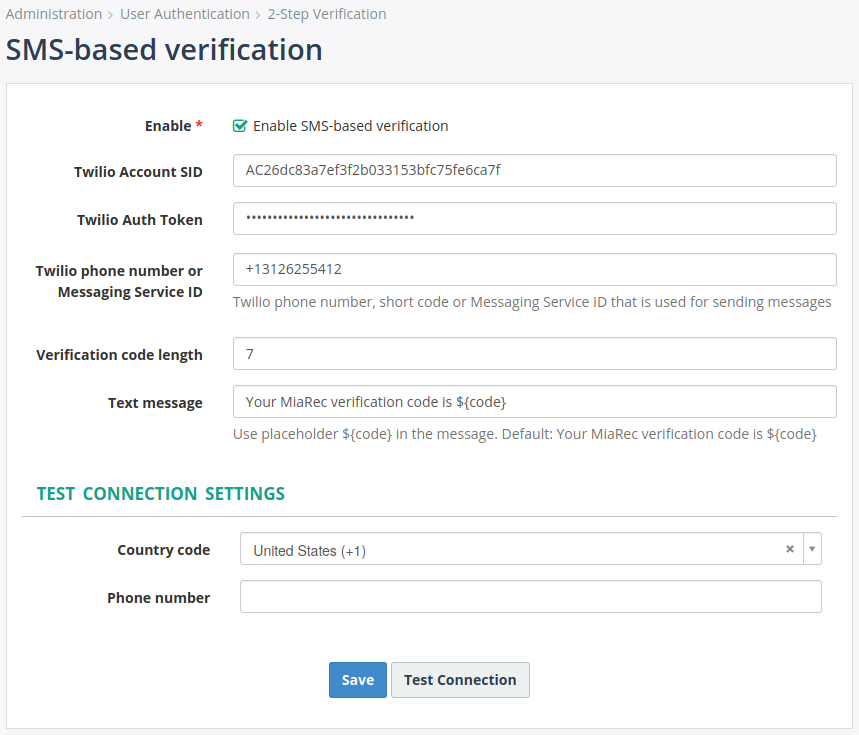
- Set Enable checkbox.
- Configure Twilio Account SID and Twilio Auth Token fields with the corresponding values of the previously created Twilio account.

- Twilio phone number or Messaging Service ID field specifies a phone number, Short Code, or Messaging Service that sends the message. This must be a Twilio phone number that you own, formatted with a ‘+’ and country code, e.g. +16175551212 (E.164 format). You can also use a Messaging Service SID, if it was setup in the previous steps.
- Specify the Verification code length field to define the length of a verification code. Minimum is 6, maximum is 8.
- Optionally, modify the Text message field to define the SMS message text with verification code that will be sent to a user.
The Test Connection Settings section allows you to test sending of SMS to the specified number. Specify Country code, Phone number and press Test Connection button. If you successfully receive the test SMS, then your SMS-based verification settings are ready to go.
After you verify that all settings are correct, click the Save button.