Onboarding a tenant
Goal: provision a new customer tenant from nothing to its first fully processed conversation — created, licensed, AI-enabled, connected to a conversation source, and verified.
Who can do this
A System-tenant operator whose role can view and edit Tenants (and, for the verification steps, view conversations and jobs).
Before you begin
- Multi-tenancy is enabled.
- You know the customer's subscription: which license types and how many seats (see Licensing overview).
- You know how their conversations will arrive: the MiaRec recorder, a telephony integration (Teams, Twilio, Webex, …), or uploads/imports.
Step 1 — Create the tenant
- Go to Administration › User Management › Tenants and click Add.
- Enter the tenant Name and, optionally, timezone, language, and domain.
- Save. You land on the new tenant's detail page.
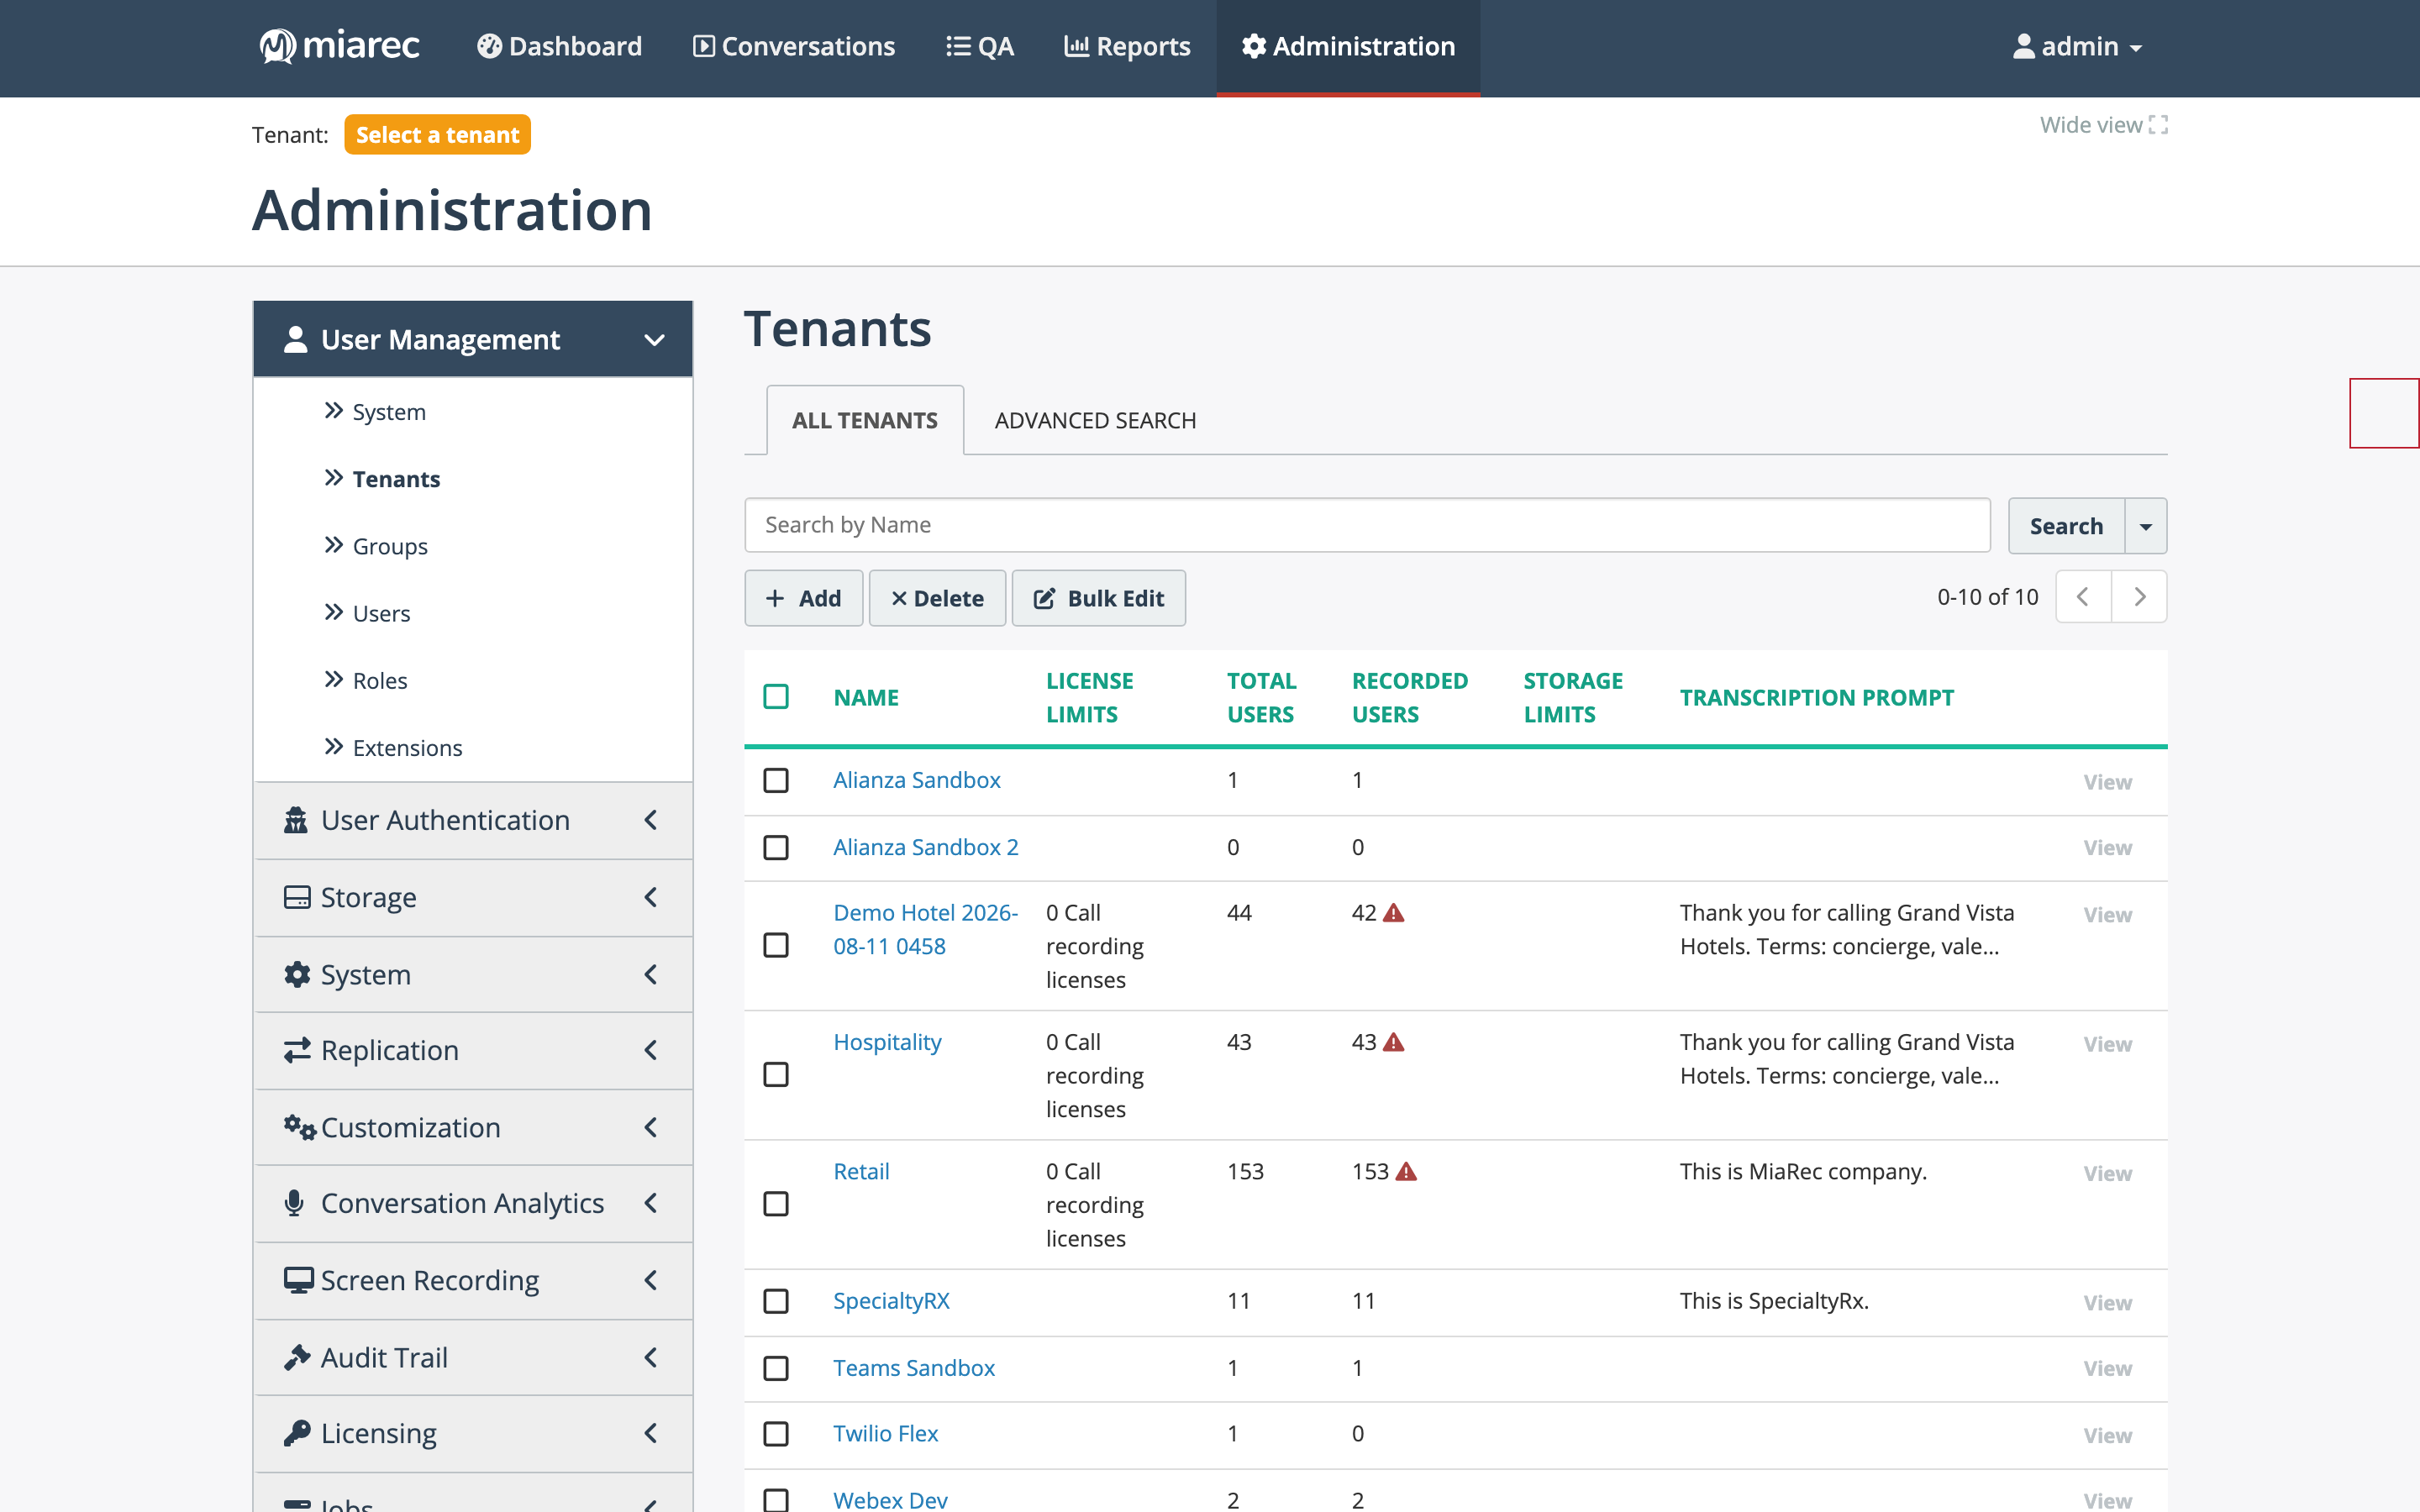
The Tenants list. Each row summarizes a tenant's license limits, user counts, storage limits, and per-tenant transcription prompt; the warning icons flag tenants whose assigned seats exceed their limits.
Clone an existing tenant
If you provision similar customers repeatedly, open a template tenant and click Clone Tenant instead. Cloning copies the tenant's settings, topics, custom fields and options, scorecards (evaluation forms), AI task overrides, data redaction rules, and reports — not its users or conversations.
Step 2 — Set license limits
On the tenant's Edit Tenant form, in the License limits section, enter the seat counts the customer purchased: Call recording, Screen recording, Live monitoring, Agent evaluation (QA), and Speech analytics (Conversation Analytics). A type left empty means No limits — the tenant draws freely from the system-wide pool, so set explicit numbers for commercial customers. See License usage for how limits, keys, and per-user assignment fit together.
Step 3 — Activate AI processing
If the subscription includes Conversation Analytics:
- Make sure the tenant has Speech analytics license seats (step 2) — transcription and AI tasks only run for licensed users.
- Configure the tenant's transcription settings — engine access, per-tenant prompt, and any service limits (LLM tokens, transcription minutes) — see Transcription tenant configuration.
- Review which global AI tasks apply to the tenant and add per-tenant overrides if the customer needs custom prompts.
Step 4 — Connect the conversation source
Depending on how conversations arrive:
- MiaRec recorder — in the tenant's Recording settings, pick the Recording Interface and configure the Associate calls with tenant rules (extension semantics, uniqueness, matching rule) so captured conversations land in this tenant. Then add the tenant's extensions (individually or as a range). See Recording interfaces.
- Telephony integration — connect the platform from the integration catalog and follow the platform's dedicated integration guide.
- Uploads / imports — review the upload settings or set up an import job.
Step 5 — Create users, or let auto-provisioning do it
Create the tenant's groups, roles, and users manually (or hand that to a tenant administrator), or enable User auto provisioning on the tenant so accounts are created automatically the first time an unknown extension produces a conversation. Auto-provisioning assigns each new user a group, role, recording setting, licenses, and (optionally) web portal access derived from their extension — see Tenant configuration for every field.
Step 6 — Verify the first conversation
- In the page header, use the tenant selector (Tenant: Select a tenant) to view the new tenant (see View-as and impersonation).
- Place a test call (or trigger the integration/upload) and confirm the conversation appears under Conversations, assigned to the expected user.
- If AI is enabled, open the conversation and check that a transcript and AI results appear after processing completes.
- If something is missing, check the pipeline: Administration › Jobs for the transcription and AI task runs and their logs — see the jobs console — and the per-tenant usage dashboards described in transcription monitoring.
Expected result
The tenant exists with correct license limits; conversations arrive, are associated with the tenant and its users, and (when subscribed) come back transcribed and analyzed. Users can sign in — or will be auto-provisioned as their conversations arrive.
Related pages
- Tenant configuration — the full reference for every setting touched above.
- Licensing overview — the license model.
- Onboarding verification: cross-tenant dashboard — watch the tenant's volumes once live.